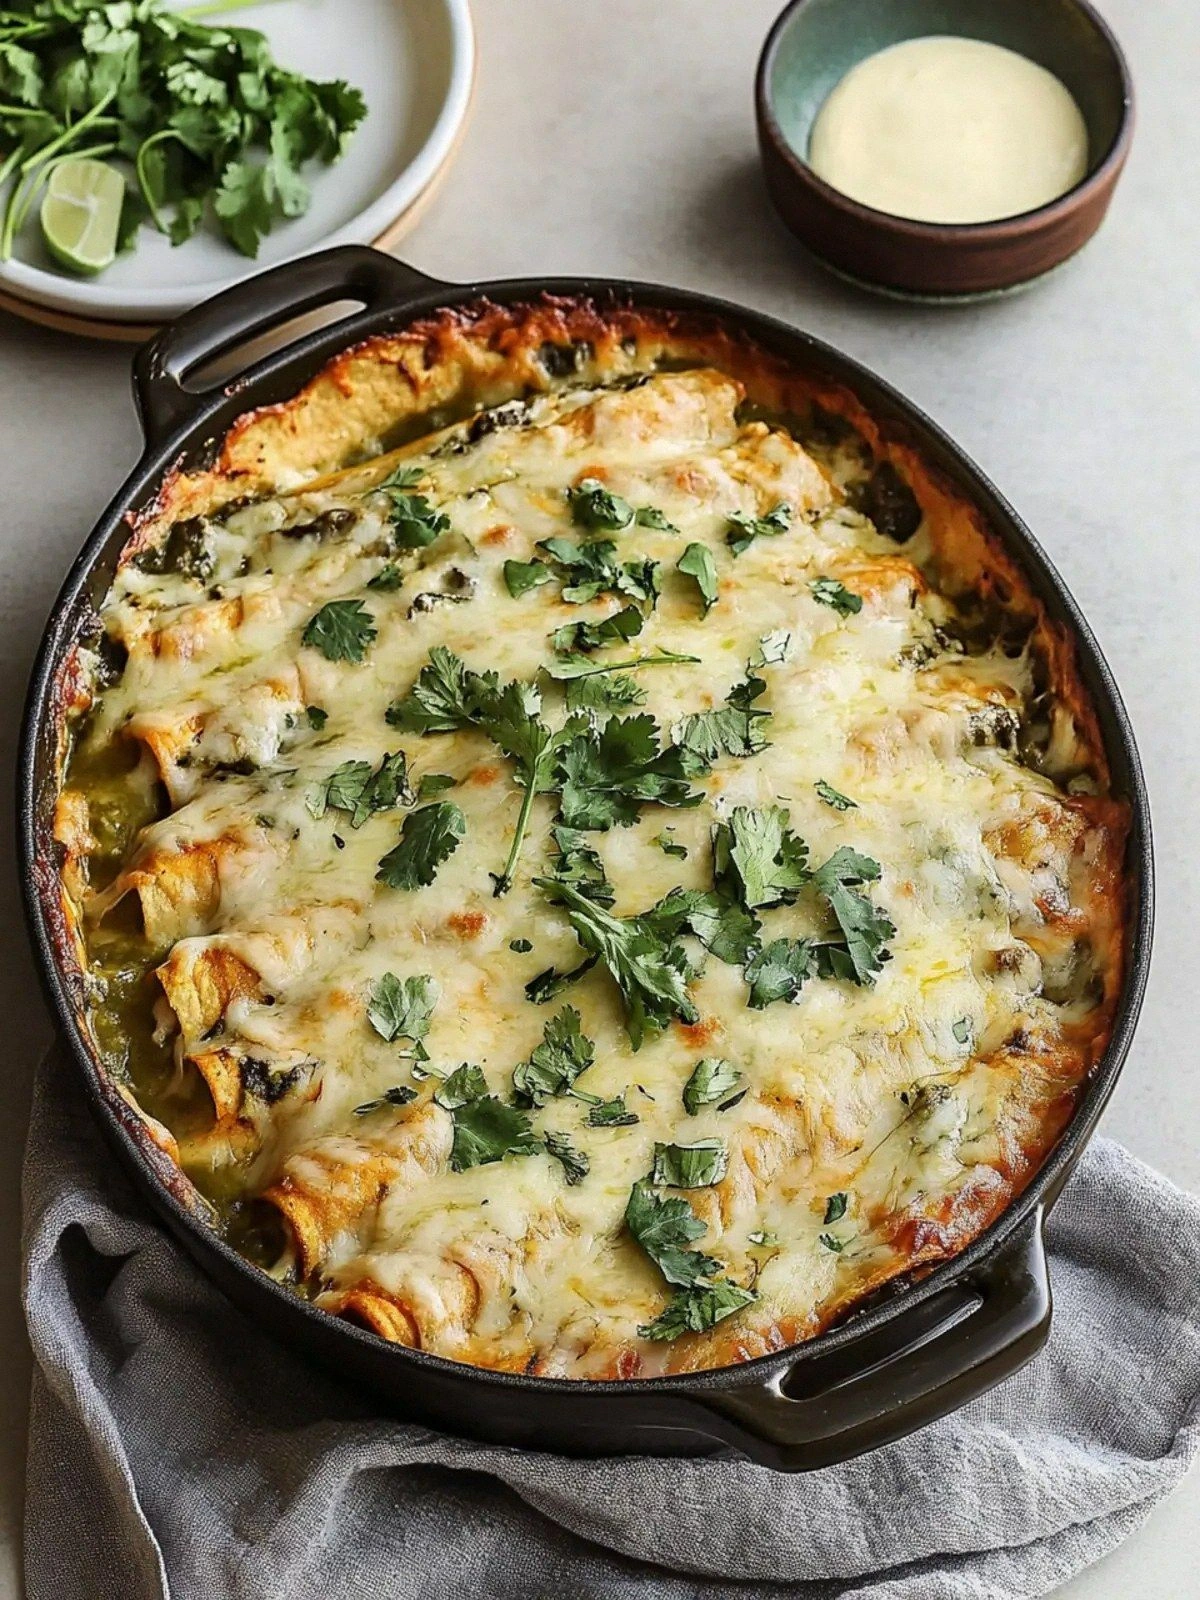
I was standing in the middle of my kitchen, the smell of burnt toast still clinging to my hair, when a friend shouted, “You’re going to make the best enchiladas ever, or you’re going to turn the stove into a fire hazard!” The stakes were high, and I decided to rise to the challenge by whipping up a salsa verde chicken enchilada that would make even the most skeptical foodie swoon. That moment turned into a culinary revelation, a recipe that blends the tang of green tomatillos with the comforting hug of shredded rotisserie chicken. The kitchen lights flickered, the timer buzzed, and I realized that this wasn’t just another dinner—it was a promise of flavor that would keep the family coming back for more.
Picture this: a bright green sauce that glistens like a fresh emerald, the crunch of a tortilla that snaps like a crisp snap of ice, and the aroma of cumin and garlic that rolls over the countertop like a warm blanket. The sound of the skillet sizzling is the soundtrack, and the first bite is a burst of citrusy zing that tingles the palate, followed by the creamy melt of Monterey Jack cheese that coats the tongue like velvet. The texture is a delightful dance of soft and crunchy, while the heat from the chili powder lingers just enough to keep you coming back for seconds. I dare you to taste this and not go back for a third plate—trust me, your taste buds will thank you.
What makes this version stand out from the countless enchilada recipes out there? It’s the secret sauce that transforms ordinary into extraordinary: a store-bought salsa verde that’s been seasoned to perfection with garlic powder, cumin, and chili powder, creating a depth of flavor that feels homemade. The shredded rotisserie chicken adds a smoky richness without the need for extra cooking steps, saving time while keeping the dish hearty. The black beans provide a creamy texture that balances the acidity, and the Monterey Jack cheese melts into a silky coating that ties everything together. And let’s not forget the fresh cilantro, which adds a bright, herbal lift that cuts through the richness. This isn’t just another recipe—it’s a culinary triumph that will become the go-to comfort dish in any household.
And there’s a twist you won’t see in most enchilada recipes: a splash of lime juice added just before baking, which brightens the entire dish and gives the cheese a subtle sparkle. That small, unexpected step elevates the flavors from good to unforgettable. If you’re ready to dive into a cooking adventure that feels like a warm hug, let me walk you through every single step. By the end, you’ll wonder how you ever made enchiladas any other way.
What Makes This Version Stand Out
- Taste: The salsa verde is packed with bright acidity and a subtle heat that cuts through the richness of cheese and chicken, creating a harmonious flavor profile that lingers on the palate.
- Texture: The combination of soft tortillas, creamy black beans, and melted Monterey Jack results in a mouthfeel that’s both comforting and indulgent.
- Time: By using rotisserie chicken and store‑bought salsa, the prep time is cut dramatically, making it a perfect weeknight winner.
- Uniqueness: The addition of lime juice before baking adds a citrusy zing that sets this dish apart from traditional enchilada recipes.
- Crowd‑Pleaser: Friends and family rave about how “this is hands down the best version you’ll ever make at home,” and it’s easy to see why.
- Ingredient Quality: The use of fresh cilantro and Monterey Jack cheese elevates the dish, giving it a gourmet touch without breaking the bank.
- Make‑Ahead Potential: The assembled enchiladas can be refrigerated for up to 24 hours, then baked, making it a great option for busy schedules.
- Health‑Friendly: With a balance of protein, fiber, and healthy fats, this dish satisfies the craving for comfort food while keeping you on track.
Alright, let’s break down exactly what goes into this masterpiece…
Inside the Ingredient List
The Flavor Base
The foundation of this enchilada is the salsa verde, a bright green sauce that carries the entire dish. It’s the vehicle that carries the heat, acidity, and herbal notes. If you skip it, you’ll lose the vibrant, fresh undertone that keeps the dish from feeling heavy. A good salsa verde should be smooth, yet slightly chunky, with a hint of citrus. For an extra kick, add a pinch of smoked paprika to deepen the smoky undertones.
The Texture Crew
The shredded rotisserie chicken is the star of the show, providing a tender, smoky bite that pairs perfectly with the creamy beans and melty cheese. If you don’t have rotisserie chicken on hand, a pre‑cooked shredded chicken breast will do, but the flavor will be slightly milder. The black beans contribute a silky, earthy base that balances the acidity of the salsa. If you prefer a lighter version, use drained and rinsed canned beans; for a richer taste, mash them slightly to create a thicker consistency.
The Unexpected Star
The fresh cilantro isn’t just a garnish; it’s a flavor enhancer that lifts the dish with its bright, citrusy aroma. A small handful can transform a simple enchilada into something that feels fresh and lively. If you’re not a fan of cilantro, consider substituting with fresh parsley or basil for a different herbal profile. Remember, the key is to add it at the end to preserve its bright flavor.
The Final Flourish
Monterey Jack cheese is the gooey, melty layer that binds everything together. Its mild, buttery flavor makes it a perfect partner for the robust salsa verde. If you’re looking for a sharper bite, try a mix of Monterey Jack with a bit of sharp cheddar. The tortillas provide the structural base; nine medium‑size corn tortillas are ideal for 4 servings, offering just the right amount of chewiness without being too thick.
Everything’s prepped? Good. Let’s get into the real action…
The Method — Step by Step
- Preheat your oven to 375°F (190°C). Line a baking dish with parchment paper for easy cleanup. This step is crucial because a properly preheated oven ensures even cooking and a golden top.
- In a large mixing bowl, combine the 2.5 cups of salsa verde, 1 tsp garlic powder, 0.5 tsp ground cumin, 1 tsp chili powder, and a pinch of salt. Stir until the spices are fully incorporated and the sauce has a smooth consistency. This is the moment where the flavors mingle—watch the color deepen as the spices dissolve.
- Add the 3 cups of shredded rotisserie chicken to the sauce and mix until the chicken is evenly coated. The chicken should look like it’s been marinated overnight, even though it’s just a few minutes. The heat from the sauce will help release the chicken’s natural juices.
- Heat a non‑stick skillet over medium heat and lightly toast each of the 9 tortillas for 15–20 seconds on each side. This step prevents them from becoming soggy once the filling is added. The tortillas should feel warm and pliable, not dry.
- Place a toasted tortilla on a clean surface and spoon a generous amount of the chicken‑salsa mixture onto the center. Sprinkle a tablespoon of black beans over the filling, then top with a handful of Monterey Jack cheese. Roll the tortilla tightly, tucking the ends under, and place seam‑side down in the prepared baking dish. Repeat until all tortillas are assembled.
- Cover the baking dish with foil and bake for 20 minutes. After 20 minutes, remove the foil, sprinkle the remaining cheese on top, and bake for an additional 10 minutes until the cheese is bubbly and golden. The foil keeps moisture from escaping, ensuring the enchiladas stay tender.
- While the enchiladas finish baking, whisk 2 tbsp of fresh lime juice with 1 tsp of salt. This bright, acidic splash will be added to the finished dish to give it a fresh lift.
- Once baked, remove the dish from the oven and let it rest for 5 minutes. Then drizzle the lime‑salt mixture evenly over the enchiladas. Sprinkle 0.25 cups of freshly chopped cilantro, and serve immediately with a side of guacamole or a simple green salad.
That's it—you did it. But hold on, I've got a few more tricks that'll take this to another level…
Insider Tricks for Flawless Results
The Temperature Rule Nobody Follows
Many cooks think that baking at a high temperature will give a crispier top, but the truth is that a moderate 375°F (190°C) allows the cheese to melt evenly without burning the tortillas. I once tried 425°F and ended up with a charred exterior and a soggy interior. The right temperature keeps the enchiladas moist inside while still giving that golden top.
Why Your Nose Knows Best
Trust your senses—if the aroma of the salsa starts to smell like burnt garlic, it’s time to reduce the heat. The garlic powder in the sauce can quickly go from aromatic to acrid if left on a hot pan for too long. A quick stir and a lower flame will bring the aroma back to its bright, herbal profile.
The 5‑Minute Rest That Changes Everything
Letting the enchiladas rest after baking is a game‑changer. The resting period allows the flavors to meld and the cheese to set, preventing a runny mess when you cut into them. I’ve seen people cut straight from the oven and end up with a cheese waterfall—resting stops that.
The Cilantro Timing
Adding cilantro too early will cause it to wilt and lose its bright flavor. Wait until the enchiladas are out of the oven, then sprinkle the cilantro on top. The fresh herbs will retain their green vibrancy and add a refreshing contrast to the warm dish.
The Lime Splash
The lime juice is more than a garnish; it’s a flavor enhancer that brightens the entire dish. Whisk it with a pinch of salt to create a simple, refreshing drizzle. If you prefer a sweeter kick, add a teaspoon of agave syrup.
Creative Twists and Variations
This recipe is a playground. Here are some of my favorite ways to switch things up:
Veggie‑Loaded Enchiladas
Swap the chicken for sautéed spinach, zucchini, and bell peppers. The vegetables add color and a fresh bite that pairs wonderfully with the salsa verde.
Spicy Chipotle Kick
Add a tablespoon of chipotle adobo sauce to the salsa for a smoky, fiery flavor that’s perfect for those who like a little heat.
Cheese Swap
Use pepper jack or a blend of cheddar and Monterey Jack for a sharper, more complex cheese profile.
Coconut Milk Creaminess
Stir in a splash of coconut milk into the salsa before baking. The coconut adds a subtle sweetness and makes the sauce silky smooth.
Gluten‑Free Version
Use corn tortillas and ensure your salsa verde is gluten‑free. The dish remains hearty and flavorful while meeting dietary needs.
Breakfast Enchiladas
Replace the chicken with scrambled eggs and add a pinch of paprika. Serve with a side of hash browns for a protein‑packed breakfast.
Storing and Bringing It Back to Life
Fridge Storage
Store leftover enchiladas in an airtight container for up to 3 days. Keep them in the refrigerator to maintain freshness. The cheese stays firm, and the salsa stays vibrant.
Freezer Friendly
Wrap each enchilada tightly in plastic wrap, then place in a freezer bag. Freeze for up to 2 months. Thaw overnight in the fridge before reheating.
Best Reheating Method
Reheat in a preheated oven at 350°F (175°C) for 15 minutes. Add a splash of water to the baking dish before covering with foil; the steam will keep the enchiladas moist and prevent the tortillas from drying out.