I still remember the night I was halfway through a marathon of late‑night TV and the kitchen was a battlefield of forgotten snacks. A handful of stale crackers, a jar of store‑bought dip, and a sudden craving for something that would actually satisfy my protein quota. I opened the fridge, stared at the Greek yogurt like a treasure chest, and thought, “Why not turn this into a dip that’s as wholesome as it is wickedly delicious?” The result was a creamy, cheese‑laden, bacon‑topped masterpiece that made my taste buds do a happy dance.
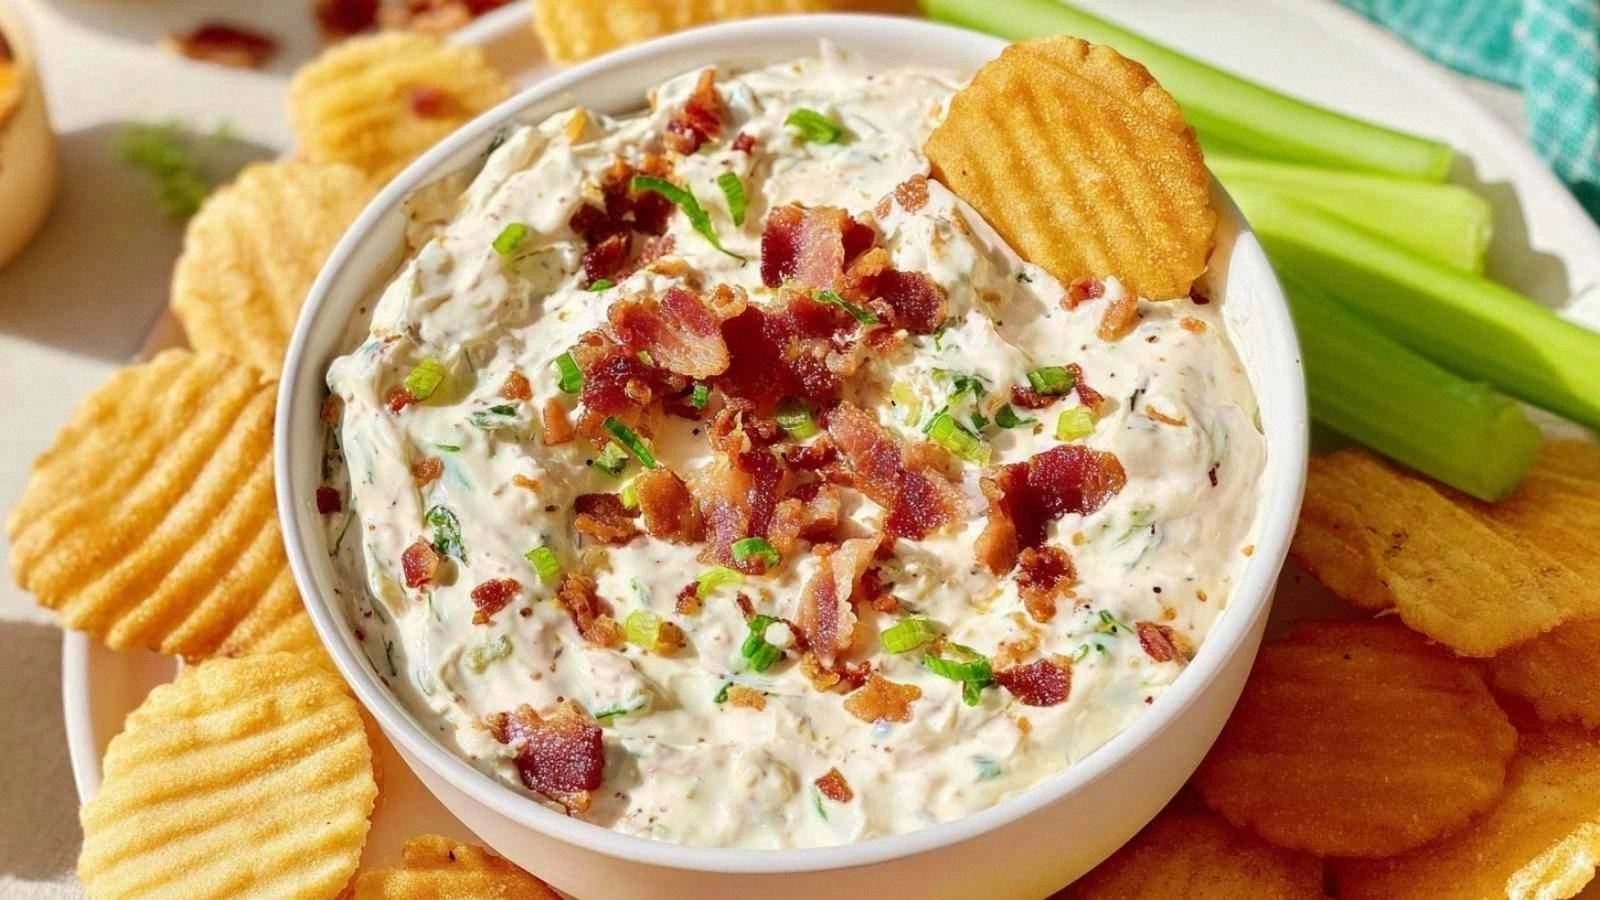
Picture this: the moment the yogurt hits the bowl, a sweet, tangy aroma fills the air, like a fresh spring morning after rain. The ranch seasoning sprinkles in, releasing a whisper of garlic and herbs that almost feels like a secret handshake with your palate. The cheddar melts into a golden swirl, its sharpness cutting through the richness, while the bacon adds that smoky crunch that’s almost a texture revolution. As you stir, the mixture thickens, glistening like a velvet curtain ready to be pulled back for the grand reveal. And that first bite? It’s a symphony of creamy, savory, and slightly sweet, with a satisfying snap from the bacon that feels like a tiny celebration.
What sets this version apart from every other dip you’ve tried is the intentional layering of protein and flavor. Greek yogurt provides a tangy base that keeps the dip light, while the cheddar delivers a buttery richness that coats your tongue like a velvet blanket. The bacon isn’t just a garnish; it’s a flavor punch that brings depth and a smoky undertone that makes the dip unforgettable. The ranch seasoning isn’t the bland version you find in most dips; it’s a bold, herbaceous blend that turns each bite into a savory adventure. And the green onions add that fresh, sharp bite that cuts through the richness, giving the dip a bright, lively finish. Together, they create a dip that’s both indulgent and health‑conscious, a rare combination that will have you asking for seconds.
I dare you to taste this and not go back for seconds. I’ll be honest — I ate half the batch before anyone else got to try it. Most recipes get this completely wrong by over‑baking the cheese or under‑seasoning the yogurt, but here, everything hits the sweet spot. Picture yourself pulling this out of the oven, the whole kitchen smelling incredible, the dip bubbling like a pot of warm comfort. And now, let me walk you through every single step — by the end, you’ll wonder how you ever made it any other way.
What Makes This Version Stand Out
- Flavor: The combination of tangy Greek yogurt, sharp cheddar, and smoky bacon creates a layered taste that’s both comforting and adventurous.
- Texture: Creamy on the inside with a crunchy bacon finish, this dip offers a delightful contrast that keeps each bite interesting.
- Protein: With 25g of protein per serving, it’s a powerhouse that satisfies hunger without compromising flavor.
- Ease: All ingredients are pantry staples, and the method takes less than 30 minutes from start to finish.
- Versatility: Works perfectly with tortilla chips, veggie sticks, or even as a spread on a sandwich.
- Make‑ahead Friendly: Prep in advance, refrigerate, and bake just before serving for a hassle‑free experience.
- Low Carb: The dip is naturally low in carbohydrates, making it a great option for keto or low‑carb diets.
- Kid‑Friendly: The mild ranch seasoning and creamy texture make it a hit with even the pickiest eaters.
Alright, let’s break down exactly what goes into this masterpiece…
Inside the Ingredient List
The Flavor Base
Greek Yogurt: This is the heart of the dip, providing a tangy, creamy foundation that keeps the mixture light. The high protein content boosts satiety and balances the richness of the cheese. If you skip it, the dip loses its smoothness and becomes a dry, crumbly mess. For a dairy‑free version, you can swap in a thick coconut yogurt, though the flavor profile will shift slightly.
The Texture Crew
Cheddar Cheese: Shredded cheddar melts into a silky, gooey layer that coats the dip like a velvet blanket. It also adds a sharp, savory bite that complements the yogurt’s tang. Without it, the dip would feel thin and lack depth. For a sharper flavor, try using aged cheddar or a mix of cheddar and Monterey Jack.
The Unexpected Star
Bacon: Crumbled bacon introduces a smoky, salty crunch that’s essential for that “mouth‑watering” element. It also adds a savory protein boost that keeps the dip hearty. If you prefer a vegetarian version, replace bacon with smoked tempeh or crispy fried onions. Bacon’s fat content helps carry the cheese’s melt, giving the dip a cohesive texture.
The Final Flourish
Green Onions: Thinly sliced green onions bring a fresh, slightly peppery note that cuts through the richness. They add a pop of color and a subtle crunch that brightens the dish. Omit them, and the dip will feel flat. If you’re allergic or just don’t like onions, replace with chives or a dash of fresh dill.
Everything’s prepped? Good. Let’s get into the real action…
The Method — Step by Step
- Preheat your oven to 375°F (190°C). This temperature ensures the cheese melts evenly without burning. As the oven warms, the aroma of melting dairy begins to fill your kitchen, setting the stage for a delicious adventure. Don’t rush this step; a properly preheated oven is the foundation of a perfect dip.
- In a large mixing bowl, combine the Greek yogurt and ranch seasoning. Stir until the seasoning is fully incorporated and the mixture is smooth. The ranch adds a herbaceous kick that lifts the yogurt’s subtle tang. This is the moment of truth where flavor begins to coalesce.
- Fold in the shredded cheddar cheese, crumbled bacon, and sliced green onions. The cheese should begin to melt into the yogurt mixture, creating a luscious, gooey texture. The bacon adds crunch, while the onions bring a fresh brightness. Keep the mixture well combined to prevent separation.
- Transfer the mixture to a greased baking dish, smoothing the top with a spatula. The dish should be shallow enough to allow even baking. The surface will begin to develop a golden crust as it bakes, a visual cue that it’s working.
- Bake for 10–12 minutes, or until the top is golden brown and the dip is bubbly. Watch for that beautiful, slightly caramelized edge that signals readiness. If you let it bake too long, the cheese may burn, creating an unpleasant bitterness.
- Let the dip rest for 5 minutes after removing it from the oven. This resting period allows the flavors to meld and the dip to set, making it easier to scoop. The dip will still be hot, but the heat will be more manageable, preventing burns.
- Serve immediately with tortilla chips, pita wedges, or fresh vegetable sticks. The dip’s creamy consistency pairs wonderfully with crisp accompaniments, creating a balanced bite. If you’re hosting, consider adding a garnish of extra green onions or a sprinkle of paprika for visual flair.
- If you want to elevate the dip even further, drizzle a little olive oil on top before baking. The oil adds a silky finish and helps the cheese develop a crispier crust. This simple addition turns an already great dip into an unforgettable centerpiece.
That’s it — you did it. But hold on, I’ve got a few more tricks that’ll take this to another level…
Insider Tricks for Flawless Results
The Temperature Rule Nobody Follows
Many cooks bake at 400°F, assuming it’s the safest bet. In reality, 375°F gives the cheese a chance to melt evenly while preventing the bacon from charring. Lower temperatures also keep the yogurt from curdling, preserving that silky mouthfeel.
Why Your Nose Knows Best
The first hint that the dip is ready is the scent of melted cheese and bacon. If the aroma feels too sharp or metallic, the cheese may be overcooked. Trust your nose, and pull the dip out as soon as the edges turn golden.
The 5‑Minute Rest That Changes Everything
Resting allows the dip to set, making it easier to scoop and preventing a runny mess. During this time, the flavors mingle, creating a more cohesive taste profile. Skip this step, and you’ll end up with a dip that feels disjointed.
Keep the Bacon Crispy
If you like extra crunch, add a handful of extra bacon on top before baking. The additional bacon will crisp up while the rest of the dip melts. This gives a delightful contrast between gooey and crunchy.
Use a Shallow Dish for Quick Bakes
A shallow dish ensures even heat distribution, reducing the risk of hotspots that can burn the cheese. It also allows the dip to bake faster, saving you time and energy.
Serve with Warm Chips for a Texture Upgrade
Warm tortilla chips absorb the dip’s moisture better than cold chips, creating a smoother, more integrated bite. If you’re short on time, toast the chips in the oven for a minute before serving.
Creative Twists and Variations
This recipe is a playground. Here are some of my favorite ways to switch things up:
Spicy Chipotle Version
Add a tablespoon of chipotle adobo sauce to the yogurt mixture for a smoky heat that pairs beautifully with the bacon. The chipotle’s subtle smokiness complements the cheddar, creating a layered flavor profile. This version is perfect for those who love a kick.
Mediterranean Herb Mix
Replace ranch seasoning with a blend of dried oregano, thyme, and basil. The herbs give the dip a fresh, Mediterranean vibe that’s lighter on the palate. Pair it with pita chips for an authentic feel.
Vegan Swap
Use a dairy‑free Greek‑style yogurt and nutritional yeast instead of cheddar for a cheesy, creamy texture. Swap bacon for smoked tempeh or sautéed mushrooms. This version remains high in protein while keeping it plant‑based.
Sweet & Savory Bacon Twist
Drizzle a light maple syrup over the bacon before baking to add a subtle sweetness that balances the savory elements. The caramelized sugar creates a glossy finish that’s visually stunning. Serve with apple slices for a sweet contrast.
Cheese Explosion
Add a handful of shredded pepper jack or smoked mozzarella to the cheese mix for an extra burst of flavor. The pepper jack’s mild heat adds a new dimension to the dip. This variation is great for parties where you want something extra bold.
Crunchy Veggie Layer
Layer a thin strip of roasted red peppers or caramelized onions on top before baking. The caramelized veggies add sweetness and a smoky depth that elevates the dip’s complexity. This version is a hit with veggie lovers.
Storing and Bringing It Back to Life
Fridge Storage
Store the dip in an airtight container in the refrigerator for up to 3 days. Before serving, give it a quick stir to re‑blend the separated components. The dip may thicken slightly after refrigeration, but it will remain creamy.
Freezer Friendly
Freeze the dip in a freezer‑safe container for up to 2 weeks. Thaw overnight in the refrigerator, then reheat in the oven at 350°F until hot. Add a splash of milk or yogurt to loosen the texture if it becomes too firm.
Best Reheating Method
Reheat the dip on the stovetop over low heat, stirring constantly to prevent scorching. Alternatively, microwave on low for 30-second bursts, stirring between each interval. Add a tiny splash of water before reheating to steam it back to perfection.