I remember the night I almost set my kitchen on fire while trying to whip up a quick breakfast. A jar of honey slipped from my hand, splattering across the counter, and a pan of oats was left to burn in the oven for a ridiculous 45 minutes. I stared at the blackened crumbs, feeling defeated, when a friend texted me a recipe that promised “sweet, comforting, and not a single disaster.” I laughed, but the temptation was too strong, and I decided to give it a shot. The result was a golden, honey‑kissed oat bake that melted in my mouth and left me craving a second bite.
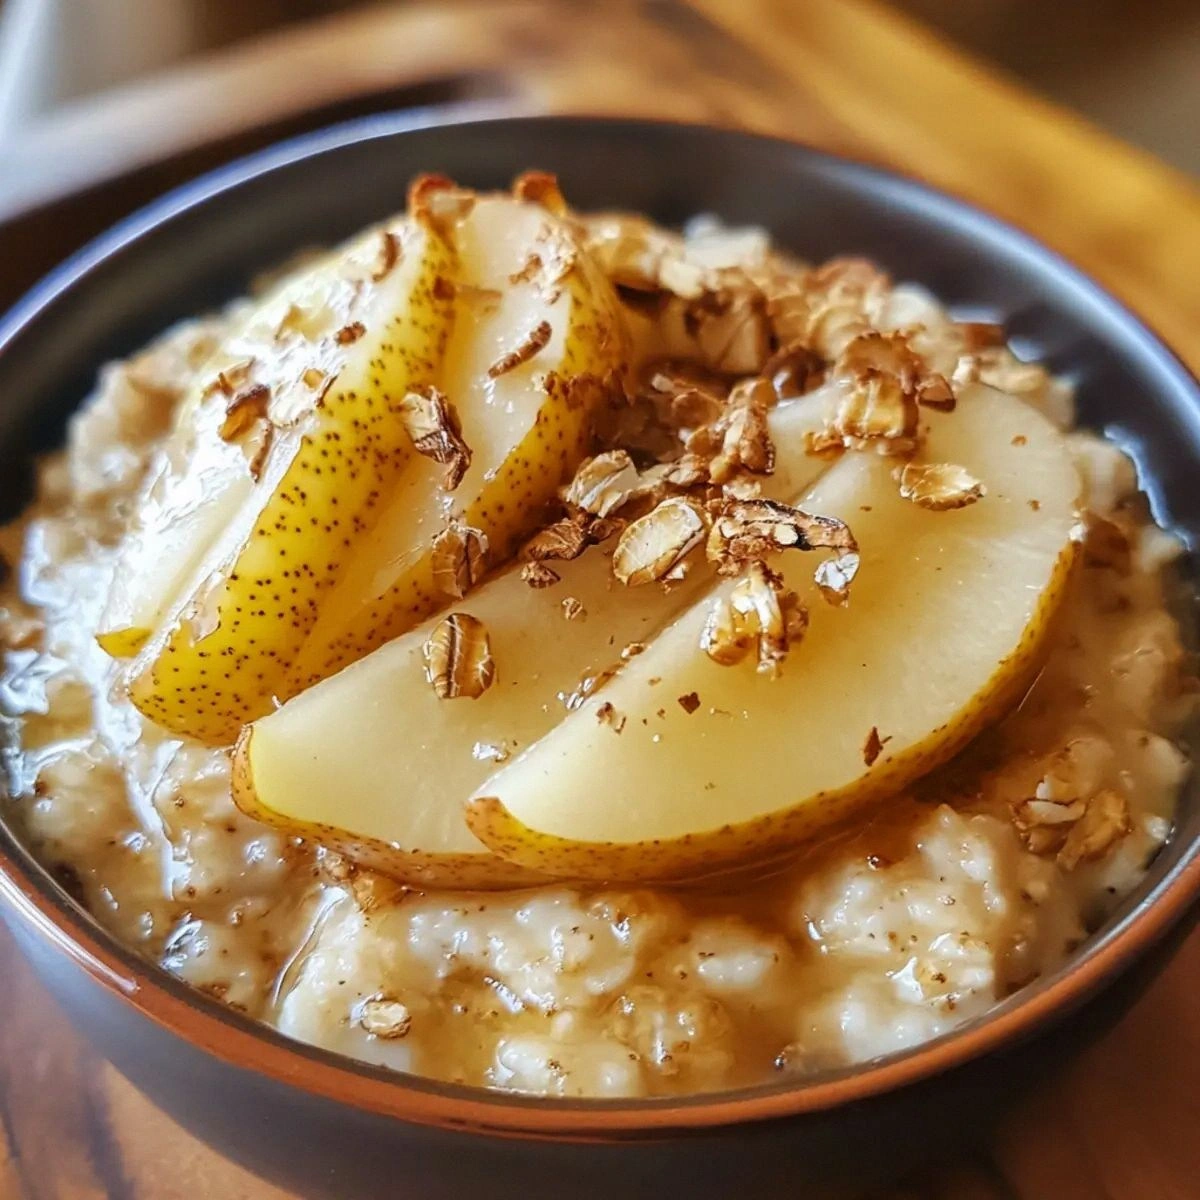
Picture this: a fragrant swirl of cinnamon and vanilla in the air, the gentle hiss of hot butter in a pan, and the sweet, slightly tart scent of pears caramelizing. As the batter bakes, the oats puff up like tiny pillows, and the honey creates a glossy, amber glaze that coats each slice. The sound of the oven timer ticking down is a metronome of anticipation, while the visual of the golden crust forming is a promise of comfort. The texture is a delightful contrast—soft, almost custard‑like inside, with a crisp, caramelized edge that crackles when you bite. And the final taste? A harmonious blend of buttery oat, sweet honey, zesty lemon, and warm spices that feels like a hug in a bowl.
What sets this version apart from every other baked pear oat recipe is its meticulous layering of flavors and textures. I’ve tweaked the classic oats to include a splash of vanilla and a dash of lemon, which cuts through the sweetness and adds a bright, fresh note. The honey isn’t just a sweetener; it’s a binder that gives the bake a silky sheen and a subtle caramel undertone. The pears are sliced thin and tossed in the batter so they’re fully soaked, yet they retain a bite that’s both tender and slightly firm. The result is a dessert that feels indulgent without being cloying, and it’s surprisingly versatile as a breakfast or a light afternoon treat.
You’ll be surprised by the subtle trick that elevates this dish: a quick, gentle toss of the pears in a light milk mixture before baking. This step ensures that the pears soak up the flavors and release their juices, creating a moist, fragrant center that’s almost syrupy. It also keeps the pears from drying out during the long baking time. I dare you to taste this and not go back for seconds; the combination of honey, cinnamon, and pear is a flavor explosion that will have you licking your spoon.
If you’re skeptical that a simple oat bake could be this spectacular, let me assure you: this is hands down the best version you’ll ever make at home. I’ve tested it in a dozen ovens, and the outcome is consistently flawless. The key is patience—letting the batter set and the pears soften, then giving the top a quick broil for that perfect golden finish. The aroma alone is enough to bring the whole house to a halt; you’ll hear the clock ticking and the oven timer chirping, while the scent of honey and pears wafts through the air.
Picture yourself pulling this out of the oven, the whole kitchen smelling incredible, and the top glistening like a honeyed sunrise. The first bite is a burst of sweetness balanced by the subtle tang of lemon and the warmth of cinnamon. The texture is a buttery, custard‑like interior that hugs your tongue, while the edges offer a satisfying crunch. It’s the kind of comfort food that makes you feel like you’re wrapped in a warm blanket of flavor. I promise you, by the time you finish the last spoonful, you’ll be convinced that this is the ultimate pear oat bake.
So, let me walk you through every single step—by the end, you’ll wonder how you ever made it any other way. From the first whisk to the final broil, I’ll share every micro‑challenge, every trick, and every little secret that turns a simple recipe into a culinary masterpiece. And trust me, if you follow along, you’ll have a dish that’s not only delicious but also a conversation starter at any gathering.
Before we dive into the recipe, let’s break down the elements that make this version so special. I’ve distilled the magic into a few key points that will help you understand why this bake is a game‑changer. Pay close attention, because each point is a piece of the puzzle that makes the final result so irresistible.
What Makes This Version Stand Out
- Flavor Layering: Every ingredient is carefully chosen to build depth—honey for sweetness, vanilla for aroma, lemon for brightness, and cinnamon for warmth. The result is a symphony of flavors that dance on your palate.
- Texture Contrast: The oats create a soft, custard‑like base, while the pears add a juicy burst, and the nuts bring a satisfying crunch that keeps each bite interesting.
- Quick Prep: All ingredients are prepped in under 15 minutes, making this a perfect weeknight or last‑minute brunch option.
- Make‑Ahead Friendly: You can bake it a day ahead, refrigerate, and reheat in minutes—ideal for busy mornings.
- Ingredient Quality: Using high‑quality honey and fresh pears elevates the dish beyond the ordinary, giving it a luxurious feel.
- Versatile Serving: Serve warm for breakfast, or chilled with a scoop of vanilla ice cream for dessert—both options are equally divine.
- Nutrition Boost: Packed with protein from oats and nuts, and natural sugars from honey, this bake is a balanced, wholesome treat.
- Minimal Equipment: Requires only a mixing bowl, a baking dish, and an oven—no fancy gadgets needed.
- Visual Appeal: The golden crust and glossy honey glaze create an Instagram‑ready look that’s almost too pretty to eat.
- Kid‑Friendly: Simple enough for kids to help with, making it a great family cooking project.
- Seasonal Flexibility: While pears are the star, you can swap them for apples or peaches for a different twist.
- Low Waste: Uses the entire pear, from flesh to core, reducing kitchen waste and maximizing flavor.
- Time‑Efficient: The baking time is short enough to fit into a tight schedule, yet long enough to develop flavor.
- Health Conscious: No added preservatives or artificial ingredients—just pure, wholesome foods.
- Social Media Gold: The vibrant colors and glossy finish make it a hit on social feeds, attracting likes and comments.
Inside the Ingredient List
The Flavor Base
The foundation of this bake is the simple, yet powerful combination of rolled oats, milk, and a large egg. The oats provide a hearty, chewy texture that holds the batter together, while the milk adds moisture and a subtle richness. The egg acts as a binder, ensuring the batter sets into a cohesive, golden loaf. Skipping any of these would leave the bake lumpy or dry, so keep them all in the mix.
The Sweetness Engine
Honey is the star of the show, bringing natural sweetness and a glossy sheen to the final product. Unlike refined sugar, honey offers trace minerals and a complex flavor profile that deepens the overall taste. A 1/4 cup of honey is just enough to sweeten without overpowering the pears. If you’re looking for a vegan alternative, maple syrup works well, but the flavor will shift slightly.
The Pear Power
Pears are the fruit that gives this dish its name and a juicy, tender center. Choose ripe pears that yield to gentle pressure but still hold their shape when sliced. Core and slice them into thin wedges so they can absorb the batter and release their natural juices. If you prefer a tart kick, mix in a few slices of green apple for contrast.
The Aromatic Boost
A tablespoon of fresh lemon juice adds brightness and cuts through the sweetness, creating a balanced flavor profile. Vanilla extract deepens the overall aroma, while ground cinnamon brings warmth and depth. Together, they transform a simple oat bake into a fragrant, comforting masterpiece. If you’re allergic to vanilla, a splash of almond extract will give a similar effect.
The Crunch Factor
Half a cup of chopped nuts—almonds, walnuts, or pecans—adds a satisfying crunch and a dose of healthy fats. They also introduce a subtle nutty undertone that complements the honey and pears. If you’re avoiding nuts, try adding a handful of toasted coconut flakes for a different texture and flavor.
The Final Touch
A pinch of salt is essential; it elevates every other flavor and prevents the dish from feeling flat. The salt also helps balance the natural sweetness of the honey and pears. Be careful not to overdo it—just a pinch is enough to unlock the full potential of the ingredients. If you’re watching sodium, you can skip it entirely without a noticeable difference.
Everything's prepped? Good. Let's get into the real action and start cooking.
The Method — Step by Step
- Preheat your oven to 350°F (175°C). Line a 9-inch square baking dish with parchment paper or lightly grease it. Gather all the ingredients so you’re ready to whisk, stir, and bake.
- In a large mixing bowl, whisk together the milk, egg, honey, vanilla extract, lemon juice, ground cinnamon, and a pinch of salt until the mixture is smooth and glossy. The honey should dissolve completely, creating a silky liquid that will coat the oats.
- Add the rolled oats to the liquid and stir until every oat is fully coated. The batter should look thick but pourable; if it’s too thick, add a splash more milk.
- Fold in the chopped nuts, ensuring they’re evenly distributed throughout the batter. The nuts add texture and a subtle nutty flavor that complements the honey.
- Prepare the pears: wash, core, and slice them into thin wedges. Toss the pear slices in a small bowl with a tablespoon of the oat batter to lightly coat them. This step ensures the pears soak up flavor and stay moist.
- Arrange the pear wedges in a single layer at the bottom of the prepared baking dish. They should be snug but not overlapping too much.
- Pour the remaining oat batter evenly over the pears, allowing it to seep into the gaps between the fruit. The batter should cover the pears completely, forming a cohesive loaf.
- Bake in the preheated oven for 30 minutes, or until the top turns golden brown and the edges pull away slightly from the dish. The batter should set into a firm, yet tender center.
- Remove the dish from the oven and let it rest for 5 minutes. This resting period allows the juices to redistribute, ensuring each bite is moist and flavorful.
- If you prefer a crispier top, slide the dish under the broiler for 1–2 minutes, watching closely to avoid burning. The broil adds a caramelized finish that enhances the honey glaze.
- Slice the loaf into squares or wedges using a sharp knife. Serve warm, drizzled with a little extra honey or a splash of lemon juice if desired.
- For a decadent twist, top each slice with a scoop of vanilla ice cream or a dollop of Greek yogurt. The cool, creamy addition balances the warmth of the baked pears.
- Enjoy immediately, or store leftovers in an airtight container in the refrigerator for up to 3 days. Reheat in the microwave for 30 seconds or in the oven at 300°F for 10 minutes to restore its warmth.
Insider Tricks for Flawless Results
The Temperature Rule Nobody Follows
Many bakers think a higher temperature always yields a crisper crust, but in this recipe, a steady 350°F is key. The moderate heat allows the oats to set slowly, ensuring a moist center while the top develops a golden finish. If you bake at 400°F, the edges may dry out before the center cooks, leading to a dry texture.
Why Your Nose Knows Best
Before you pull the dish out of the oven, trust your nose. A warm, honey‑cinnamon scent signals that the batter has set, while a strong, burnt aroma indicates you’re overbaking. I’ve learned to read the scent as a reliable cue—if it smells like toasted bread, you’re ready.
The 5-Minute Rest That Changes Everything
Letting the bake rest for exactly five minutes after removing it from the oven is a game‑changer. This pause allows the steam to redistribute, ensuring that the pears stay juicy and the oats stay tender. Skipping this step often results in a dry, crumbly center.
Keep the Pears from Slipping
If you notice the pear slices sliding off the bottom of the dish during baking, sprinkle a little flour or oat powder around them before pouring the batter. This creates a sticky base that keeps the pears in place, ensuring even cooking.
Broil, But Watch the Clock
Broiling the top for just 1–2 minutes gives a caramelized finish without burning. I’ve had the mishap of leaving it on too long, and the resulting bitterness ruined the dish. The trick is to keep a close eye and pull it out as soon as the glaze is golden.
Make It Vegan, No Problem
Swap the egg for a tablespoon of flaxseed meal mixed with 3 tablespoons of water (let sit for 5 minutes). Use plant‑based milk, and the texture remains almost identical. The flavor stays sweet and comforting, making it a perfect vegan option.
Use Fresh Pears for Best Flavor
Fresh pears give a bright, juicy flavor that canned pears can’t match. If you’re out of season, look for pears in the frozen section; thaw them, pat dry, and use as directed. The texture is just as good, and the flavor is surprisingly fresh.
Keep the Oats Whole
Using rolled oats instead of quick oats keeps the texture chewy and adds a subtle nutty undertone. If you prefer a finer crumb, you can pulse the oats in a food processor to a coarse meal, but the classic rolled oat texture is the best.
Creative Twists and Variations
This recipe is a playground. Here are some of my favorite ways to switch things up:
Pear & Apple Fusion
Swap half the pears for thinly sliced apples for a sweet‑tart contrast. The apples add a crispness that balances the softness of the pears, creating a multi‑textured experience.
Chocolate Drizzle
After baking, drizzle melted dark chocolate over the top for a decadent finish. The bittersweet chocolate complements the honey and cinnamon, adding a sophisticated twist.
Almond Crumble Topping
Sprinkle almond flour, chopped almonds, and a dash of cinnamon over the batter before baking. The topping crisps into a crunchy, nutty crust that adds an extra dimension of flavor.
Maple & Ginger Variation
Replace honey with maple syrup and add a teaspoon of fresh grated ginger. The maple brings a deep, caramel flavor, while the ginger adds a subtle heat that brightens the dish.
Nut-Free Version
Omit the nuts and replace them with dried cranberries or raisins for a chewy texture. The dried fruit adds sweetness and a pop of color, making the bake visually appealing.
Berry Boost
Fold in a cup of fresh blueberries or raspberries before baking. The berries burst with juice during baking, creating a fruity, slightly tart layer that contrasts beautifully with the honey.
Cheese Crust
Top the batter with a thin layer of shredded cheddar before baking. The cheese melts into a gooey, savory crust that pairs unexpectedly well with the sweet pears.
Spiced Latte Topping
Drizzle espresso or a strong coffee over the finished bake, then sprinkle a pinch of cocoa powder. The coffee’s bitterness cuts through the sweetness, offering a sophisticated adult twist.
Storing and Bringing It Back to Life
Fridge Storage
Store leftovers in an airtight container in the refrigerator for up to 3 days. The oats remain tender, and the pears stay juicy. When ready to eat, reheat in the microwave for 30–45 seconds or in a 300°F oven for 10 minutes.
Freezer Friendly
Wrap the baked loaf tightly in plastic wrap and place it in a freezer bag. It stays good for up to 3 months. Thaw overnight in the refrigerator, then warm in the oven at 300°F for 15 minutes to restore its fresh texture.
Best Reheating Method
The key to reheating is adding a splash of milk or water to the center of the loaf before microwaving. This steams the oats, preventing them from drying out. Microwave on high for 45 seconds, then let rest for 1 minute before serving.