When I was scrambling to salvage a dinner after a last‑minute party crash, I found myself staring at an empty fridge, a handful of frozen veggies, and a bag of leftover chicken. I was about to give up when a flash of culinary inspiration hit: why not turn the chaos into a crustless, cloud‑soft chicken pot pie that could be whipped up in twenty minutes? The idea was simple, but the execution felt like a secret handshake between a comfort‑food aficionado and a kitchen wizard. I was determined to make a dish that would make even the most skeptical foodie swoon, and I wasn’t about to let a broken oven or a half‑fired skillet stand in my way.
The moment I cracked the first garlic clove, the kitchen filled with a warm, aromatic haze that made my mouth water before the first bite even arrived. The mushrooms released a deep, earthy scent that mingled with the sweet, caramelized notes of the mirepoix blend, creating a perfume that could make a grown‑up sigh in delight. The sound of the sautéing vegetables crackled like a campfire on a rainy evening, and the gentle hiss of the ghee hinted at the richness to come. My eyes widened as the coconut milk and chicken broth swirled together, forming a silky sauce that promised to coat the chicken like velvet. The anticipation was tangible; even the timer on my phone seemed to pause, waiting for the next step.
What sets this version apart from the endless list of pot pies you’ll find online is the way it strips away the crust and focuses on pure, unadulterated flavor. By using tapioca flour instead of traditional wheat, the sauce thickens without any heaviness, giving the dish a light, almost airy finish that feels like a hug in a bowl. The combination of sea salt, black pepper, Italian seasoning, and sage creates a seasoning blend that is both familiar and daringly bold, making every bite a revelation. The frozen ingredients keep the preparation fast yet fresh, while the coconut milk adds a subtle sweetness that balances the savory notes. And because it’s crustless, there’s no extra step of pie dough, no waiting for the crust to brown, no need to worry about a soggy bottom.
Picture yourself pulling this out of the oven, the whole kitchen smelling incredible, and seeing a golden, bubbling surface that shimmers like a polished trophy. I dare you to taste this and not go back for seconds, because the flavors are so layered and satisfying that the first bite will leave you craving the next. If you’ve ever struggled with a pot pie that turns out too heavy or too dry, you’re not alone — and I’ve got the fix. Let me walk you through every single step — by the end, you’ll wonder how you ever made it any other way.
What Makes This Version Stand Out
- Speed: The crustless design eliminates dough prep and baking time, slashing the overall cooking time to just 45 minutes. This is a game‑changer for busy weeknights or last‑minute gatherings. The recipe’s reliance on frozen vegetables and pre‑cooked chicken keeps prep to a minimum, allowing you to focus on flavor rather than logistics.
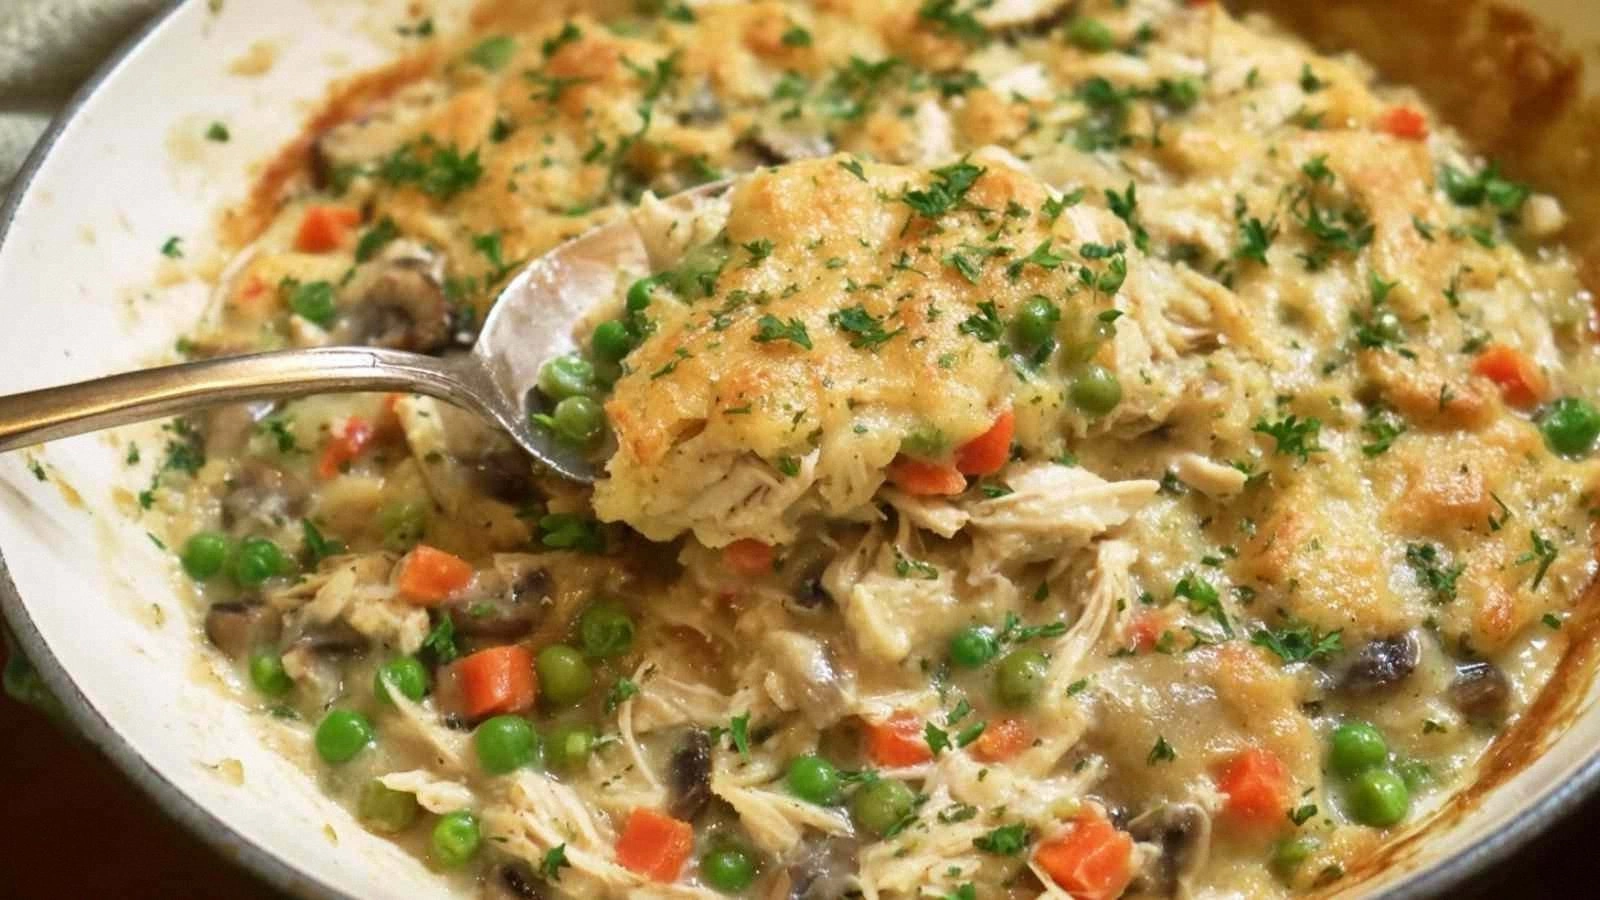
- Texture: Tapioca flour thickens the sauce into a silky, cloud‑like consistency that clings to the chicken without becoming gummy. The mushrooms stay tender yet flavorful, and the peas burst with a satisfying snap. The result is a harmonious mouthfeel that feels both comforting and refined.
- Flavor Depth: The blend of Italian seasoning and sage introduces earthy, herbal undertones that elevate the dish beyond a simple comfort food. The coconut milk’s subtle sweetness counters the savory mirepoix, creating a balanced palate that lingers on the tongue. The sauce coats the ingredients like velvet, ensuring every bite is infused with richness.
- Ingredient Quality: Using ghee instead of butter adds a nutty depth that complements the coconut milk. Fresh garlic and a high‑quality frozen mirepoix blend guarantee that each component delivers maximum flavor. The recipe’s simplicity allows the quality of each ingredient to shine through.
- Make‑Ahead Potential: Once cooked, the pot can be cooled and refrigerated for up to three days, or frozen for up to two weeks. Reheating is effortless: just warm on the stovetop with a splash of broth or coconut milk to restore moisture. This makes the dish perfect for meal prep or a quick weeknight dinner.
- Crowd‑Pleaser: The dish’s comforting profile and vibrant colors make it a hit with both kids and adults. The absence of a crust means it’s lighter, which is great for guests who prefer a lighter meal or for those who are watching their calorie intake. The bold seasoning blend ensures that even the most discerning palate will find it irresistible.
- Versatility: Swap the chicken for turkey or tofu, the mushrooms for shiitake or portobello, or the coconut milk for a lighter Greek yogurt. The base recipe remains the same, giving you endless opportunities to personalize. The result is a flexible framework that can adapt to dietary preferences and seasonal ingredients.
Inside the Ingredient List
The Flavor Base
Ghee, the clarified butter, is the cornerstone of the sauce’s richness. It has a higher smoke point than regular butter, allowing it to brown the garlic without burning. If you’re avoiding dairy, a neutral oil like grapeseed can substitute, though the nutty undertone will be missing. The ghee’s flavor is the first thing your taste buds notice, setting the stage for the rest of the dish.
The Texture Crew
The mushrooms add an umami punch and a satisfying bite. Sliced or diced, they absorb the sauce and release their own juices, creating a silky matrix that binds everything together. If you prefer a smoother sauce, you can pulse the cooked mushrooms in a blender before adding them back to the pot. The frozen peas contribute a pop of color and a subtle sweetness that balances the savory base.
The Unexpected Star
Frozen mirepoix is a convenience that packs a flavorful punch. It’s a blend of carrots, celery, and onions, diced and frozen to preserve freshness. Using frozen mirepoix saves chopping time and still delivers that classic vegetable base you’d expect in a pot pie. If you’re adventurous, try adding a splash of white wine during the sauté to deepen the flavor profile.
The Final Flourish
Tapioca flour is the secret to that silky, thick sauce without the heaviness of wheat flour. It thickens quickly and dissolves smoothly, giving the dish a light, almost airy finish. Coconut milk provides a subtle sweetness and a creamy texture that contrasts beautifully with the savory elements. The combination of sea salt, black pepper, Italian seasoning, and sage creates a seasoning blend that is both familiar and daringly bold, making every bite a revelation.
Everything’s prepped? Good. Let’s get into the real action…
The Method — Step by Step
- Heat the Ghee: In a large, heavy‑bottomed skillet, melt the 2 tablespoons of ghee over medium heat. Once the ghee is shimmering, add the minced garlic and sauté until fragrant, about 30 seconds. Watch for the garlic to turn a light golden color; that’s the cue that it’s ready. If the garlic starts to brown too quickly, lower the heat immediately. This step builds the aromatic foundation of the dish.
- Sauté the Mirepoix: Add the 10 oz of frozen mirepoix to the skillet. Stir well, letting the vegetables cook for 4–5 minutes until they begin to soften. The mixture should release a sweet, caramelized aroma that fills the kitchen. Keep the heat steady; you want the vegetables to cook through without burning. This step ensures the base remains flavorful and evenly cooked.
- Introduce the Mushrooms: Toss in the 2 cups of sliced mushrooms. Cook for another 3–4 minutes, stirring occasionally, until they release their juices and start to brown. The mushrooms will deepen the sauce’s umami profile and add a delightful texture contrast. Keep an eye on the liquid; if it evaporates too quickly, add a splash of broth to keep things moist.
- Add the Chicken and Peas: Stir in the 4 cups of cooked chicken and 1 cup of frozen peas. Allow everything to heat through for 2 minutes, letting the flavors mingle. The peas will add a bright burst of color and a subtle sweetness that balances the savory elements. This is the moment when the dish starts to look like a cohesive, comforting pot.
- Season the Sauce: Sprinkle in the 1 teaspoon sea salt, 1 teaspoon ground black pepper, 1 teaspoon Italian seasoning, and 1 teaspoon ground sage. Mix thoroughly, ensuring every ingredient is coated with the seasoning blend. The combination of herbs will give the dish an aromatic depth that feels both familiar and adventurous. Taste the sauce; adjust seasoning if needed.
- Incorporate the Liquids: Pour in the 1.5 cups of chicken broth and the 1 cup of full‑fat coconut milk. Stir until the mixture is smooth and begins to bubble. The coconut milk will lend a silky texture, while the broth provides the necessary liquid base. Allow the mixture to simmer gently for 5 minutes, letting the flavors meld.
- Thicken with Tapioca Flour: Sprinkle the 2 tablespoons of tapioca flour over the sauce. Whisk vigorously to avoid lumps, then let the mixture cook for an additional 2–3 minutes until it thickens to a glossy, velvety consistency. The sauce should coat the back of a spoon without dripping. This step is crucial for achieving that silky finish.
- Final Touches: Remove the skillet from the heat and let it rest for a minute. The sauce will continue to thicken slightly as it cools. Serve immediately, spooning the luscious mixture over a bed of steamed rice or a side of crustless bread. If you prefer a slightly crisp top, transfer the mixture to a shallow baking dish, bake at 350°F for 10 minutes, or broil for 2–3 minutes until golden.
That's it — you did it. But hold on, I've got a few more tricks that'll take this to another level…
Insider Tricks for Flawless Results
The Temperature Rule Nobody Follows
Many cooks keep the skillet on high heat throughout, which can scorch the sauce. I’ve found that starting with medium heat and lowering it after adding the liquids preserves the delicate coconut flavor. Keep the heat low during the final thickening; this prevents the sauce from becoming too thick or clumpy.
Why Your Nose Knows Best
Smell the sauce as it simmers. When it starts to steam and release a fragrant aroma, that’s the signal that the flavors are developing. A subtle, buttery scent indicates the ghee has reached its optimal temperature, while a faint coconut aroma confirms the milk has warmed without scorching.
The 5-Minute Rest That Changes Everything
After turning off the heat, let the pot sit for five minutes before serving. This brief rest allows the sauce to settle, making it easier to spoon and ensuring a uniform consistency. The residual heat also helps the chicken finish cooking gently, keeping it moist.
Keep the Peas Bright
Frozen peas can turn gray if overcooked. Add them in the last two minutes of cooking and stir gently. The quick heat will revive their color and maintain a fresh, sweet bite.
Use a Lighter Coconut Milk If You’re Watching Calories
Full‑fat coconut milk gives the dish a rich mouthfeel, but if you prefer a lighter version, try light coconut milk. The sauce will still be creamy, just with fewer calories and a slightly thinner consistency.
Reheat with a Splash of Broth
When reheating leftovers, add a tablespoon of chicken broth or water to the pot. This restores moisture and prevents the sauce from drying out. Warm gently over low heat, stirring until the mixture is silky again.
Creative Twists and Variations
This recipe is a playground. Here are some of my favorite ways to switch things up:
Turkey & Sweet Potato
Swap the chicken for shredded turkey and add diced sweet potato. The sweetness of the potato pairs beautifully with the savory herbs, creating a comforting yet adventurous flavor profile. Great for Thanksgiving leftovers or a hearty fall meal.
Vegan Coconut Curry
Replace the chicken with tofu or tempeh, and add a tablespoon of curry powder. The coconut milk becomes the base of a creamy curry, and the vegetables take on a new, exotic dimension. Serve over jasmine rice for a satisfying vegan dinner.
Herb‑Infused Cream
Stir in a handful of fresh basil or thyme at the end of cooking. The fresh herbs brighten the dish and add a subtle aromatic lift. This variation works well for a springtime dinner when herbs are at their peak.
Spicy Kick
Include a pinch of red pepper flakes or a dash of hot sauce. The heat contrasts with the creamy sauce, creating a dynamic flavor experience. Ideal for those who love a little spice in their comfort food.
Cheesy Finale
Sprinkle shredded mozzarella or cheddar over the top before a quick broil. The cheese melts into a golden crust, adding a gooey texture that’s hard to resist. This variation brings a familiar, cheesy twist to the original recipe.
Storing and Bringing It Back to Life
Fridge Storage
Cool the pot completely, then transfer it to an airtight container. Store in the refrigerator for up to three days. When reheating, add a splash of water or broth to keep the sauce moist, and warm gently on the stovetop.
Freezer Friendly
Divide the dish into individual portions in freezer‑safe containers. Freeze for up to two weeks. Thaw overnight in the refrigerator before reheating. A quick microwave or stovetop reheat will bring it back to its original silky texture.
Best Reheating Method
Reheat the dish on low heat, stirring occasionally. Add a small amount of chicken broth or water to prevent drying. The sauce will regain its velvety consistency, making it feel like freshly cooked.