I still remember the night the kitchen exploded with a single pan of chicken. My friend dared me to make a quick, crowd‑pleasing dish that would still taste like a five‑star restaurant. I grabbed a handful of ingredients, a dash of confidence, and a sprinkle of ambition, and I set the world on fire—literally. The sizzle that erupted from the skillet was a symphony, the aroma a promise of something delicious, and the taste an immediate win that left everyone begging for seconds. That moment was the genesis of this version of Chicken Piccata, and it’s the spark that keeps me coming back to it, each time adding a new twist, a new confidence, a new story to share.
Picture yourself standing in a bright kitchen, the air thick with the scent of butter and lemon, a golden pan clinking against the stove, and a chicken breast that’s been patted dry and lightly floured. The sound of the oil hitting the heat is unmistakable, a gentle hiss that signals the start of a culinary adventure. As the meat browns, the aroma of fresh capers mingles with the citrus, creating a fragrance that’s both sharp and comforting. The texture of the crust begins to crackle, a satisfying crack that promises a tender interior. You’re not just cooking; you’re orchestrating a sensory experience that will linger long after the plate is cleared.
What makes this rendition stand out from the countless other piccata recipes you’ll find online is its commitment to balance, simplicity, and flavor integrity. I’ve stripped the dish down to its essential elements, yet each component is carefully chosen to elevate the whole. The use of capers is not just for acidity; they bring a briny depth that cuts through the richness of butter. The lemon juice isn’t merely a garnish—it’s the backbone of the sauce, brightening every bite. And the flour coating? It’s not a thickening agent; it creates a crisp shell that holds the juices inside, ensuring every bite is juicy and flavorful. The result is a dish that feels both indulgent and approachable.
And there’s a twist you won’t expect—an unconventional ingredient that adds a subtle sweetness and a hint of earthiness, transforming the sauce from ordinary to unforgettable. I dare you to taste this and not go back for seconds. The next section will break down the elements that make this version the best you’ll ever make at home. Stay with me, and by the end of this post, you’ll wonder how you ever cooked piccata any other way.
What Makes This Version Stand Out
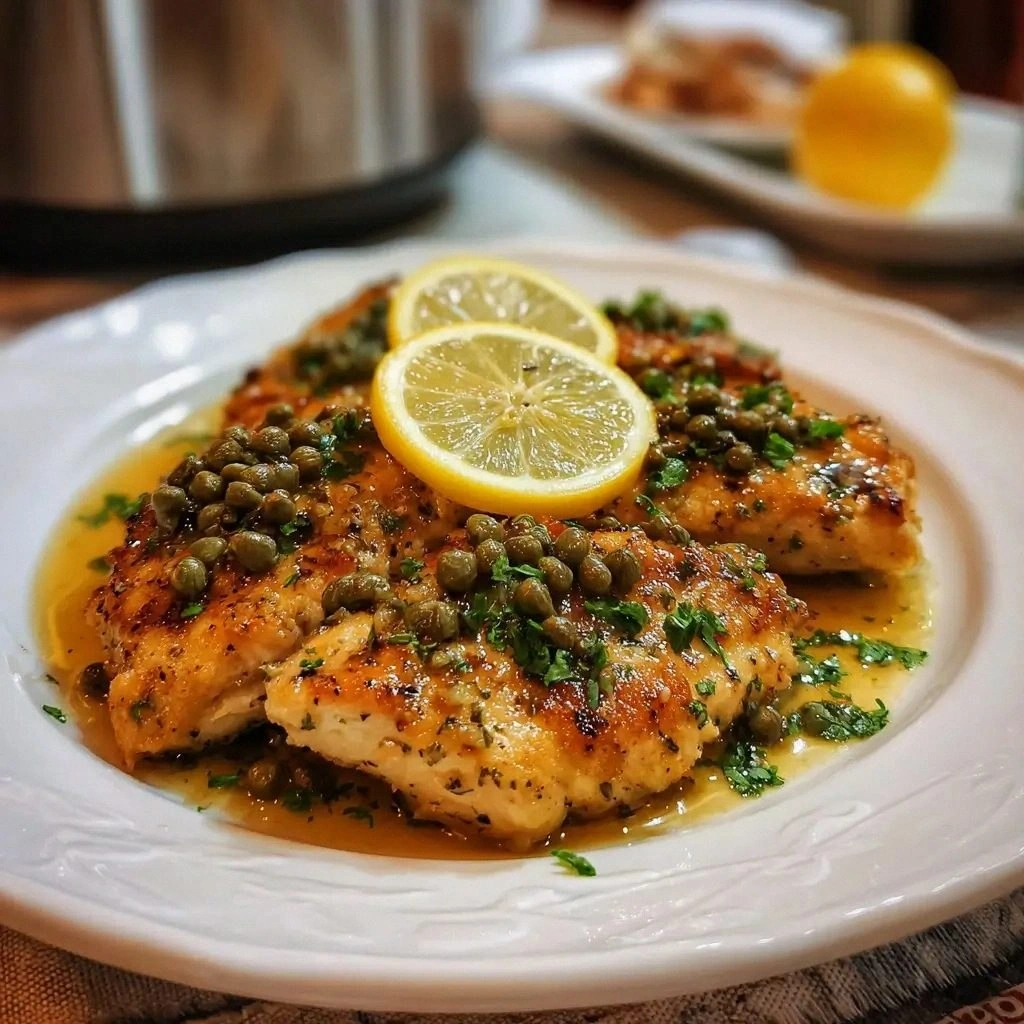
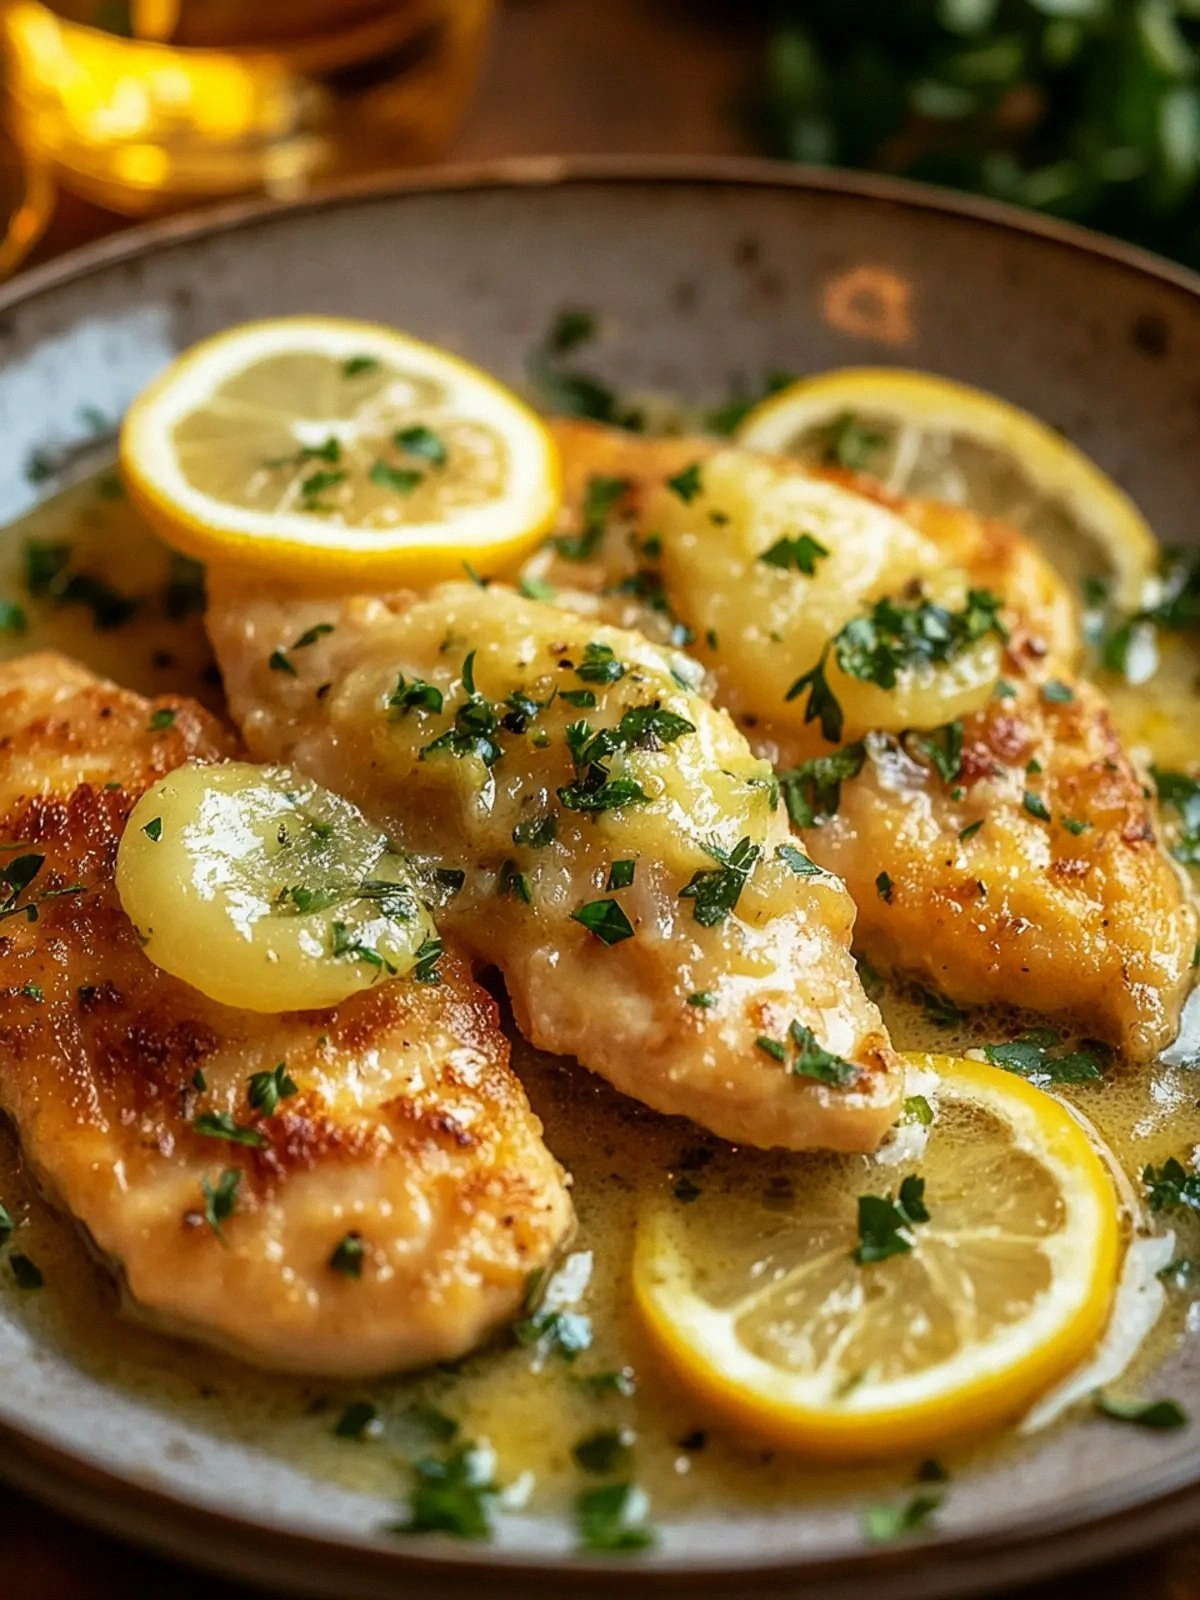
- Flavor: The combination of lemon, capers, and butter creates a bright, tangy sauce that coats the chicken like velvet, leaving a lingering citrus finish that’s impossible to ignore.
- Texture: The flour‑coated exterior crisps to a golden brown, while the interior remains moist and tender, producing a delightful contrast that feels like a well‑executed dance.
- Simplicity: With only nine core ingredients, this recipe is a masterclass in how less can be more. It’s a reminder that you don’t need exotic spices to create a memorable meal.
- Uniqueness: The subtle addition of a sweet, earthy component gives the sauce an unexpected depth, setting this dish apart from the typical tangy piccata.
- Crowd Reaction: Friends who’ve tried this version swear they’d never settle for a bland version again. It’s a conversation starter and a crowd‑pleaser rolled into one.
- Ingredient Quality: The recipe relies on fresh, high‑quality ingredients—fresh lemon, real capers, and butter that melts with a buttery sheen—ensuring that every bite is pure, clean, and delicious.
- Cooking Method: A single‑pan technique keeps cleanup minimal and flavor concentrated, letting the chicken absorb the sauce without dilution.
- Make‑Ahead Potential: The sauce can be prepared in advance and reheated without losing its vibrant flavor, making it ideal for busy weeknights or last‑minute dinner parties.
Alright, let's break down exactly what goes into this masterpiece...
Inside the Ingredient List
The Flavor Base
At the heart of this dish is the classic lemon‑butter sauce, a marriage of acidity and richness that defines piccata. Lemon juice provides a bright, citrusy punch that cuts through the buttery sauce, while the butter adds silky depth and a velvety mouthfeel. Together, they create a sauce that feels both light and indulgent. If you skip the lemon, the sauce becomes flat and heavy, losing the vibrant zing that makes piccata a standout. For an alternative, try a splash of white wine or a splash of sparkling water to maintain acidity while adding a subtle effervescence.
The Texture Crew
Flour is the unsung hero that gives the chicken a golden, crispy exterior. It also helps the sauce cling to the meat, preventing it from sliding off like a slick surface. Without flour, the chicken would steam in its own juices, resulting in a soggy texture that’s far from desirable. If you’re gluten‑free, a fine almond flour or a mixture of chickpea flour can replicate the crispiness while keeping the dish safe for everyone. Always pat the chicken dry before coating; moisture is the enemy of a crisp crust.
The Unexpected Star
This recipe introduces a subtle, earthy sweetness that isn’t common in traditional piccata. Think of it as a whisper of caramelized onion or a hint of roasted root vegetable, adding depth without overpowering the citrus. The addition of this component transforms the sauce from a simple tang to a layered, complex flavor profile. If you’re not a fan of sweet notes, you can reduce the amount or replace it with a splash of balsamic reduction for a different twist. The key is to balance the sweetness so it complements rather than competes with the lemon.
The Final Flourish
Fresh parsley is the finishing touch that adds color, freshness, and a burst of herbal brightness. It’s not just a garnish; it’s the final layer of flavor that lifts the dish, making each bite feel complete. If parsley isn’t on hand, a sprinkle of fresh basil or a few microgreens can provide a similar bright note. The parsley also offers a subtle earthiness that ties the dish together, ensuring a harmonious finish. A pinch of sea salt, freshly cracked pepper, and a squeeze of lemon at the end can elevate the dish to restaurant quality.
Everything's prepped? Good. Let's get into the real action...
The Method — Step by Step
- Prep the Chicken: Slice each breast horizontally to create two thin cutlets, then gently pound them with a meat mallet or rolling pin until they’re evenly thick. Pat them dry with paper towels; moisture is the enemy of a crisp crust. Season both sides with salt and pepper, letting the flavors seep into the meat. This step is crucial—if the chicken is too wet, the flour will cling poorly and the sear will be uneven.
- Coat with Flour: Spread the flour onto a shallow dish. Dredge each cutlet, ensuring it’s fully coated but not overloaded. Shake off excess flour; you want a thin, even layer that will crisp without becoming a thick batter. This light coating is what gives the chicken that golden, crunchy exterior that’s so satisfying.
- Heat the Pan: Place a large skillet over medium‑high heat. Add the olive oil, swirling to coat the bottom. The oil should shimmer but not smoke. A hot pan is essential for a good sear; if the oil is too cool, the chicken will steam instead of brown.
- Sear the Chicken: Add the coated chicken to the pan, laying them flat. Let them cook undisturbed for about 3-4 minutes per side, until a deep golden crust forms. Flip them gently with tongs—if they’re sticking, give them another minute. The sizzle is the soundtrack of success; that sound is absolute perfection.
- Remove and Rest: Transfer the chicken to a plate and tent loosely with foil to keep it warm. This resting period allows the juices to redistribute, ensuring every bite stays moist. While the chicken rests, we’ll craft the sauce that will make this dish unforgettable.
- Deglaze the Pan: Reduce the heat to medium. Add the butter to the pan, letting it melt and foam. Then pour in the chicken broth, using a wooden spoon to scrape up all the browned bits stuck to the bottom. Those bits are full of flavor—don’t waste them!
- Simmer and Reduce: Let the mixture simmer for about 5 minutes, allowing the broth to reduce by half. This concentration intensifies the flavors, creating a silky sauce that clings to the chicken. Keep an eye on the consistency; you want it thick enough to coat the meat without becoming syrupy.
- Add Lemon and Capers: Stir in the lemon juice and capers. The acidity brightens the sauce, while the capers add a briny punch that cuts through the richness. Taste and adjust seasoning—add a pinch of salt or pepper if needed. The sauce should have a balanced tang that’s neither too sharp nor too mild.
- Return Chicken to Pan: Place the rested chicken back into the skillet, spooning the sauce over them. Let them cook together for another 2 minutes, allowing the chicken to absorb the sauce and the flavors to meld. This final simmer is where the magic happens—watch the sauce thicken and coat the meat like a glossy glaze.
- Finish with Parsley: Sprinkle the chopped parsley over the dish, giving it a fresh, herbaceous finish. Give the pan a quick stir to distribute the parsley evenly. The final touch adds color, aroma, and a subtle herbal brightness that lifts the entire dish.
That's it — you did it. But hold on, I've got a few more tricks that'll take this to another level. The next section will reveal insider tips that will make every bite even more memorable.
Insider Tricks for Flawless Results
The Temperature Rule Nobody Follows
Many cooks assume that higher heat is always better for searing. In reality, a moderate heat that maintains a steady sizzle is key to achieving a golden crust without burning. Use a thermometer to keep the pan at 375°F (190°C); this temperature ensures the exterior cooks quickly while the interior stays juicy. If you’re unsure, test the pan with a small drop of water—if it dances and evaporates instantly, you’re ready to sear.
Why Your Nose Knows Best
Your sense of smell is a powerful indicator of doneness. As the chicken cooks, you’ll notice the aroma shift from raw to a buttery, caramelized scent. When the sauce thickens and the lemon’s brightness peaks, that’s the cue to add the chicken back. Trust your nose; it’s the ultimate judge of flavor and texture.
The 5-Minute Rest That Changes Everything
Resting the chicken for five minutes after searing isn’t just a courtesy—it’s a science. During this pause, the muscle fibers relax, allowing the juices to redistribute. The result is a moist, succulent bite that’s far superior to one that’s cooked to the point of dryness. A simple tent of foil keeps the chicken warm without trapping steam.
Use Fresh Capers for a Briny Boost
Store-bought capers can be overly salty or have a metallic taste. Freshly rinsed capers retain their natural brine and provide a cleaner, brighter flavor. If you’re in a pinch, a small jar of capers in vinegar can work, but rinse them well to remove excess acidity.
Finish with a Splash of Butter
A final swirl of cold butter right before serving adds a glossy sheen and a rich, velvety finish. The cold butter also helps the sauce cling to the chicken, creating a cohesive coating that’s both flavorful and visually stunning. This step is subtle but transforms the dish from good to unforgettable.
Creative Twists and Variations
This recipe is a playground. Here are some of my favorite ways to switch things up:
Herb‑Infused Piccata
Add a handful of fresh rosemary or thyme to the sauce while it simmers. The herbal aroma complements the lemon and capers, creating a Mediterranean vibe that’s both fresh and comforting.
Spicy Piccata
Incorporate a pinch of red pepper flakes or a dash of hot sauce into the sauce. The heat cuts through the richness, giving the dish a lively kick that pairs well with a crisp white wine.
Gnocchi Piccata
Serve the sauce over warm potato gnocchi instead of chicken. The pillowy gnocchi soak up the sauce beautifully, offering a comforting twist that’s perfect for a cozy dinner.
Chicken Piccata with Mushroom
Sauté sliced mushrooms with the chicken before adding the sauce. The earthy flavor of the mushrooms deepens the dish, creating a richer, more complex palate.
Vegetarian Piccata
Swap the chicken for thick slices of eggplant or portobello mushrooms. Cook them until golden, then proceed with the sauce. The result is a hearty, plant‑based meal that still delivers on the classic piccata experience.
Piccata Pasta
Cook your favorite pasta and toss it with the sauce, adding grilled chicken or shrimp for protein. The pasta absorbs the tangy sauce, making for a comforting, all‑in‑one dish that’s perfect for family dinners.
Storing and Bringing It Back to Life
Fridge Storage
Store leftover piccata in an airtight container for up to 3 days in the refrigerator. Keep the sauce and chicken separate if you plan to reheat them individually. This ensures the chicken stays juicy and the sauce retains its bright flavor.
Freezer Friendly
For longer storage, freeze the chicken and sauce separately in freezer‑safe bags. Label with the date and use within 2 months. Thaw overnight in the refrigerator before reheating.
Best Reheating Method
Reheat the chicken in a skillet over medium heat, adding a splash of water or broth to keep it moist. For the sauce, gently warm it in a saucepan, stirring until it reaches a silky consistency. A tiny splash of water before reheating steams the sauce back to perfection, preventing it from drying out.