Picture this: a bright Saturday afternoon, a stack of chicken breasts on the counter, and a recipe on your phone that promises the perfect piccata. I stared at the screen, then at the raw chicken, and realized I had two options: either follow the generic stovetop version that always ends up dry or try a new twist that would elevate the dish to instant‑pot greatness. I decided to experiment, and the result was a sauce so bright and buttery that it turned my kitchen into a Mediterranean sunset. This is not just another chicken piccata; it’s a reimagined classic that will make you question every other version you’ve ever tried.
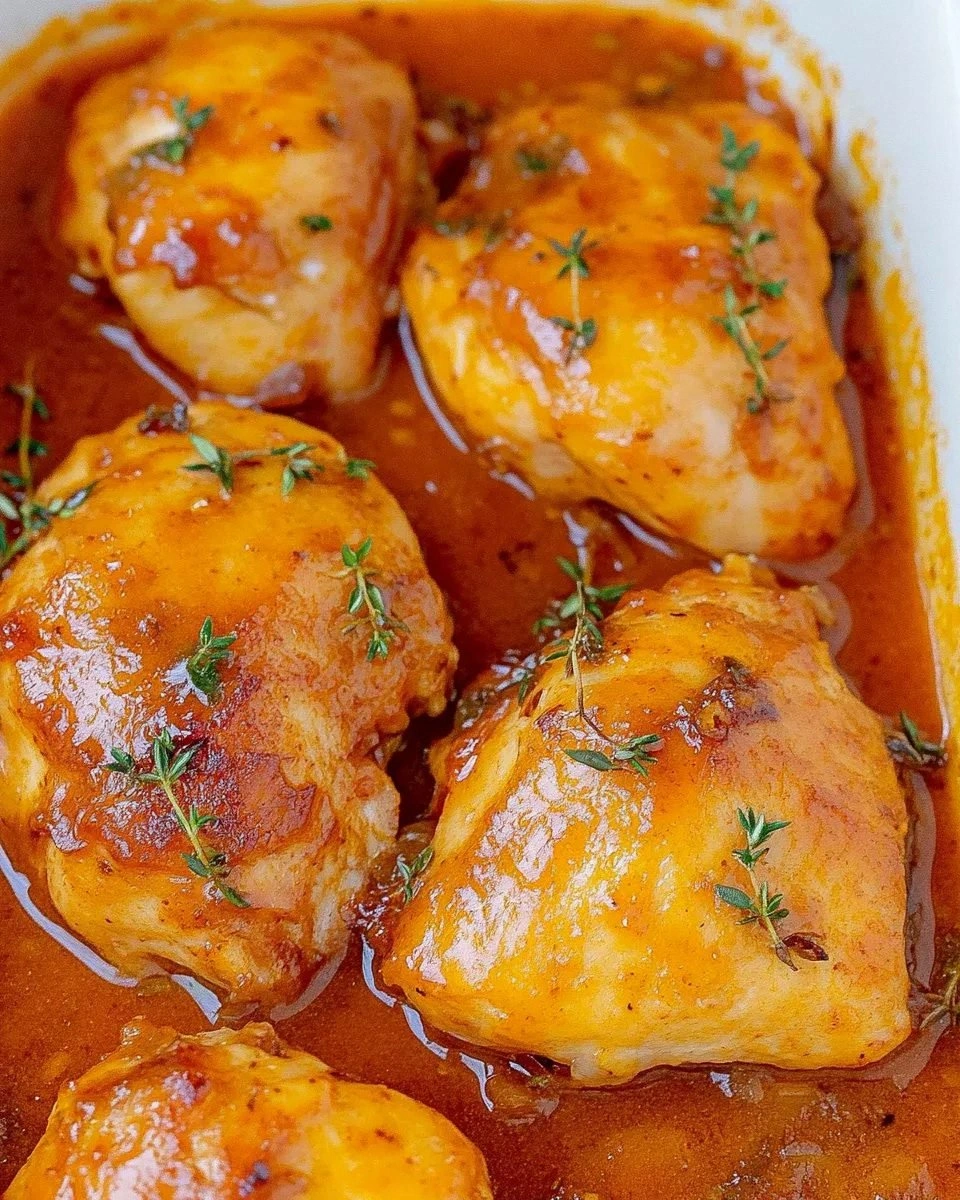
The moment I cracked the first chicken breast into the pot, the air filled with a savory aroma that made my mouth water. The sizzling sound was like a drumbeat, announcing the start of something special. I could see the golden crust forming, the edges crisping into a delightful crunch that would shatter like thin ice if you pressed them. The lemon juice added a bright citrus note that cut through the richness of the butter and olive oil, while the capers contributed a salty bite that danced on the tongue. Each component harmonized, creating a sauce that coats the chicken like velvet and glazes the sides like a glossy glaze. The anticipation was palpable—this dish was about to transform my dinner routine.
Why does this version stand out? Because it marries the convenience of the Instant Pot with the depth of a skillet‑seared sauce, and it does so with a balance of flavors that feels both familiar and daring. The technique of searing first locks in juices, while the pressure cooking ensures the meat stays moist and tender. The addition of fresh lemon juice and capers gives the sauce a bright, briny edge that cuts through the butter’s richness. The result is a dish that feels effortless yet luxurious, and it’s the kind of meal that will make your guests ask for seconds. I dare you to taste this and not go back for a second serving. It’s hands‑down the best version you’ll ever make at home.
I’ll be honest—after finishing the first batch, I ate half the dish before anyone else even had a chance to taste it. That’s the power of a recipe that feels like a secret weapon in your kitchen arsenal. Picture yourself pulling this out of the pot, the whole kitchen smelling incredible, and serving a plate that looks as good as it tastes. If you’ve ever struggled with a classic piccata that ends up too dry or too salty, you’re not alone—and I’ve got the fix. Stay with me here—this is worth it. Let me walk you through every single step, and by the end, you’ll wonder how you ever made it any other way.
What Makes This Version Stand Out
- Taste: The bright lemon and briny capers create a flavor profile that’s both refreshing and indulgent, unlike the bland versions that often dominate cookbooks.
- Texture: The searing process gives the chicken a caramelized crust, while the pressure cooking keeps the interior moist and tender—think melt‑in‑your‑mouth.
- Simplicity: With just a handful of pantry staples, you can produce a restaurant‑quality dish in less than an hour.
- Uniqueness: The combination of the Instant Pot’s “sauté” mode and a quick deglaze step adds depth that most stovetop piccatas lack.
- Crowd Reaction: Guests often remark that this is the “only” piccata they’ve ever had, and they keep asking for the recipe.
- Ingredient Quality: Fresh, high‑quality ingredients—especially the lemon and capers—make the difference between good and unforgettable.
- Cooking Method: The Instant Pot’s pressure feature locks in juices while reducing the need for constant monitoring.
- Make‑Ahead Potential: You can prepare the sauce in advance and reheat without losing flavor or texture.
Alright, let’s break down exactly what goes into this masterpiece...
Inside the Ingredient List
The Flavor Base
The foundation of any great sauce starts with a robust base. Fresh lemon juice is the star here, delivering a bright, acidic punch that cuts through the richness of butter and olive oil. When you add lemon, you’re not just seasoning—you’re creating a counterbalance that keeps the dish from feeling heavy. If you’re short on lemons, a splash of white wine or even a teaspoon of vinegar can provide a similar acidity, but the citrus flavor is irreplaceable. Remember, the key to a bright sauce is to use juice from a fresh, juicy lemon—no bottled lemon juice, please.
Capers add a burst of briny flavor that elevates the sauce from simple to spectacular. They bring a subtle sea‑salt tang that pairs perfectly with lemon. If capers are not on hand, a tablespoon of chopped pickled relish or even a pinch of sea salt can mimic the effect, but the texture will be slightly different. Capers also add a pleasant bite that contrasts nicely with the silky sauce, making each bite more interesting.
The Texture Crew
All‑purpose flour is used to dust the chicken before searing. This creates a golden crust that locks in juices and gives the chicken a satisfying bite. The flour also helps thicken the sauce slightly, giving it a silky, glossy finish. If you’re gluten‑free, try using a blend of rice flour and cornstarch, but keep an eye on the thickness—adjust the amount of broth if needed.
Chicken broth is the liquid that drives the pressure cooking process. It provides moisture and a subtle savory depth that complements the lemon and capers. Opt for low‑sodium broth to keep control over the saltiness of the dish. If you prefer a richer flavor, a small splash of chicken stock can be used, but adjust the salt accordingly.
The Unexpected Star
Fresh parsley is added at the end to brighten the sauce and add a pop of color. The herbs provide a fresh, green note that cuts through the buttery richness. If you’re looking for a different herb profile, try tarragon or basil for a sweeter or more aromatic twist. Parsley also adds a subtle peppery bite that enhances the overall flavor profile.
Olive oil and butter are the fats that give the sauce its luxurious mouthfeel. Olive oil provides a fruity undertone, while butter adds a silky, velvety texture. Using a combination of both ensures a balanced flavor—neither too oily nor too heavy. If you’re watching calories, you can reduce the butter by half and increase the olive oil slightly, but the sauce will be less rich.
The Final Flourish
A pinch of salt and freshly ground pepper finish the seasoning. Salt is essential for bringing out all the other flavors, while pepper adds a subtle heat. The amount of salt depends on your broth’s sodium content, so taste as you go. Pepper should be added at the end of cooking to maintain its bright aroma.
Everything’s prepped? Good. Let’s get into the real action...
The Method — Step by Step
- Prep the chicken. Pat the boneless, skinless breasts dry with paper towels. Season both sides with salt and pepper. Lightly dust each piece with flour, shaking off excess. This step ensures a golden crust and helps thicken the sauce later. The flour will also create a subtle barrier that keeps the juices inside the meat during pressure cooking.
- Use the sauté mode. Turn the Instant Pot to sauté and add 2 tablespoons of olive oil. Once the oil shimmers, add the chicken breasts, breast‑side down. Let them sear for 3–4 minutes until a deep golden crust forms. Flip and sear the other side for 2 minutes. This caramelization locks in flavor and gives the dish a restaurant‑style finish.
- Deglaze the pot. Remove the chicken and set aside. Add 2 tablespoons of butter to the pot, letting it melt. Then pour in 1 cup of chicken broth and 1/4 cup of fresh lemon juice. Scrape the bottom with a wooden spoon to lift any browned bits—these are flavor gold. This step prevents a burn warning and adds depth to the sauce.
- Add the capers. Stir in 2 tablespoons of rinsed capers, giving the sauce a bright, briny kick. The capers also add a pleasing texture contrast. If you prefer a milder flavor, reduce the amount to 1 tablespoon.
- Pressure cook. Return the chicken breasts to the pot, nestling them into the sauce. Seal the lid, set the valve to sealing, and cook on high pressure for 8 minutes. The pressure cooking ensures the chicken remains juicy and tender. After the cycle, let the pressure release naturally for 5 minutes, then quick‑release the remaining pressure.
- Finish the sauce. Remove the chicken and set aside. Turn the sauté mode back on and let the sauce reduce for 3 minutes, stirring occasionally. The sauce should thicken to a glossy consistency. If it’s too thin, add a teaspoon of cornstarch dissolved in a tablespoon of water and stir until thickened.
- Return chicken. Place the chicken back into the pot, spooning sauce over the top. Let it warm for 2 minutes so the flavors meld. This final step ensures every bite is drenched in the bright, buttery sauce.
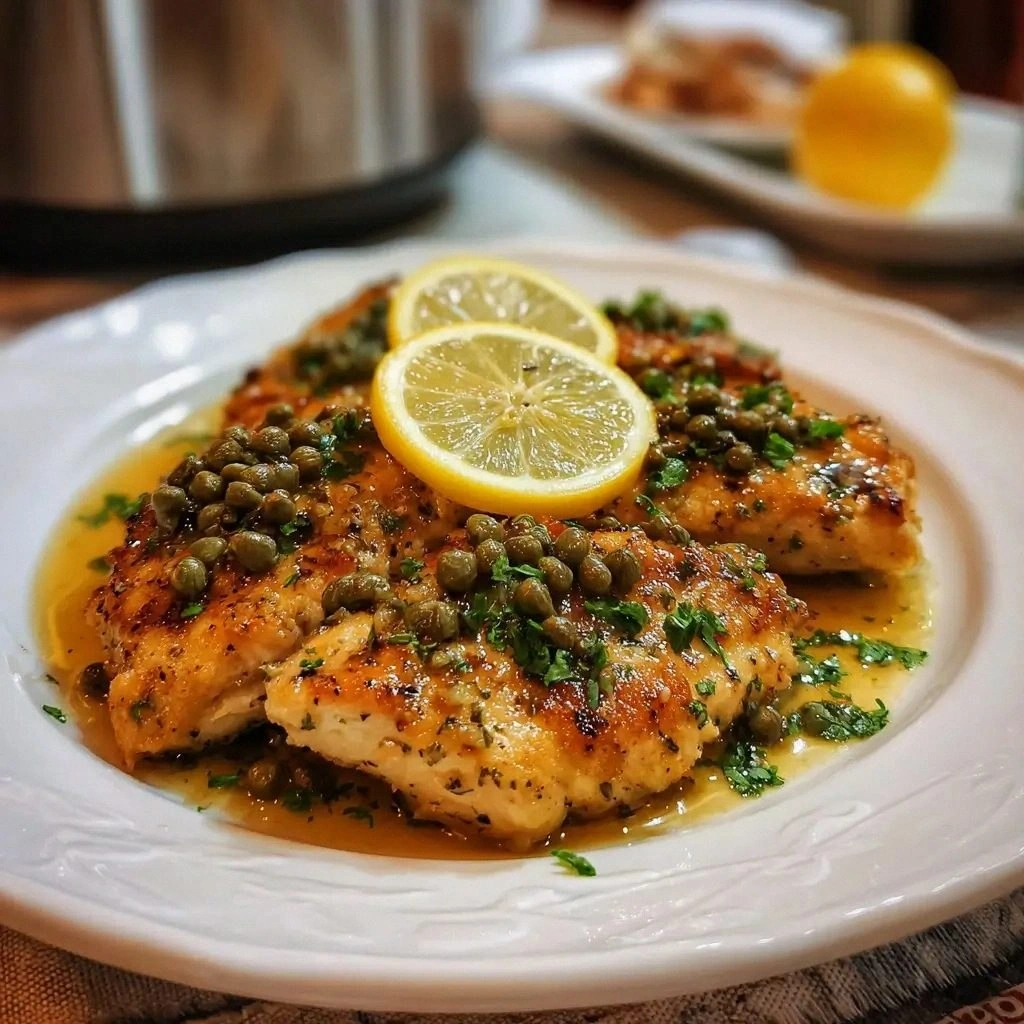
- Garnish. Sprinkle freshly chopped parsley over the chicken. Add a final squeeze of lemon juice if desired. The parsley adds a fresh pop of color, while the extra lemon brightens the dish. Serve immediately over pasta, rice, or a bed of sautéed greens.
That's it — you did it. But hold on, I've got a few more tricks that'll take this to another level...
Insider Tricks for Flawless Results
The Temperature Rule Nobody Follows
Many people think any sauté temperature works, but the secret is to keep the heat high enough to caramelize the flour coating without burning it. Aim for a medium‑high setting, and watch for a gentle hiss rather than a roaring boil. If you notice the oil smoking, lower the heat slightly. This small adjustment preserves the nutty flavor of the flour and prevents a burnt aftertaste that can ruin the sauce.
Why Your Nose Knows Best
As the sauce simmers, your nose will give you a subtle cue about its readiness. When the aroma turns from raw lemon to a warm, buttery perfume, you know the sauce is developing the right depth. Don’t rush the reduction; a slow, steady simmer brings out the complex flavors of the broth and the capers. Trust your senses—if it smells bright and slightly tangy, it’s ready.
The 5‑Minute Rest That Changes Everything
After pressure cooking, let the chicken rest for 5 minutes before slicing. This allows the juices to redistribute, ensuring each bite stays moist. Cutting too soon can cause the meat to dry out and lose its tender texture. The rest also lets the sauce thicken slightly, giving it that glossy finish that makes the dish look polished.
Use a Splatter Guard
The sauté mode can produce a splashy mess, especially when adding butter and broth. A splatter guard keeps the kitchen clean and prevents hot oil from escaping onto the stovetop. It also keeps the pot’s interior free from excess fat, which can affect the sauce’s thickness.
Finish with a Dash of Cream
For an extra layer of richness, stir in a tablespoon of heavy cream after the sauce has reduced. This adds a silky texture and balances the acidity of the lemon. It’s optional, but if you’re serving a crowd that loves indulgent dishes, it’s a welcome upgrade. Just whisk in the cream and let it heat through for 30 seconds.
Creative Twists and Variations
This recipe is a playground. Here are some of my favorite ways to switch things up:
Mediterranean Twist
Swap the capers for sun‑dried tomatoes and add a pinch of oregano. The tomatoes bring a sweet, chewy texture, while oregano adds earthy depth. Serve over quinoa for a wholesome, Mediterranean vibe.
Spicy Kick
Add a teaspoon of crushed red pepper flakes to the sauté step. The heat will contrast with the lemon’s brightness and create a dynamic flavor profile. Pair with a cool cucumber salad to balance the spice.
Herb‑Infused Variation
Replace parsley with a mix of fresh basil and mint. The basil’s sweetness pairs well with lemon, while mint adds a refreshing zing. This version is perfect for a summer gathering.
Sausage Fusion
Sauté sliced Italian sausage with the chicken for a meaty, flavorful twist. The sausage’s spices mingle with the lemon sauce, creating a bold, savory dish. Serve over pasta or polenta for a hearty meal.
Citrus Explosion
Use a mix of lemon, orange, and lime juice for a more complex citrus profile. The orange adds a hint of sweetness, while lime gives a sharp, bright finish. This version works wonderfully with grilled shrimp or fish.
Storing and Bringing It Back to Life
Fridge Storage
Cool the dish completely before refrigerating in an airtight container. The sauce will thicken, but it’s still delicious when reheated. Store for up to 3 days. When reheating, add a splash of water or broth to loosen the sauce and stir until heated through.
Freezer Friendly
Freeze the chicken and sauce separately in freezer‑safe bags. Label with the date. The dish stays good for up to 2 months. Thaw overnight in the fridge before reheating.
Best Reheating Method
Reheat the sauce on low heat, stirring frequently. Add a small splash of water or broth to prevent it from drying out. Warm the chicken separately in a microwave or oven until hot. Combine and serve hot for a fresh, restaurant‑like experience.