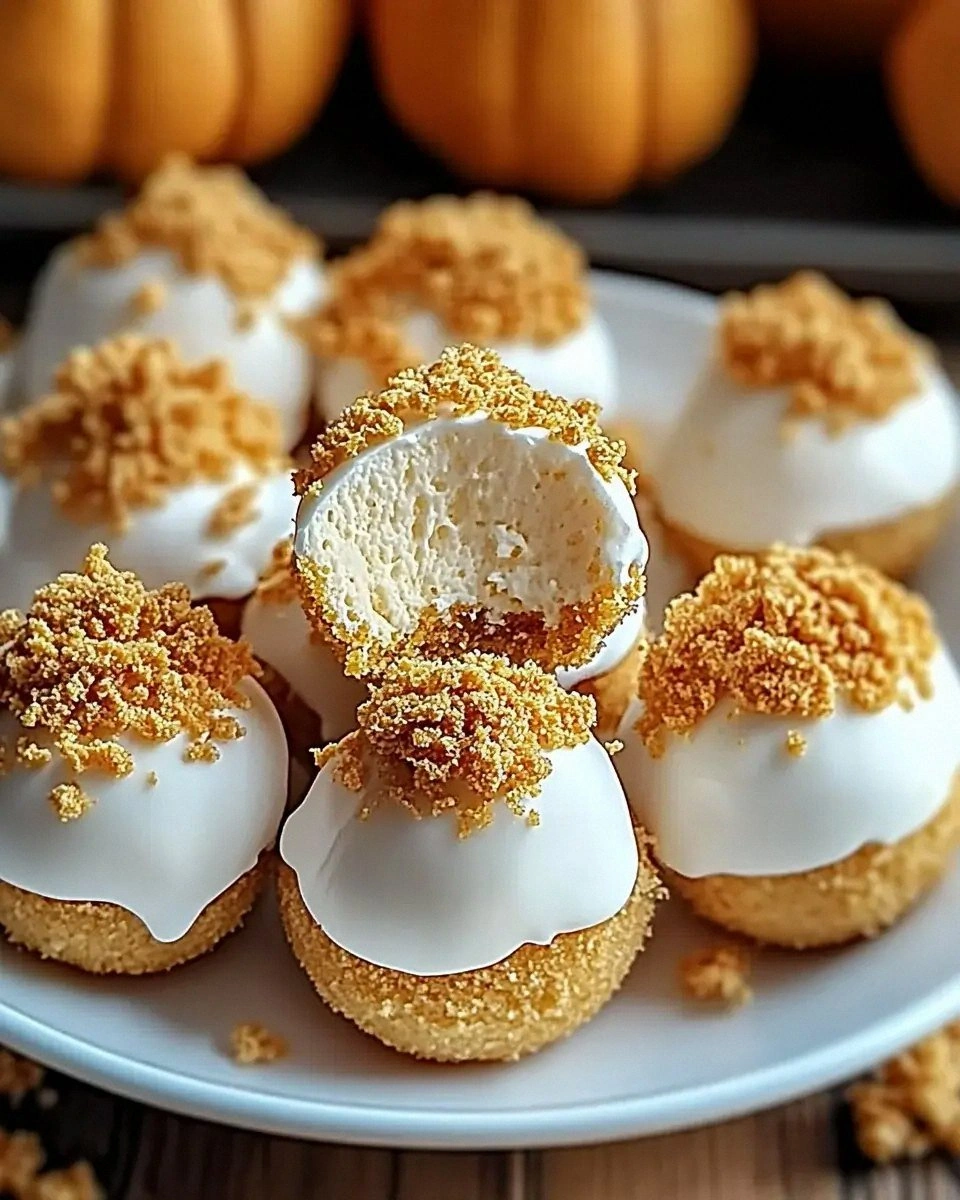
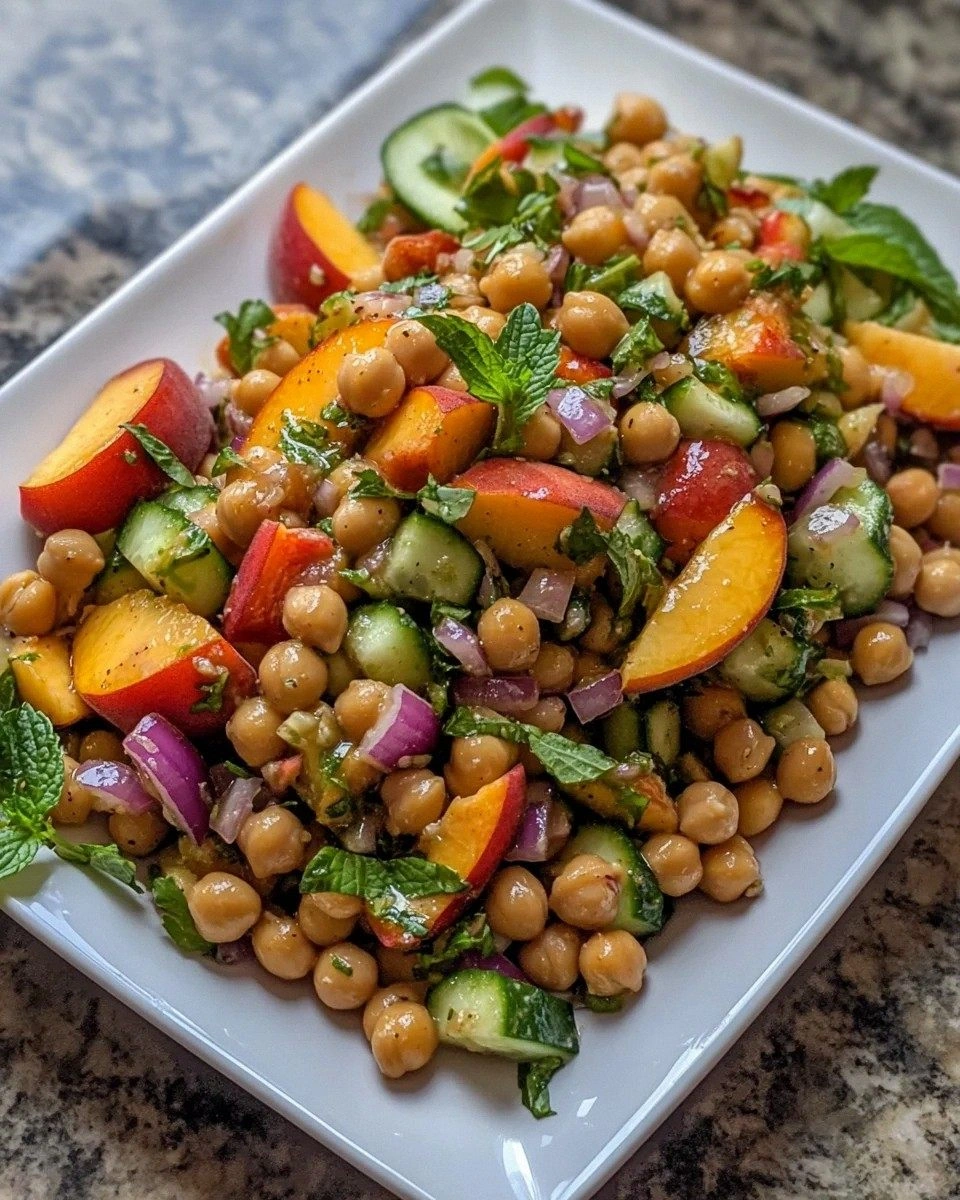
I’ll be honest — I ate half the batch before anyone else got a chance to try it. It all started on a rainy Saturday when my kitchen smelled like a bakery that had just closed for the night and I was desperate for something that felt both indulgent and effortless. I had a half‑dozen fresh strawberries staring at me, a box of yellow cake mix begging for attention, and a lone cream cheese that had been waiting in the fridge for a better purpose. I tossed a quick dare at my roommate: “I bet you can’t make a cheesecake that looks like it took three hours and costs three dollars.” She laughed, I laughed, and the universe responded with a dump‑cake revelation that still makes my stomach do somersaults.
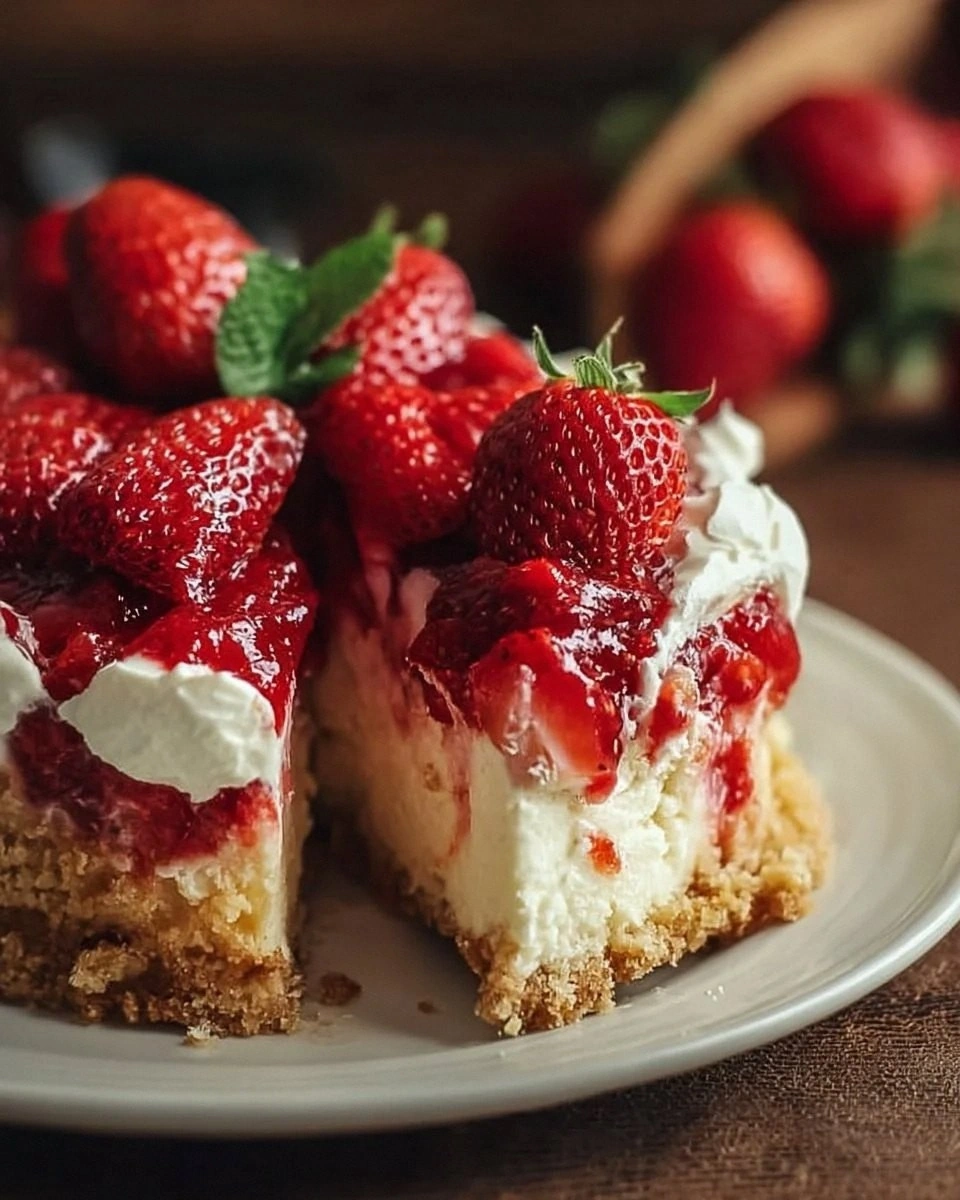
Picture this: the oven door swings open, and a golden‑brown cake top crackles like fresh autumn leaves, while a glossy strawberry‑cheesecake swirl bubbles up from the middle, its aroma a mash‑up of sweet berries, buttery crust, and a whisper of vanilla that makes the whole house feel like a five‑star patisserie. The first bite? A buttery, cake‑like base that gives way to a silky, tangy cheesecake layer, all punctuated by juicy strawberry pieces that burst like fireworks in your mouth. The texture contrast is so dramatic that it feels like a culinary roller coaster, and the flavor balance is so spot‑on that I dare you to taste this and not go back for seconds.
Most strawberry cheesecake dump cakes out there get the texture wrong – they’re either too soggy or too dry, and the strawberry flavor often ends up as a faint afterthought. This version flips the script by using a simple cream‑cheese mixture that sets into a perfectly smooth layer, while the cake mix forms a crisp, buttery crust that holds everything together. The secret? A splash of water that keeps the batter from turning into a gummy mess, and a generous amount of fresh strawberries that keep the fruit flavor bright and authentic. I’ve tried the “no‑bake” shortcuts that promise speed, but they never delivered the same mouthfeel – this is hands down the best version you’ll ever make at home.
Now, I’m about to walk you through every single step — by the end, you’ll wonder how you ever made it any other way. Okay, ready for the game‑changer? This next part? Pure magic. Stay with me here — this is worth it.
What Makes This Version Stand Out
- Texture: The bottom layer is a buttery cake that edges crisp up like a perfectly toasted baguette, while the middle settles into a velvety cheesecake that holds its shape without wobbling.
- Flavor Fusion: Fresh strawberries bring a natural sweetness that balances the tang of cream cheese, and the vanilla extract adds a subtle aromatic backdrop.
- Simplicity: With only eight core ingredients and a single‑pan method, you won’t need a mixer, a fancy pan, or a trip to the specialty store.
- Speed: From prep to oven‑ready in under 15 minutes, this dump cake slashes the time you’d normally spend on a layered cheesecake.
- Make‑Ahead Potential: You can assemble it the night before, refrigerate, and bake fresh in the morning – perfect for brunch or a surprise dessert.
- Crowd Reaction: Even the most skeptical dessert‑hater will be shouting “more!” after the first forkful, thanks to the irresistible caramelized strawberry topping.
- Ingredient Quality: Using real strawberries and full‑fat cream cheese gives depth that boxed mixes alone can’t achieve.
- Versatility: Swap the cake mix for chocolate or spice blends, and you’ve got a whole new dessert family without learning a new technique.
Inside the Ingredient List
The Flavor Base
The cream cheese is the heart of this cake. It provides that tangy, rich foundation that makes a cheesecake feel like a hug from a dairy‑loving aunt. If you skimp on the quality, you’ll notice a watery, bland aftertaste that no amount of strawberries can fix. I always reach for a full‑fat block that’s been softened at room temperature; it blends smoother and sets firmer. A common mistake is using low‑fat cream cheese – it turns the middle into a rubbery mess that cracks when you cut it.
Granulated sugar does double duty: it sweetens the cheese layer and helps the strawberries caramelize as they bake. Too much sugar will make the top overly crunchy, while too little leaves the cheesecake bland. The ½ cup called for here is the sweet spot for a balanced flavor profile. If you’re watching carbs, you can substitute a natural sweetener like erythritol, but expect a slightly different texture.
The Texture Crew
Vanilla extract is the secret aromatics whisperer. A single teaspoon infuses the entire cake with a warm, fragrant note that ties the buttery crust and the tangy cheese together. Don’t use vanilla sugar or imitation vanilla – the real thing gives depth that artificial flavors simply can’t match. If you’re feeling adventurous, a splash of almond extract can add an extra layer of complexity, but keep it under ¼ teaspoon.
The large egg acts as a binder, ensuring the cheesecake layer holds together when you slice it. It also adds a subtle richness that makes the texture silkier. If you’re allergic to eggs, a flax‑egg (1 tbsp ground flaxseed + 3 tbsp water) works in a pinch, though the final texture will be a tad denser.
The Unexpected Star
Fresh strawberries are the show‑stopper. Their natural acidity cuts through the richness of the cream cheese, while their sugars caramelize during baking to create a glossy, jewel‑like topping. I always hull and slice them just before mixing – this keeps their bright color and prevents them from turning mushy. If you can’t find fresh berries, frozen ones work, but be sure to thaw and drain them thoroughly to avoid excess water.
The yellow cake mix brings the buttery crust without any extra effort. It’s pre‑balanced with leavening agents, so you don’t have to guess how much baking powder to add. For a deeper flavor, I sometimes swap the regular mix for a vanilla or buttermilk version, which adds a subtle tang that complements the cheesecake.
The Final Flourish
Unsalted butter, melted, creates a glossy, golden‑brown finish on the cake’s surface. The butter also helps the cake mix spread evenly, forming that coveted crisp edge that shatters like thin ice when you cut into it. If you prefer a richer crust, you can increase the butter to ¾ cup, but watch the cake from the 25‑minute mark to prevent over‑browning.
Water might seem like a boring addition, but the 1 ¼ cups keep the batter from becoming a doughy slab. It creates steam inside the oven, which puffs the cake gently while keeping the cheesecake layer moist. Skipping the water will result in a dense, gummy texture that no one wants.
A dusting of powdered sugar is optional but adds a final touch of elegance. It melts into a delicate veil that makes the dessert look restaurant‑ready without adding any extra sweetness. If you’re serving this to a crowd that loves a bit of sparkle, go ahead and sprinkle it liberally right before serving.
Everything's prepped? Good. Let's get into the real action...
The Method — Step by Step
Preheat your oven to 350°F (175°C). While the oven warms up, grease a 9‑x‑13‑inch baking dish with a thin layer of butter or non‑stick spray. This ensures the cake releases cleanly and the edges stay crisp. The moment the oven clicks, you’ll hear a faint hum that signals the start of something delicious.
In a medium bowl, combine the softened cream cheese, granulated sugar, vanilla extract, and the large egg. Beat with a whisk or an electric mixer on medium speed until the mixture is smooth, glossy, and free of lumps. This step is crucial – a well‑blended base prevents grainy pockets in the final cheesecake layer.
Spread the cream‑cheese mixture evenly over the bottom of the greased pan. Use a spatula to smooth it into a uniform layer, about ¼‑inch thick. You’ll notice it spreading like melted butter on warm toast – that’s the sign it’s at the perfect consistency.
Layer the sliced strawberries over the cream‑cheese base, arranging them in an overlapping pattern for visual appeal. The strawberries should cover the entire surface; any gaps will become pockets of plain cake later on. This is the moment where the fruit’s aroma starts to fill the kitchen, promising caramelized sweetness.
In a separate large bowl, whisk together the yellow cake mix, melted butter, and water until just combined. Do not over‑mix; a few streaks of flour are okay. Over‑mixing creates gluten development, which can make the crust tough instead of tender.
Pour the cake batter over the strawberry‑cheese layer, allowing it to naturally spread and seep into the gaps. The batter will form a beautiful marble effect as it meets the fruit juices – a visual cue that flavors are about to fuse.
Slide the pan into the preheated oven and bake for 30‑35 minutes. Around the 20‑minute mark, you’ll see the edges pulling away from the sides of the pan and the top turning a deep golden‑brown. That sizzle when it hits the pan? Absolute perfection.
When the cake is done, remove it from the oven and let it cool in the pan for at least 15 minutes. This resting period allows the cheesecake layer to set, preventing it from sliding off when you cut. The kitchen will be filled with a warm, buttery scent that makes you want to dive right in.
After cooling, dust the top with powdered sugar if you like a touch of sparkle. Slice into squares, serve warm or at room temperature, and watch your guests’ faces light up. That first forkful? It’s a symphony of buttery crust, tangy cheesecake, and bright strawberry jam – a flavor combo that feels like a celebration in every bite.
Insider Tricks for Flawless Results
The Temperature Rule Nobody Follows
Never bake a dump cake straight from a cold fridge. Let the batter sit at room temperature for 5‑10 minutes before it goes in the oven. This small adjustment prevents the batter from shrinking as it heats, resulting in a cake that rises evenly and retains that coveted fluffy crumb.
Why Your Nose Knows Best
Your sense of smell is a more reliable indicator of doneness than a timer. When the cake’s edges start to pull away and you detect a nutty, caramel aroma, it’s time to pull it out. If you rely solely on the clock, you risk over‑baking, which dries out the cheesecake layer.
The 5‑Minute Rest That Changes Everything
After the oven, let the cake rest for exactly five minutes on a wire rack before cutting. This short pause allows the steam to redistribute, locking in moisture and giving the cheesecake a firm yet creamy texture. Skipping this step leads to a soggy bottom and a crumbly top.
Butter Matters More Than You Think
Use real unsalted butter, not margarine. The milk solids in butter caramelize during baking, creating that golden‑brown crust that’s both flavorful and visually appealing. A friend once swapped butter for oil and ended up with a greasy, pale top that never crisped up.
The Secret of the Strawberry Layer
Toss the sliced strawberries with a pinch of sea salt and a drizzle of honey before dumping them. The salt amplifies the fruit’s natural sweetness, while the honey adds a glossy finish that looks restaurant‑ready. This tiny tweak transforms the fruit from “nice” to “show‑stopping.”
Creative Twists and Variations
This recipe is a playground. Here are some of my favorite ways to switch things up:
Chocolate Dream Dump Cake
Swap the yellow cake mix for a chocolate cake mix and add a tablespoon of cocoa powder to the cream‑cheese mixture. The result is a decadent chocolate‑strawberry duet that satisfies any cocoa lover.
Lemon‑Blueberry Bliss
Replace strawberries with fresh blueberries and add the zest of one lemon to the cheesecake layer. The citrus brightens the flavor, while the blueberries add a pop of tartness.
Nutty Caramel Crunch
Stir in ½ cup of chopped toasted pecans into the cake batter and drizzle a caramel sauce over the top before serving. The nuts add crunch, and the caramel adds a buttery depth that pairs beautifully with the strawberry.
Spiced Autumn Variation
Add a teaspoon of pumpkin spice to the cake mix and swap strawberries for diced apples. This version is perfect for a cozy fall gathering and brings a warm, comforting aroma.
Mini Individual Servings
Divide the batter among four ramekins and bake at 325°F for 20‑25 minutes. These bite‑size portions look elegant on a dessert platter and are ideal for dinner parties.
Storing and Bringing It Back to Life
Fridge Storage
Cover the leftover cake tightly with plastic wrap or a reusable silicone lid and store it in the refrigerator for up to 4 days. The cheesecake layer stays firm, and the strawberry topping remains juicy.
Freezer Friendly
Slice the cake into portions, wrap each piece in parchment paper, then place them in a freezer‑safe bag. Freeze for up to 2 months. When you’re ready to enjoy, let it thaw in the fridge overnight and reheat gently.
Best Reheating Method
Preheat the oven to 300°F (150°C), place a slice on a baking sheet, and add a tiny splash of water (about a teaspoon) around the edges. Cover loosely with foil and heat for 10‑12 minutes. The water creates steam that revives the cheesecake’s creaminess without drying it out.