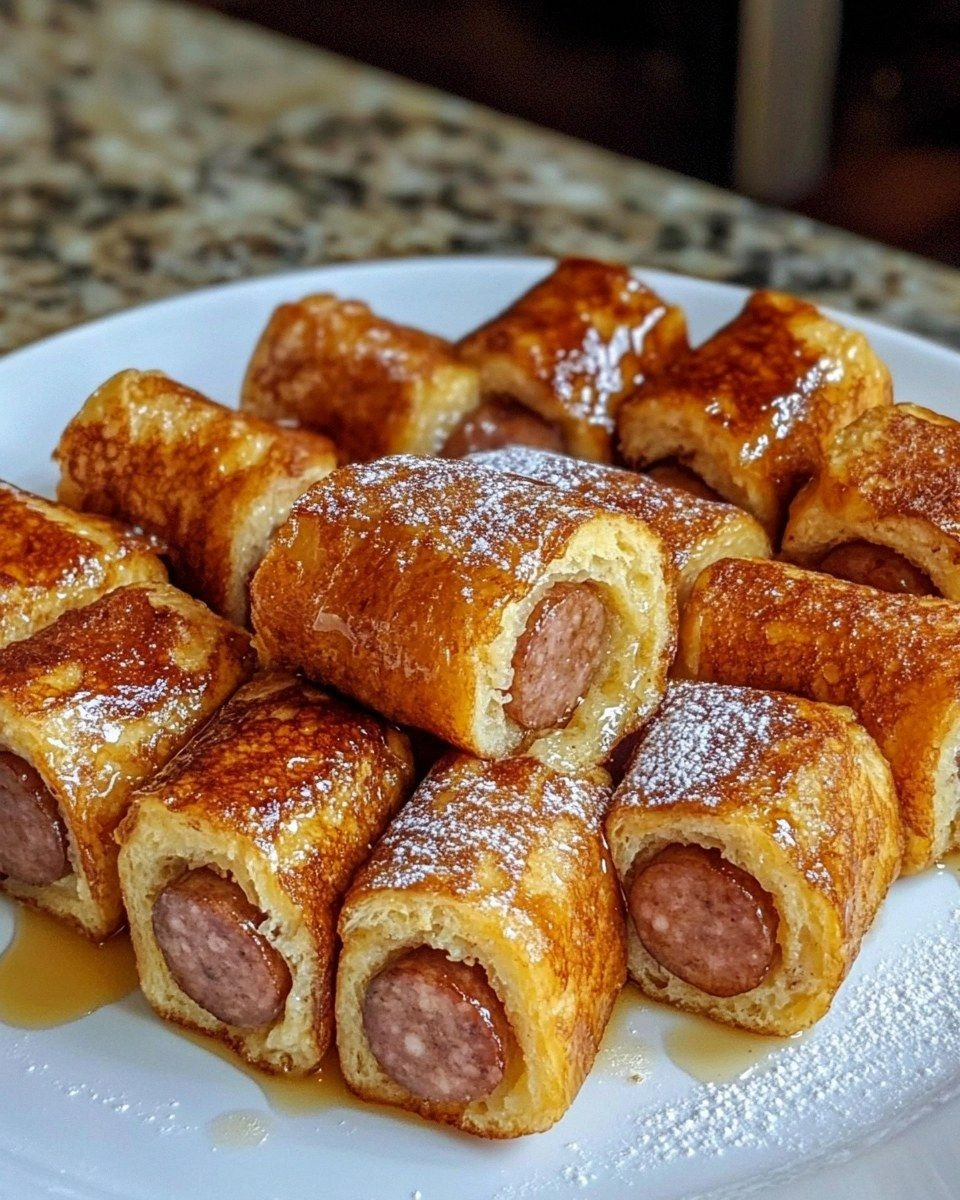
I still remember the morning I created these sausage french toast roll-ups like it was yesterday. My kids had declared regular french toast "boring" (the nerve!), and I had exactly eight slices of bread, some breakfast sausages, and a wild idea. Thirty minutes later, I was watching them devour these golden spirals like they'd discovered breakfast gold. The crispy edges gave way to fluffy, custard-soaked bread wrapped around juicy sausage links, all kissed with cinnamon and vanilla. That first bite? Pure magic. The sausage snaps between your teeth, the sweet eggy bread melts on your tongue, and suddenly you're wondering why anyone ever eats french toast flat when you could roll it up like this.
Here's the thing — most people get breakfast all wrong. They think sweet and savory should stay in their separate corners, never mingling before noon. But I'm here to tell you that when you wrap sausage in french toast, something incredible happens. The fat from the sausage bastes the bread from the inside as it cooks, creating this unctuous, almost croissant-like interior that's downright addictive. I've made these for brunch parties where people literally follow me into the kitchen asking for the recipe. One friend tried to bribe me with concert tickets for the secret. (I took the tickets, then shared the recipe anyway because I'm not a monster.)
What makes this version absolutely unbeatable isn't just the flavor combo — it's the technique. We're not just rolling bread around sausage and calling it a day. Oh no. We're creating little breakfast burritos of joy that get perfectly crispy on every edge, stay sealed during cooking, and soak up just enough of that cinnamon-vanilla custard to taste like dessert while still being breakfast. The contrast between the sweet exterior and savory interior will make your taste buds do a happy dance. Trust me, once you try these, there's no going back to regular french toast.
Let me walk you through every single step — by the end, you'll wonder how you ever made it any other way.
What Makes This Version Stand Out
Perfect Sweet-Savory Balance: Most breakfast recipes lean too far in one direction, but these roll-ups nail the ratio. The sausage brings salty, umami richness while the cinnamon-vanilla custard adds just enough sweetness to make it feel special. It's like having pancakes and sausage in one perfect bite, but better because the flavors actually marry together instead of sitting separately on your plate.
Crispy Edge Magic: Every single edge of these roll-ups gets golden and crisp, creating textural contrast that'll make you weak in the knees. That sizzle when they hit the buttered pan? Absolute perfection. The rolled design means maximum surface area for crisping, so you get those shatteringly crisp edges that give way to soft, custardy centers.
Kid-Approved Handheld Design: Everything's more fun when you can eat it with your hands, and these roll-ups are no exception. They're like breakfast sushi that kids can't resist. No syrup-soaked shirts, no cutting required, just grab and go. My kids actually ask for these on school mornings, which is basically a miracle.
Make-Ahead Champion: You can prep these the night before and keep them in the fridge, ready to hit the pan in the morning. Or freeze a big batch and reheat whenever the craving strikes. They're like having a personal breakfast chef on standby, except the chef is you, and you're brilliant.
Ingredient Flexibility: This recipe is your breakfast playground. Use any bread you like, any sausage you prefer, add chocolate chips or fruit inside, go crazy with spices. It's bulletproof and adapts to whatever's lurking in your kitchen. I've made them with everything from brioche to stale hot dog buns (don't judge, they were amazing).
Guaranteed Crowd Pleaser: I dare you to serve these at a brunch and have leftovers. I've cooked for picky toddlers, surly teenagers, and food-snobby adults — they all devour these. One batch feeds a surprising number of people because they're so satisfying. Plus, they look fancy enough that people think you worked way harder than you did.
Inside the Ingredient List
The Flavor Foundation
The bread you choose here isn't just a vehicle — it's half the flavor party. White bread gives you that classic, nostalgic french toast taste, but whole wheat brings this nutty depth that makes the whole thing taste more sophisticated. Either way, you want something sturdy enough to roll without tearing but soft enough to soak up custard. Skip the pre-sliced sandwich bread if it's super thin; you want something with a bit of heft. Texas toast thickness is perfect if you can find it, but regular sandwich bread works if you handle it gently.
The Protein Powerhouse
Breakfast sausage links are the star here, and quality absolutely matters. Cheap sausages full of fillers will give you cheap results — tough, greasy, and disappointing. Spring for the good stuff, or better yet, make your own if you're feeling ambitious. The sausage needs to be pre-cooked before rolling because it won't cook through inside the bread in the time it takes to brown the outside. I usually buy my favorite brand and give them a quick pan-fry while I'm setting up the rest of my ingredients. If you're feeling wild, maple-flavored sausages add an extra layer of sweet-savory complexity.
The Custard Crew
Four large eggs might seem like a lot for eight roll-ups, but trust the ratio. You want enough custard to fully coat the bread without making it soggy. Fresh eggs create a richer, more luxurious coating that sets up beautifully. The milk loosens everything so it soaks in properly — whole milk gives the richest results, but even skim works in a pinch. I once used half-and-half when I was out of milk, and honestly, it was incredible. Just know that richer dairy makes for a more indulgent (read: decadent) final product.
The Flavor Amplifiers
Vanilla extract and cinnamon are the dynamic duo that makes these taste like proper french toast. Don't skip them, even if you're tempted. The vanilla adds warmth and aroma that makes people ask "what's that amazing smell?" when you're cooking. Cinnamon brings that familiar breakfast comfort that ties the whole thing together. You only need a teaspoon of each, but they make all the difference. I sometimes add a pinch of nutmeg too, especially around the holidays, for that extra cozy factor.
The Cooking Essentials
Butter is non-negotiable here — it's what creates that gorgeous golden crust and adds rich flavor that oil just can't match. A tablespoon might not seem like enough for eight roll-ups, but you're working in batches, and too much butter actually makes them greasy. The key is keeping the heat at the right level so the butter browns but doesn't burn. Maple syrup is obviously for serving, but go for the real stuff if you can. The powdered sugar is optional but highly recommended for that bakery-style finish that makes everything feel special.
The Method — Step by Step
- Start by trimming the crusts off your bread slices — I know, I know, your grandmother said the crusts are the best part, but trust me here. The crusts can make the rolls crack and split, plus they don't absorb the custard as well. Use a sharp knife and cut straight across, trying to keep the bread as rectangular as possible. Save those crusts for making breadcrumbs or feeding birds if it makes you feel better about waste. Lay the trimmed slices flat on your cutting board and get ready for the rolling magic.
- Grab your rolling pin (or a wine bottle if you're in a pinch) and flatten each bread slice to about 1/4 inch thickness. This step is crucial — thinner bread rolls tighter and seals better. Don't go too thin or it'll tear, but you want it pliable. Start from the center and roll outward, rotating the bread as you go. If any slices seem particularly stubborn, let them sit out for a few minutes to dry slightly. They'll roll like a dream once they've lost some moisture.
- Position a sausage link at the bottom edge of each flattened slice, perpendicular to the direction you'll roll. The sausage should be pre-cooked and patted dry — wet sausage makes soggy roll-ups. Roll the bread around the sausage tightly but gently, like you're making a tiny burrito. The key is keeping it snug without squeezing out the filling. As you roll, the bread will naturally seal itself, but if you're worried, you can place them seam-side down while you finish the rest.
- Whisk together the eggs, milk, vanilla, and cinnamon in a shallow dish that's wide enough to fit your roll-ups. Use a fork or whisk and really beat it well — you don't want streaks of egg white or clumps of cinnamon. The mixture should be smooth and slightly frothy. I like to use a pie plate because the wide surface area makes coating easy. Let the mixture sit for a minute so the cinnamon can hydrate and distribute evenly.
- Working one at a time, roll each sausage bundle in the custard mixture. You want to coat every surface but avoid over-soaking — about 5-10 seconds per roll-up is perfect. Use a fork or tongs to turn them gently, making sure the ends get coated too. They should be saturated but not falling apart. Place the coated roll-ups on a plate while you finish the rest. Don't let them sit too long or they'll get mushy.
- Heat a large skillet or griddle over medium heat and add half the butter. You want it to foam gently but not brown immediately — that's the sweet spot. If the butter browns too fast, your heat is too high. Swirl to coat the pan evenly. The butter should smell nutty and delicious, not burnt. This is the moment of truth where breakfast magic happens.
- Place the roll-ups seam-side down in the pan, working in batches so you don't crowd them. They should sizzle gently when they hit the butter — if they don't, the pan isn't hot enough yet. Cook for 2-3 minutes per side, using tongs to turn them carefully. You're looking for golden-brown on all sides, like tiny breakfast egg rolls. Don't walk away from the stove here — they can go from perfect to burnt in the blink of an eye.
- As they finish cooking, transfer to a warm plate and keep them in a low oven (200°F) if you're making a big batch. This keeps them crisp while you finish the rest. Add more butter to the pan between batches if needed. The second batch always cooks faster because the pan is properly seasoned now. Serve them warm with maple syrup for dunking and a dusting of powdered sugar if you're feeling fancy.
That's it — you did it. But hold on, I've got a few more tricks that'll take this to another level...
Insider Tricks for Flawless Results
The Temperature Rule Nobody Follows
Here's where most people mess up: they crank the heat too high, trying to get that golden color fast. But high heat burns the outside before the inside gets warm and custardy. Medium heat is your best friend here — it gives the custard time to set while the outside slowly browns to perfection. If you're unsure, test with one roll-up first. It should take about 8-10 minutes total cooking time. Patience pays off with perfectly cooked centers and gorgeous color.
Why Your Nose Knows Best
Your sense of smell is the most underused tool in your kitchen arsenal. When these roll-ups are perfectly cooked, your kitchen will smell like a french toast bakery had a baby with a breakfast diner — cinnamon and vanilla mingling with browned butter and savory sausage. If you smell burning, you've gone too far. If you don't smell anything, your pan isn't hot enough yet. That nutty, buttery aroma means the Maillard reaction is working its magic, creating hundreds of flavor compounds that make these irresistible.
The 5-Minute Rest That Changes Everything
I know it's tempting to dig in immediately, but letting these rest for just 5 minutes after cooking does wonders. The custard sets up slightly, making them easier to handle and preventing that disappointing squirt of hot liquid when you bite in. Plus, the flavors seem to meld together in those few minutes. Set them on a wire rack if you have one — this prevents the bottoms from getting soggy while they cool slightly. Your tongue will thank you for not scalding it with molten custard.
The Double-Dip Secret
Want next-level custard distribution? Do a light first dip, cook the roll-ups for just 30 seconds per side, then give them a quick second dip in fresh custard and return to the pan. This creates layers of custard that set up like tiny crepes around the sausage. It's an extra step, but the result is a more complex texture that'll have people asking what your secret is. Just don't try this with very soft bread or you'll end up with breakfast mush.
The Butter Browning Technique
Don't just melt your butter — brown it first for incredible nutty flavor. Melt the butter over medium heat until it stops foaming and you see tiny brown specks form. Remove from heat immediately and pour into a heat-safe bowl. Let it cool slightly, then use this liquid gold for cooking. The browned butter adds depth that makes these taste like they came from a fancy brunch spot. Just be careful not to burn it — brown butter can turn black and bitter in seconds.
Creative Twists and Variations
This recipe is a playground. Here are some of my favorite ways to switch things up:
Apple Pie Roll-Ups
Add a thin slice of apple and a pinch of apple pie spice inside each roll-up before cooking. The apple gets tender and creates this amazing apple-sausage combo that tastes like autumn in breakfast form. Use maple syrup with a splash of bourbon for serving. A friend tried this and now refuses to make them any other way. The apple adds moisture and natural sweetness that plays beautifully with savory sausage.
Monte Cristo Inspired
Slip in a thin slice of ham and swiss cheese with the sausage for a Monte Cristo vibe. Dust with powdered sugar and serve with raspberry jam for dipping. It's like the best parts of a Monte Cristo sandwich and french toast had a delicious baby. Rich, indulgent, and perfect for special occasion brunches. Your guests will think you're a culinary genius.
Spicy Maple Version
Use spicy breakfast sausage and add a pinch of cayenne to the custard. Serve with maple syrup mixed with a dash of hot sauce. The sweet-heat combo is absolutely addictive — you get that sweet maple upfront, then a gentle warmth that builds. My spice-loving friends can't get enough of these. The contrast between the sweet custard and spicy sausage is pure magic.
Chocolate Chip Comfort
Sprinkle a few mini chocolate chips inside each roll-up before rolling. They melt into little pockets of chocolate that make these feel like dessert for breakfast. Use chocolate milk in the custard for extra chocolate flavor. Kids go absolutely bonkers for these, and honestly, so do adults. It's like having chocolate chip pancakes and sausage in one perfect package.
Everything Bagel Style
Mix everything bagel seasoning into your custard and use breakfast sausage with sage. Serve with cream cheese mixed with maple syrup for dipping. It's all the flavors of an everything bagel with cream cheese, but in french toast form. The seasoning adds crunch and savory depth that takes these in a completely different direction. Breakfast purists might scoff until they try it.
Tropical Paradise
Add a thin slice of pineapple and use coconut milk in the custard. Serve with maple syrup mixed with a splash of coconut extract. These taste like a tropical vacation in breakfast form. The pineapple gets warm and juicy, creating little bursts of sweetness. Perfect for when you want to pretend you're eating breakfast on a beach somewhere instead of at your kitchen table.
Storing and Bringing It Back to Life
Fridge Storage
Cooked roll-ups keep beautifully in the fridge for up to 4 days. Store them in an airtight container with parchment paper between layers to prevent sticking. Let them cool completely before refrigerating — this prevents condensation that makes them soggy. They actually taste great cold, straight from the fridge, but reheating brings back that fresh-cooked magic. If you're storing them, undercook them slightly so they don't dry out when you reheat.
Freezer Friendly
These freeze like champions for up to 3 months. Lay them in a single layer on a baking sheet and freeze until solid, then transfer to freezer bags. This prevents them from freezing into a solid block. You can reheat them straight from frozen — no need to thaw. They're perfect for meal prep or those mornings when cooking feels impossible. I always keep a batch in the freezer for emergency breakfast situations.
Best Reheating Method
Oven reheating is your best bet for maintaining crispiness. Pop them in a 350°F oven for 8-10 minutes, flipping halfway through. They come out almost as good as fresh. The air fryer works even better — 5 minutes at 350°F and they're perfectly crispy. Microwave works in a pinch, but you'll lose that lovely texture. If you do microwave, wrap them in a damp paper towel to prevent drying out, then crisp them up in a hot pan for 30 seconds per side.