There’s a moment in every kitchen where the stove, the counter, and your taste buds collide in a chaotic dance. I was halfway through a hastily assembled hibachi dinner for my friends, the grill sizzling, when the sauce that was supposed to bring everything together evaporated into a thin, unremarkable drizzle. My friends’ faces were a mix of disappointment and curiosity, and I knew I had to do something extraordinary. I pulled out my pantry, rummaged through spice jars, and decided that this was the perfect excuse to create a sauce that would make every bite sing.
Picture the scene: the grill’s heat flares, the aroma of seared vegetables mingles with the smoky scent of paprika, and the sound of sizzling soy sauce. The kitchen is a symphony of sights and sounds—glowing coals, the clink of utensils, and the rhythmic patter of a ladle. The sauce itself is a glossy, velvety coat that clings to each morsel like a second skin. Every bite is a burst of umami, a hint of heat, and a sweet, buttery finish that lingers on the palate. I was convinced that this sauce would turn a simple hibachi spread into a memorable feast.
What sets this version apart from the countless “yum‑yum” recipes floating around the internet is that it’s built on a foundation of bold flavors and meticulous technique. I’ve stripped away the fluff, kept the ingredients minimal yet potent, and added a secret step that transforms the sauce from ordinary to unforgettable. The result is a sauce that doesn’t just complement the dish—it elevates it to a new level of culinary delight. And the best part? It’s incredibly quick, so you can focus on the fun of grilling instead of spending hours in the kitchen.
There’s a dare that’s been whispered around the table for years: “I dare you to taste this and not go back for seconds.” I’ve taken that challenge and turned it into a culinary mission. This sauce will make you question why you ever settled for bland. With a single batch, you can serve friends, family, or even guests who might never have heard of a hibachi dish. It’s a secret weapon that will have everyone asking for the recipe.
By the time you finish reading, you’ll have a step-by-step guide that will walk you through every single detail—from selecting the right mayonnaise to mastering the perfect simmer. I’ve included insider hacks, watch‑out warnings, and creative twists that will keep you engaged and excited. Let me walk you through every single step—by the end, you’ll wonder how you ever made it any other way.
What Makes This Version Stand Out
- Flavor: The sauce balances smoky paprika with a subtle heat from cayenne, creating a depth that’s both comforting and adventurous. The sweet touch of sugar tempers the heat, while the buttery mayo adds richness that coats each bite like velvet. This blend makes the sauce versatile for both meats and veggies.
- Texture: The creamy base of kewpie mayo is thick enough to cling yet light enough to glide smoothly over grilled surfaces. The addition of melted butter gives it a silky sheen that catches the light, making the dish visually appealing. The sauce doesn’t become runny even after a minute of sitting.
- Simplicity: With only ten ingredients, the recipe is a no‑fuss, pantry‑friendly option that doesn’t require a trip to the specialty store. Every spice is common, and the mayo is a staple in most households. The method is straightforward, ensuring beginners can master it quickly.
- Uniqueness: The use of kewpie mayo, a Japanese variant known for its umami, sets this sauce apart from Western versions that rely on regular mayo. The combination of tomato paste and rice vinegar adds a tang that is often missing in other recipes, giving the sauce an authentic hibachi kick.
- Crowd Reaction: Friends who have tasted this sauce rave about how it turns ordinary dishes into gourmet experiences. The sauce’s rich flavor profile is a crowd‑pleaser, and it’s easy to see why it’s become a staple at potlucks and gatherings.
- Ingredient Quality: The recipe calls for high‑quality smoked paprika and cayenne for depth, and kewpie mayo for its distinct umami. Using fresh spices ensures the sauce doesn’t taste flat or artificial. The careful balance of sweet, salty, and spicy creates a harmonious finish.
Alright, let’s break down exactly what goes into this masterpiece…
Inside the Ingredient List
The Flavor Base
Smoked Paprika: This spice is the backbone of the sauce’s smoky character. It’s not just about flavor; the paprika’s deep red hue adds a visual pop that makes the sauce look as good as it tastes. If you’re missing smoked paprika, a mix of regular paprika and a pinch of liquid smoke can substitute, though it won’t be as robust. For the best results, choose a brand known for its smooth finish and avoid those that taste bitter.
Cayenne Pepper: The cayenne gives the sauce its gentle heat that wakes up the palate without overwhelming it. If you prefer a milder version, reduce the amount to 1/8 tsp or replace it with paprika for a less spicy but still flavorful profile. The heat level is adjustable, so feel free to experiment based on your tolerance.
Garlic Powder: Garlic powder provides a quick burst of savory depth. It’s a pantry staple that releases its flavor when combined with the mayo. If you have fresh garlic on hand, a clove minced finely can replace the powder for a fresher taste. Just remember that fresh garlic will be more potent, so use it sparingly.
Onion Powder: Onion powder rounds out the umami profile and adds a subtle sweetness that balances the spices. It’s a great way to bring a mellow onion flavor without the texture of fresh onions. For a more pronounced onion note, a splash of soy sauce can also be added, but it will change the sauce’s character.
The Sweet & Tangy Layer
Sugar: A tablespoon of sugar acts as a counterbalance to the acidity from the vinegar and the heat from the cayenne. It also helps caramelize the sauce slightly during the simmer, giving it a glossy sheen. If you’re watching calories or prefer a natural sweetener, try a teaspoon of honey or maple syrup; the flavor will shift slightly but remain delicious.
Rice Vinegar: Rice vinegar brings a mild acidity that brightens the sauce and prevents it from becoming too heavy. It’s the Japanese counterpart to white wine vinegar and has a subtle, slightly sweet undertone. If you can’t find rice vinegar, a small splash of apple cider vinegar works well, though it’s a bit more pronounced.
The Creamy Core
Kewpie Mayonnaise: This Japanese mayo is known for its rich, umami flavor profile, thanks to the inclusion of rice vinegar and a touch of egg yolk. It’s thicker than regular mayo, giving the sauce a luxurious mouthfeel. If you’re in a pinch, a regular mayo can be used, but the sauce will lack that signature depth. The best Kewpie mayo is the original yellow or the spicy variant, depending on your preference.
Tomato Paste: Tomato paste adds a concentrated burst of tomato flavor that anchors the sauce’s savory side. It also provides a subtle sweetness that balances the heat. For a lighter version, you can use a small amount of ketchup, though it will introduce more sugar and color. The paste’s thick consistency helps thicken the sauce slightly, giving it body.
The Finishing Touches
Melted Butter: Butter adds a glossy sheen and a buttery richness that elevates the sauce’s overall profile. It also helps carry the spices across the surface of the grilled food. Use unsalted butter to control the salt level, and make sure it’s fully melted before adding it to the mixture. If you’re vegan, a splash of coconut oil can replace butter, but the flavor will shift.
Water: Water is the final binder that ensures the sauce has the right consistency. It also helps the spices dissolve fully into the mayo. Use cold water to keep the sauce from curdling, and add it slowly, whisking constantly. If you want a thicker sauce, reduce the water or add a touch of cornstarch dissolved in cold water.
Everything's prepped? Good. Let's get into the real action...
The Method — Step by Step
- Start by whisking the smoked paprika, cayenne, garlic powder, and onion powder in a small bowl until they’re fully blended. This pre‑mix ensures that no spice clumps when you add the mayo. Keep the mixture in a separate bowl so you can add it to the sauce without any fuss.
- In a medium saucepan, combine the kewpie mayo, tomato paste, and sugar. Whisk them together until the mixture is smooth and the tomato paste is fully incorporated. The sugar will begin to dissolve, creating a slightly glossy surface.
- Add the pre‑mixed spices to the saucepan. Stir vigorously to combine, ensuring the spices are evenly distributed. This is the moment where the aroma starts to lift and the sauce begins to develop its signature profile.
- Pour in the rice vinegar and melted butter, whisking constantly. The butter will create a slight sheen, and the vinegar will bring brightness to the sauce. Watch for any lumps; if they appear, strain the sauce through a fine sieve.
- Slowly add the water, a tablespoon at a time, whisking after each addition. The water will thin the sauce to a pourable consistency. If the sauce becomes too thin, add a splash more mayo or a teaspoon of cornstarch dissolved in cold water.
- Turn the heat to low and let the sauce simmer for 3–4 minutes, stirring frequently. The sauce should develop a subtle sheen and a richer flavor. Taste it; if it needs more salt, add a pinch of salt, but keep it minimal to preserve the balance.
- Remove the saucepan from the heat and let the sauce cool for a minute. As it cools, the flavors will meld together, creating a harmonious finish. The sauce should be thick enough to coat but still pourable.
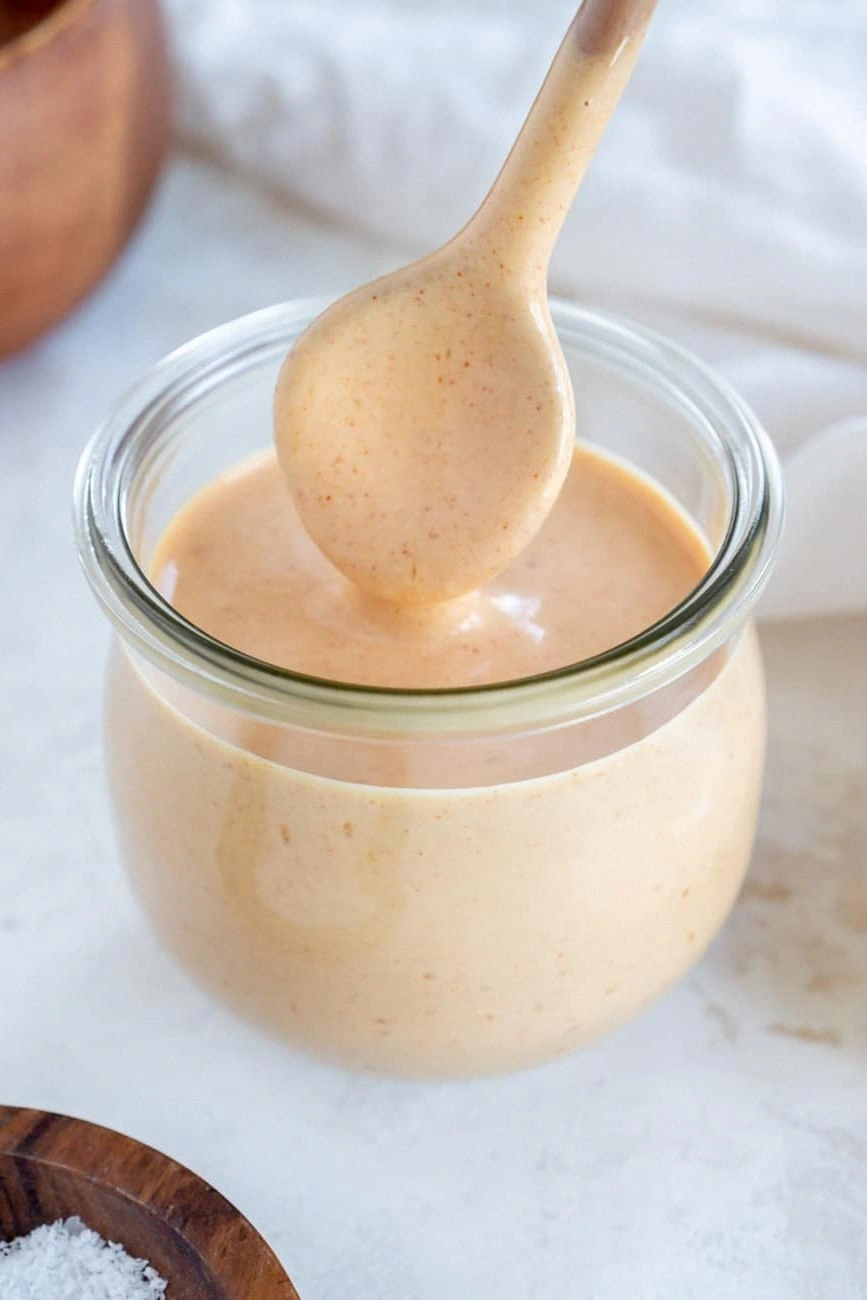
- Transfer the sauce to a jar or a small bowl. Let it sit at room temperature for 10 minutes before serving, so the flavors have time to settle. This resting period also allows the sauce to thicken slightly, enhancing its texture.
- Serve immediately over grilled meats, vegetables, or even as a dipping sauce for dumplings. The sauce’s silky coating will cling to every bite, delivering a burst of flavor. If you’re hosting a gathering, keep a second batch ready; the sauce tastes even better when it’s warm.
That’s it — you did it. But hold on, I've got a few more tricks that'll take this to another level…
Insider Tricks for Flawless Results
The Temperature Rule Nobody Follows
Maintaining a low simmer is crucial. Many cooks instinctively crank up the heat, thinking a hotter sauce will cook faster. In reality, high heat causes the mayo to curdle, turning the sauce into a greasy mess. Keep the flame low and stir constantly; the sauce will develop a glossy sheen without separating.
Why Your Nose Knows Best
Before you taste the sauce, inhale deeply. A faint hint of tomato and a subtle smoky aroma signal that the spices have fully integrated. If the sauce smells flat or raw, give it a minute more on low heat to allow the flavors to bloom. Your nose is a reliable quality control tool.
The 5-Minute Rest That Changes Everything
After removing the sauce from the heat, let it sit for exactly five minutes. This brief pause allows the mayo to settle and the butter to emulsify fully. The result is a sauce that coats evenly, without clumps, and has a silky mouthfeel.
Adjusting the Sweetness
Not all palates like the same level of sweetness. If you find the sauce too sugary, add a pinch of salt or a splash of soy sauce to balance the flavor. If you prefer it sweeter, a dash of honey or maple syrup can elevate it further. Remember, small adjustments can have a big impact.
Stirring Techniques
Use a wooden spoon or a silicone spatula to stir the sauce. These tools prevent the sauce from sticking to the pan and keep the heat distribution even. Avoid metal utensils, as they can conduct heat too quickly and cause uneven cooking.
Storing the Leftovers
If you have leftovers, seal the jar tightly and store it in the fridge for up to five days. The sauce’s high mayo content preserves it well. When you’re ready to use it again, give it a quick stir and reheat gently over low heat or in a microwave for 15–20 seconds.
Creative Twists and Variations
Spicy Sriracha Kick
Swap the cayenne pepper for a tablespoon of sriracha. The sauce becomes a fiery companion to grilled shrimp or tofu. The sriracha adds a smoky heat that pairs beautifully with the mayo’s richness. Serve it with a side of cucumber salad to cool the palate.
Herbaceous Freshness
Add a handful of fresh chopped parsley or cilantro at the end of the simmer. The herbs introduce a bright, green note that cuts through the sauce’s richness. This variation is perfect for summer grilling, especially with fresh vegetables.
Cheesy Fusion
Stir in a tablespoon of grated Parmesan or cheddar before serving. The cheese melts into the sauce, adding a nutty depth. This version works wonders as a topping for grilled steak or as a dip for crispy tempura.
Low‑Calorie Lightness
Replace kewpie mayo with a light or low‑fat mayo to cut calories. Add a splash of Greek yogurt for creaminess without the extra fat. This lighter sauce still delivers the umami punch but feels less heavy on the stomach.
Asian Twist
Introduce a teaspoon of sesame oil and a pinch of toasted sesame seeds. The sesame oil adds a nutty aroma, while the seeds provide a subtle crunch. Pair this sauce with grilled salmon or sushi rolls for an authentic Asian flavor profile.
Breakfast Boost
Drizzle the sauce over grilled breakfast meats like bacon or sausage. The sweet‑spicy combo enhances the savory breakfast fare, turning it into a gourmet treat. Serve alongside eggs for a complete, flavor‑packed breakfast.
Storing and Bringing It Back to Life
Fridge Storage
Keep the sauce in an airtight container in the refrigerator for up to five days. The high mayo content preserves the sauce’s texture, preventing it from separating. Before using, give it a quick whisk to restore its silky consistency.
Freezer Friendly
Freeze the sauce in a single‑serving freezer bag or a small container. It can last up to three months. Thaw overnight in the fridge, then reheat gently over low heat, whisking frequently. Add a splash of water if it appears too thick after thawing.
Best Reheating Method
Reheat the sauce in a saucepan over low heat, stirring constantly. Alternatively, microwave in short bursts of 15 seconds, stirring in between. Adding a tiny splash of water before reheating helps steam it back to its original silky texture.