Picture this: it’s a crisp October evening, the wind is rattling the branches, and the kids are already in full costume mode, eyes gleaming with the promise of candy. I was in the kitchen, half‑heartedly trying to whip up a generic cheese dip that would sit on the table while the ghosts and goblins roamed the living room. Suddenly, a mischievous cousin shouted, “Make it spooky, or I’m not sharing my candy!” That was the spark, the moment I realized I needed something that didn’t just taste good but also screamed Halloween on every plate. I tossed a handful of orange‑orange crayons into the mix—okay, not literally—but I did splash in a couple of drops of purple food coloring and a mountain of Halloween sprinkles, turning an ordinary dip into a vibrant, monster‑magnet masterpiece.
The first whiff that hit my nose was a sweet, buttery perfume that reminded me of a carnival treat stand, the kind that makes you want to dive headfirst into a swirl of frosting. The texture was like a cloud that had just been kissed by a marshmallow—smooth, airy, and just the right amount of tang from the Greek yogurt. As I tasted it, the flavor exploded like fireworks in a midnight sky: the subtle cake sweetness balanced perfectly with the creamy tang, while the whipped topping added a luxurious melt‑in‑your‑mouth finish. The kids’ eyes widened, their little hands dove in, and before I could even say “more,” the bowl was half empty. I dare you to taste this and not go back for seconds.
Most Halloween dips out there are either overly sugary or painfully bland, and they often require a laundry list of obscure ingredients that make you feel like you’re assembling a science experiment. This version, however, flips the script. It’s built on five pantry‑friendly staples, each chosen for a reason, and it comes together in under an hour. The secret? A white cake mix that acts as the perfect base, turning the dip into a velvety, cake‑like spread that kids can’t resist. Add in Greek yogurt for a protein punch and a tangy edge, and you’ve got a dip that’s as nutritious as it is delicious. The whipped topping? Think of it as the fluffy cloud that carries the flavor storm across your tongue.
But here’s the kicker: the technique I’m about to reveal involves a quick, low‑heat melt that locks in the flavor and gives the dip a glossy, almost lacquered finish—something most recipes completely miss. And there’s a surprise ingredient that adds a pop of color without compromising the taste (hint: it’s not a food dye you’ve seen before). Let me walk you through every single step — by the end, you’ll wonder how you ever made it any other way.
What Makes This Version Stand Out
- Flavor: The combination of cake mix and Greek yogurt creates a sweet‑tart harmony that feels like a dessert and a dip at the same time.
- Texture: Whipped topping gives it a light, airy body that coats crackers like a silk scarf.
- Simplicity: Only five core ingredients, all of which live in the pantry or fridge.
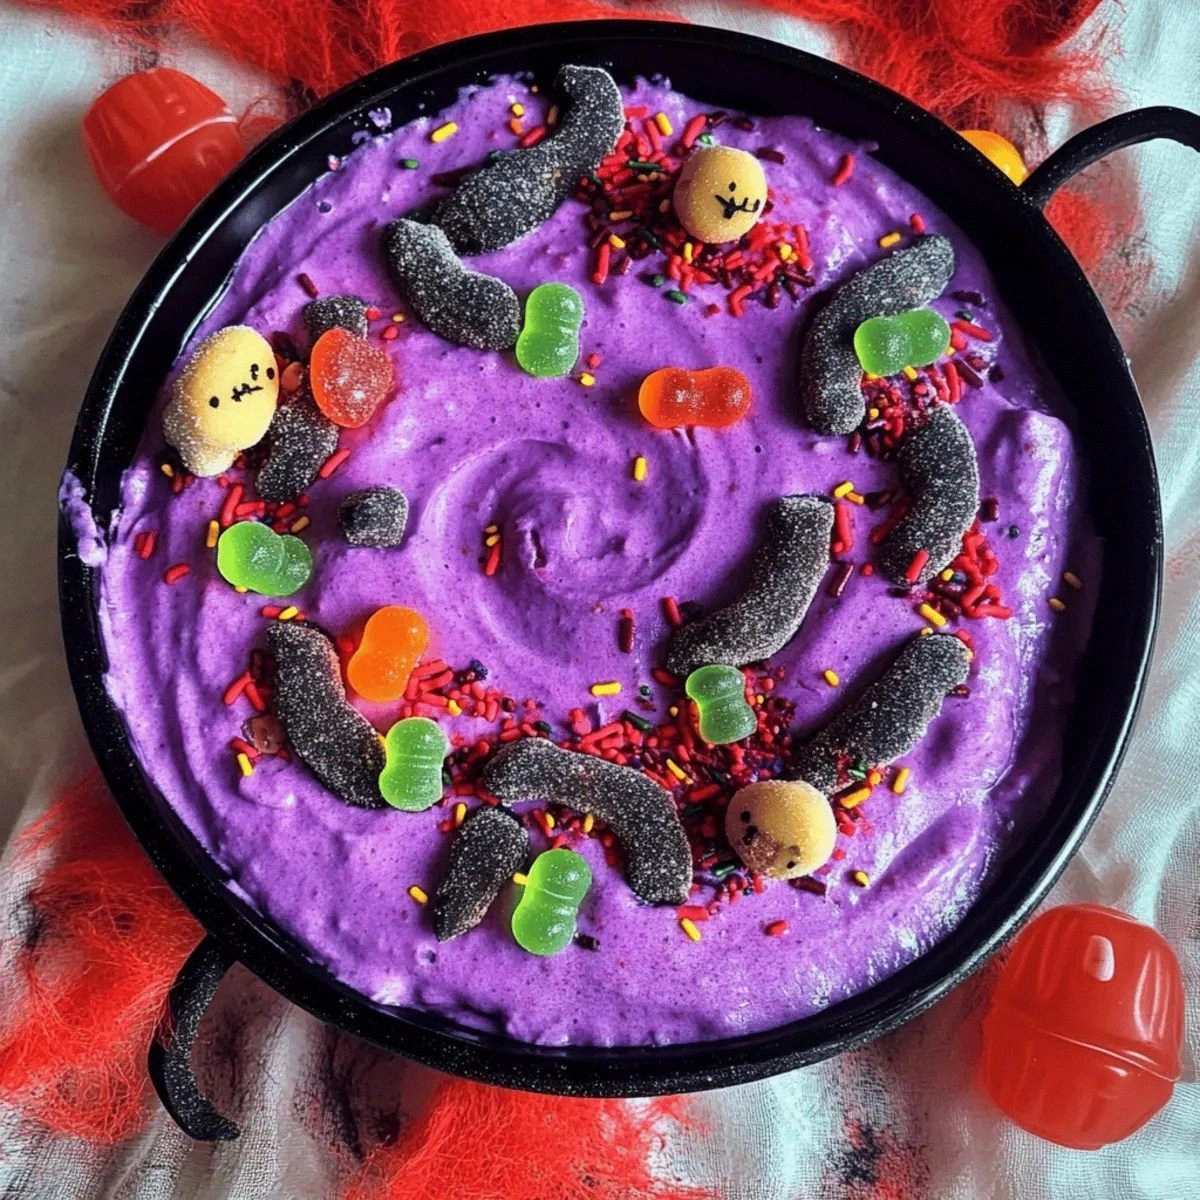
- Uniqueness: The purple food coloring and Halloween sprinkles turn a regular dip into a festive centerpiece.
- Crowd Reaction: Kids will line up, adults will sneak a bite, and the whole table will buzz with “what’s in this?” curiosity.
- Ingredient Quality: Using Greek yogurt instead of regular yogurt adds protein and a pleasant tang without extra sugar.
- Cooking Method: A gentle stovetop melt preserves the cake mix’s structure, preventing a gummy mess.
- Make‑Ahead Potential: It can be pre‑made and chilled, ready to serve when the first trick‑or‑treaters arrive.
Inside the Ingredient List
The Flavor Base
The star of this dip is the 1 cup white cake mix. This isn’t just any flour; it’s pre‑sweetened, leavened, and packed with vanilla that instantly lifts the dip’s flavor profile. Skipping it would leave you with a bland, watery mess that no one wants to dip chips into. If you’re gluten‑sensitive, swap it for a gluten‑free cake mix—just make sure it’s still sweetened.
The Texture Crew
Next up, 1 cup Greek yogurt. This brings a creamy tang that cuts through the sweetness, balancing the overall palate. It also adds a protein boost, making the dip a little less guilty. If you’re dairy‑free, you can replace it with a plain coconut yogurt, but expect a faint coconut note that might clash with the sprinkles.
The Unexpected Star
The 1 cup whipped topping is what gives the dip its cloud‑like lightness. It’s the secret that makes the dip spreadable without being runny. Skip it, and you’ll end up with a dense, cake‑like slab that’s impossible to scoop. For a lighter version, use a reduced‑fat whipped topping, but keep an eye on the texture; it can become a bit grainy if over‑whipped.
The Final Flourish
A splash of 1‑2 drops purple food coloring does more than just add a spooky hue; it creates a visual contrast that makes the dip pop against orange sprinkles. A little goes a long way—add too much and the flavor can get a metallic aftertaste. If you’re wary of synthetic dyes, a pinch of beet powder can achieve a similar deep purple without the chemicals.
Finally, the Halloween sprinkles and add‑ons are the decorative fireworks. Think candy corn, gummy worms, or even crushed pretzel sticks for a salty crunch. They’re not just for looks; they add texture and surprise bursts of flavor that keep the dip interesting bite after bite. If you’re allergic to nuts, avoid any sprinkle blends that contain them.
Everything's prepped? Good. Let's get into the real action...
The Method — Step by Step
Gather all your ingredients and set them on the counter. I like to line them up in the order I’ll use them; it keeps the process smooth and prevents that frantic “where’s the yogurt?” moment. Turn your stove to medium‑low and place a heavy‑bottomed saucepan on the burner. This pan distributes heat evenly, which is crucial for avoiding scorching the cake mix.
In a medium bowl, whisk together the white cake mix and Greek yogurt until you have a smooth, lump‑free batter. The moment the batter becomes glossy is your cue that the yogurt has fully incorporated.
Kitchen Hack: Use a hand‑held immersion blender for an ultra‑smooth batter; it eliminates any hidden lumps in seconds.Slowly pour the batter into the pre‑heated saucepan, stirring constantly with a silicone spatula. You’ll hear a faint sizzle—this is the sound of the cake mix beginning to set, creating a delicate crust at the bottom. Keep the heat low; you want a gentle cook, not a boil. After about two minutes, the mixture will thicken and start pulling away from the sides of the pan.
Drop in the 1‑2 drops of purple food coloring. Stir in a circular motion, watching the color swirl like a mini vortex. The dip should take on a deep, midnight‑purple hue that looks perfect against orange sprinkles. If the color is too faint, add another drop—just be careful, a little goes a long way.
Now, fold in the whipped topping. This is the moment where the dip transforms from a thick batter into a light, airy spread. Use a gentle folding motion to preserve the air bubbles; over‑mixing will deflate the topping and make the dip dense.
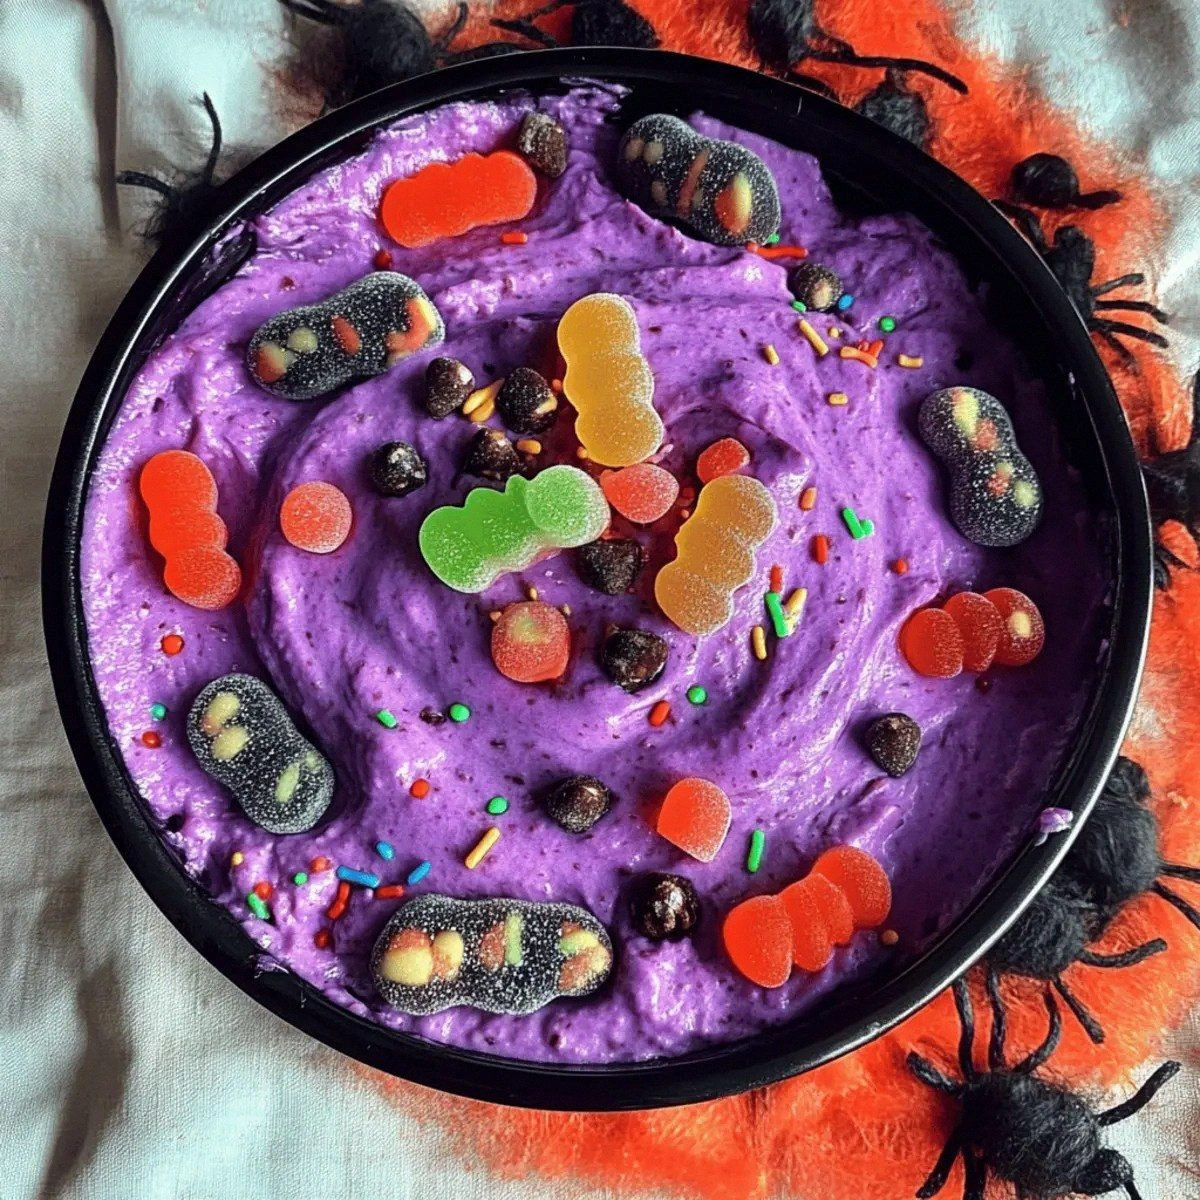
Watch Out: If the pan is too hot at this stage, the whipped topping can separate, turning the dip greasy. Reduce the heat to low and keep stirring gently.Once the mixture is uniformly fluffy, remove the pan from heat. Transfer the dip into a serving bowl—preferably a wide, shallow one that encourages easy scooping. The dip should have a glossy sheen that catches the light, promising a flavor explosion. Let it sit for two minutes; this resting period allows the flavors to meld.
Now for the fun part: sprinkle on your Halloween toppings. I love a combination of orange candy corn, black chocolate chips, and a few gummy worms for that “spooky surprise” factor. Toss them lightly so they adhere without sinking to the bottom. The contrast of colors makes the dip look like a haunted forest of treats.
Serve immediately with an assortment of dippers—pretzel sticks, sliced apples, graham crackers, or even veggie sticks for a sweet‑and‑salty combo. The dip stays creamy for about an hour at room temperature; after that, give it a quick stir and it’ll bounce back. And there you have it—your Halloween party just got a whole lot tastier.
That's it — you did it. But hold on, I've got a few more tricks that'll take this to another level...
Insider Tricks for Flawless Results
The Temperature Rule Nobody Follows
Never, ever start with a hot pan when you’re mixing the cake mix and yogurt. A sudden temperature shock can cause the yogurt to curdle, leaving you with a grainy texture that no amount of whipped topping can fix. I always start on low heat and gradually increase it after the batter has thickened. This gentle approach ensures a silky, cohesive dip every time.
Why Your Nose Knows Best
The moment the dip starts to smell slightly nutty and buttery, you’re at the perfect stage to add the food coloring. Trust that aromatic cue; it’s more reliable than a timer. If you wait too long, the dip can become too firm, making it harder to swirl the color evenly.
The 5‑Minute Rest That Changes Everything
After you’ve transferred the dip to its serving bowl, let it rest for exactly five minutes. This short pause allows the whipped topping to fully integrate, preventing any separation when you add the sprinkles. Skipping this step often results in a dip that looks gorgeous but falls apart when you scoop.
Garnish Timing Is Everything
Adding the Halloween sprinkles too early can cause them to melt into the dip, losing that delightful crunch. I always sprinkle them in the last 30 seconds of preparation, giving them just enough time to adhere without surrendering their texture. This tip keeps each bite exciting.
Flavor Boost With a Secret Ingredient
For an extra layer of depth, stir in a teaspoon of vanilla bean paste right after the whipped topping is folded in. The subtle vanilla notes amplify the cake mix’s sweetness without overpowering the tang of the yogurt. I tried skipping it once—let’s just say the dip tasted flat, and the kids were not impressed.
Creative Twists and Variations
This recipe is a playground. Here are some of my favorite ways to switch things up:
Spooky Chocolate Swirl
Replace half of the white cake mix with chocolate cake mix and add a drizzle of melted dark chocolate after the dip is plated. The result is a marbled dip that looks like a haunted river of chocolate.
Pumpkin Patch Version
Swap the Greek yogurt for pumpkin puree and add a pinch of pumpkin pie spice. The dip takes on an autumnal flavor, perfect for Thanksgiving gatherings that blend into Halloween.
Nutty Crunch
Fold in a quarter cup of finely chopped toasted pecans or walnuts just before serving. The nuts add a buttery crunch that contrasts beautifully with the creamy base.
Vegan Ghost
Use a plant‑based whipped topping and coconut‑based yogurt. The dip stays dairy‑free while retaining its fluffy texture. Just be mindful of the coconut flavor—it can become prominent if you use too much.
Savory Spin
For a less sweet version, reduce the cake mix to half a cup, add a tablespoon of grated Parmesan, and sprinkle with dried herbs like thyme. This creates a dip that pairs well with crackers and is perfect for a Halloween movie night.
Storing and Bringing It Back to Life
Fridge Storage
Transfer any leftovers into an airtight container and refrigerate within two hours of serving. It will keep fresh for up to three days. Before serving again, give it a gentle stir and add a tiny splash of milk or water to revive the creamy texture.
Freezer Friendly
Yes, you can freeze this dip! Portion it into freezer‑safe bags, flatten them for even freezing, and store for up to two months. Thaw overnight in the fridge, then whisk in a tablespoon of fresh Greek yogurt to bring back its tang.
Best Reheating Method
Reheat gently on the stovetop over low heat, stirring constantly. Add a teaspoon of water or milk if the dip looks too thick; this creates a steam effect that restores its original silkiness without compromising the flavor.