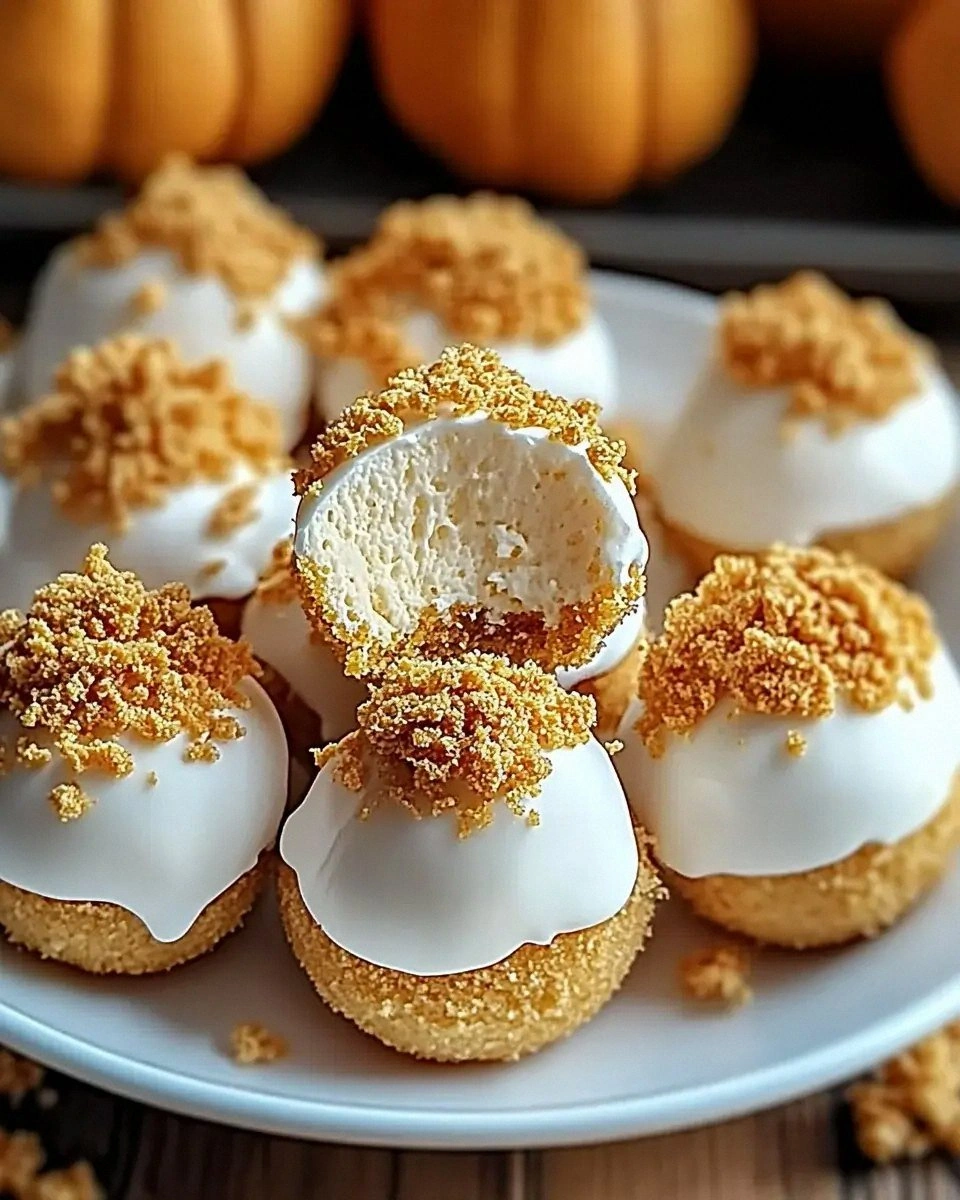
When the kitchen lights flickered on that chilly Saturday, I was armed with a bag of apples, a stack of flour, and a stubborn sense of culinary destiny. The previous week’s attempt at a classic apple pie had ended with a soggy crust that made my taste buds question every decision I’d made. I stared at the half‑baked, caramel‑smeared disaster, and the thought that “maybe I should just order takeout” crossed my mind. Instead, I decided to flip the script and create a pie that would make even the most skeptical of critics swoon. This is the story of that moment, and the recipe that turned a kitchen calamity into a triumph.
Picture the scene: a crisp autumn morning, the air tinged with the scent of cinnamon and freshly sliced apples, the oven preheating to a perfect 375°F, and the rhythmic clink of a wooden spoon against a mixing bowl. The sound of the apples tumbling into the bowl is almost meditative, the way a slow jazz saxophone fills a dim room. I could taste the buttery anticipation, the subtle tang of lemon juice dancing on the back of my tongue, and feel the gentle heat of the kitchen as it starts to hum. Every element—sight, smell, sound, taste, touch—converges into a single, delicious promise. And that promise is a pie that’s crispy on the edges, tender inside, and utterly unforgettable.
What sets this version apart is not just the flaky crust or the sweet filling, but the way each component is engineered to work in harmony. I’ve tweaked the classic Dutch apple pie recipe to amplify the crunch, balance the sweetness, and simplify the process without sacrificing flavor. The result is a pie that delivers a satisfying snap with every bite, a caramelized caramelized apple burst that melts in your mouth, and a buttery, golden crust that looks as good as it tastes. It’s a recipe that turns a simple apple pie into an edible masterpiece that will have your friends asking for seconds—and then thirds—before the crust even cracks. I dare you to taste this and not go back for seconds.
But the real twist lies in a single, unexpected ingredient that elevates the entire experience: a dash of nutmeg. While cinnamon usually takes center stage, nutmeg adds a subtle, warm complexity that lingers on the palate long after the last bite. Combined with the lemon juice’s bright acidity, it creates a flavor profile that feels both comforting and adventurous. This small addition transforms a familiar dessert into something fresh and exciting, proving that even the simplest tweaks can make a world of difference. Picture yourself pulling this out of the oven, the whole kitchen smelling incredible, and the first slice sending a wave of buttery, spicy sweetness across your tongue.
Okay, ready for the game‑changer? This is the recipe that will redefine your apple pie experience. By the end of this post, you’ll have a step‑by‑step guide, insider tricks, and creative variations that will turn a basic dessert into a showstopper. Let me walk you through every single step—by the end, you’ll wonder how you ever made it any other way.
What Makes This Version Stand Out
Before we dive into the nuts and bolts, let’s break down why this pie is a cut above the rest. The key lies in the balance of crispness, sweetness, and depth of flavor. Below are the core attributes that elevate this recipe.
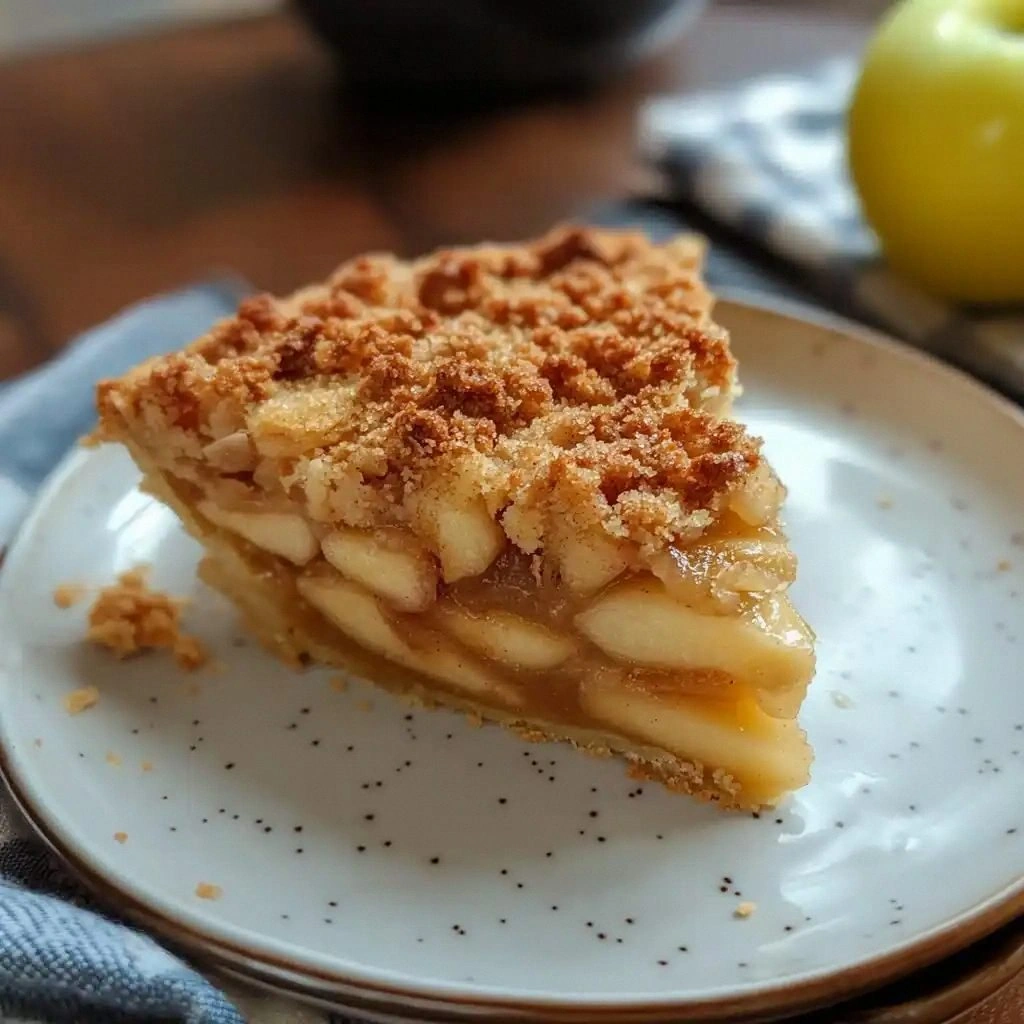
- Texture: The dual‑crust technique ensures a golden, flaky exterior that cracks like thin ice, while the interior stays moist and tender. The addition of a small amount of ice water in the dough creates steam pockets that lift the crust, giving it that coveted airy quality.
- Flavor: A blend of brown and granulated sugars caramelizes during baking, creating a complex sweet profile that pairs perfectly with the subtle warmth of nutmeg. The lemon juice cuts through the richness, adding a bright, zesty finish that keeps the pie from feeling heavy.
- Ease: Despite its sophisticated flavor, the recipe is straightforward—no advanced techniques or fancy equipment required. The dough can be prepped ahead of time, and the filling assembles in under ten minutes.
- Versatility: The optional walnut or oat topping adds a delightful crunch, while the recipe’s modular structure allows you to swap in your favorite spices or sweeteners with ease.
- Presentation: The pie’s golden crust and caramelized apple glaze make it a showstopper on any table, whether you’re serving family or impressing guests.
- Make‑ahead potential: The pie can be assembled and refrigerated overnight, letting the flavors meld even further before baking.
- Ingredient quality: Using fresh, high‑quality apples—such as Honeycrisp, Fuji, or Granny Smith—ensures a balance of sweetness and tartness that’s essential for the perfect filling.
- Audience appeal: Most people love a good apple pie, but this version delivers a crispier, more flavorful experience that will leave even the most discerning palates begging for more.
Alright, let’s break down exactly what goes into this masterpiece…
Inside the Ingredient List
The Flavor Base
All great pies start with a solid base, and this recipe’s foundation is a buttery, flaky crust that crumbles like a well‑worn cookie. The 1¼ cups of all‑purpose flour provide the structure, while the ½ teaspoon of salt brings out the natural sweetness of the apples. The ½ cup of unsalted butter, cut into small cubes, is the secret to that melt‑in‑your‑mouth tenderness. When chilled and rolled, the butter creates pockets of steam that puff up during baking, giving the crust that airy, crisp quality you’re after. I’ve found that using a mix of all‑purpose and pastry flour can make the crust even lighter, but the recipe works beautifully with 100% all‑purpose flour.
Another key component is the ¼ cup of ice water, which is added just enough to bind the dough without making it sticky. This tiny splash of cold water is the difference between a dough that sticks to your hands and one that slides off like a sheet of ice. It also helps to keep the butter cold during rolling, preventing it from melting and ruining the flaky texture. When you feel the dough come together, you’ll notice a subtle, almost buttery aroma that signals you’re on the right track.
For the filling, the 6–7 medium apples are the star of the show. Choosing apples that hold their shape, like Fuji or Honeycrisp, ensures the filling stays firm and doesn’t become mushy. Slice them thinly to promote even cooking and a smooth, cohesive filling. The apples are then tossed with ½ cup of granulated sugar and ¼ cup of brown sugar, creating a sweet, caramelized base that will melt into a glossy glaze during baking. This dual-sugar approach gives the filling a depth that single‑sugar recipes can’t match.
The 2 tablespoons of all‑purpose flour act as a natural thickener, absorbing the juices released by the apples and preventing a soggy bottom. Think of it as a gentle, invisible glue that keeps the filling from spilling out. The flour is whisked into the sugar mixture before the apples are added, ensuring even distribution. If you prefer a thicker filling, you can add an extra tablespoon of flour, but be careful not to overdo it, or the pie will become doughy.
Spices are what turn a plain dessert into a symphony of flavors. The 1 teaspoon of cinnamon delivers warmth and a familiar sweetness, while the ¼ teaspoon of nutmeg adds a subtle, earthy undertone that lingers on the palate. Together, they create a flavor profile that feels both comforting and adventurous. If you’re a spice enthusiast, feel free to add a pinch of allspice for an extra layer of depth.
The Texture Crew
The ½ cup of unsalted butter used in the topping is a game changer, providing a buttery richness that balances the apple sweetness. This butter is melted and then folded into the topping mixture, ensuring an even distribution of flavor. The butter also helps to create a glossy finish on the crust, giving the pie a professional, bakery‑like sheen.
For those who crave a crunch, the optional ¼ cup of chopped walnuts or oats can be sprinkled on top before baking. The walnuts add a nutty, earthy crunch, while the oats give a hearty, chewy texture that contrasts beautifully with the soft apples. Both options are optional, but they elevate the pie from good to unforgettable. If you’re looking for a healthier twist, go with oats; if you’re in the mood for indulgence, walnuts are the way to go.
The ¾ cup of all‑purpose flour in the topping creates a light, flaky layer that bakes to a golden brown. The flour is mixed with the butter and sugar to form a crumbly dough, which is then pressed over the filling. This extra layer of crust not only adds texture but also helps to seal in the juices, preventing the pie from drying out.
The topping’s ⅓ cup of brown sugar and ¼ cup of granulated sugar create a caramelized glaze that glistens like a jewel. The sugars caramelize during baking, forming a sweet, slightly sticky crust that’s a delight to bite into. The combination of brown and white sugar ensures a balanced sweetness that isn’t overpowering, allowing the apples and spices to shine through.
Finally, the 1 tablespoon of lemon juice adds a bright, citrusy note that cuts through the richness of the butter and sugars. The acid balances the overall flavor profile, preventing the pie from feeling too sweet or heavy. The lemon juice also helps to preserve the apple slices’ bright color, giving the pie a vibrant, appetizing appearance.
The Unexpected Star
While apples are the obvious star, the recipe’s hidden gem is the use of ice water in the dough. The cold water prevents the butter from melting prematurely, ensuring a flaky crust. It also helps to keep the dough from becoming too sticky, making it easier to roll and shape. If you’re a fan of extra crispness, add a splash of cold water to your dough each time you roll it out.
Another unexpected star is the combination of brown and granulated sugars in the filling. Brown sugar brings a subtle molasses flavor that adds depth, while granulated sugar provides a clean sweetness. The synergy between these sugars creates a glaze that’s both complex and approachable. This combination also gives the filling a glossy sheen that’s irresistible.
The optional walnuts or oats add a delightful crunch, but they also serve as a textural contrast that keeps the pie interesting. The crunch of the nuts or the chewiness of the oats punctuates the soft apple filling, creating a satisfying bite. Even if you skip them, the pie remains delicious, but adding them elevates the experience.
In short, the recipe’s success hinges on a few key ingredients that work together like a well‑orchestrated symphony. Each element, from the crust to the filling to the topping, is carefully balanced to create a harmonious, unforgettable dessert.
The Final Flourish
The final flourish of the pie is its golden crust, which is achieved through a precise baking technique. The crust is brushed with a beaten egg before baking, creating a shiny, caramelized surface that’s both visually stunning and flavorful. The egg wash also helps to lock in the butter’s richness, ensuring every bite is buttery bliss.
During the last five minutes of baking, a light dusting of powdered sugar can be added for a subtle, sweet finish that enhances the overall flavor profile. The powdered sugar also adds a slight crunch, creating a delightful contrast with the soft apple filling. It’s a simple step that can make your pie feel like a bakery‑delivered masterpiece.
Once the pie is out of the oven, let it cool on a wire rack for at least 30 minutes before slicing. This allows the filling to set, preventing a messy, runny mess that can ruin the presentation. Cooling also lets the flavors meld together, creating a more cohesive taste experience. The result is a pie that’s as beautiful to look at as it is to eat.
For those who love a little extra indulgence, consider adding a scoop of vanilla ice cream on top of a warm slice. The ice cream’s coolness contrasts perfectly with the warm, buttery crust and caramelized filling. The combination is a classic dessert pairing that never fails to impress.
In the end, every ingredient in this Dutch Apple Pie Recipe: Crispy is carefully chosen to create a dish that’s crisp, sweet, and unforgettable. The combination of textures, flavors, and techniques culminates in a pie that’s a true masterpiece.
The Method — Step by Step
First, combine the 1¼ cups of all-purpose flour, ½ teaspoon of salt, and 2 tablespoons of all-purpose flour in a large mixing bowl. Stir until the mixture is evenly blended, creating a dry foundation that will hold the rest of the dough together. Add the ½ cup of cold, cubed unsalted butter to the dry mixture and use a pastry blender or your fingertips to cut the butter into the flour until the mixture resembles coarse crumbs. The goal is to keep the butter pieces small, as they’ll melt during baking to create a flaky crust. Once the mixture looks like fine sand, pour in the ¼ cup of ice water, one tablespoon at a time, stirring gently until the dough just comes together. Be careful not to overwork the dough, or the crust will become tough.
Next, divide the dough into two equal portions: one for the bottom crust and one for the top. Roll each portion into a ball, then place them on a lightly floured surface. Use a rolling pin to flatten each ball into a 12-inch circle, making sure the edges are slightly thicker than the center for a buttery, golden border. If the dough shrinks or cracks, let it rest for 5 minutes to relax the gluten, then roll it out again. The dough should be thin enough that you can see the flour underneath, but thick enough to hold the filling without tearing.
While the dough rests, prepare the filling. Peel, core, and slice the 6–7 medium apples into thin, uniform pieces. In a large bowl, combine the sliced apples with ½ cup of granulated sugar, ¼ cup of brown sugar, 2 tablespoons of all-purpose flour, 1 teaspoon of cinnamon, ¼ teaspoon of nutmeg, and 1 tablespoon of lemon juice. Toss everything together until the apples are evenly coated. The flour and sugar will create a natural glaze that caramelizes during baking, while the spices add warmth and depth. If you prefer a sweeter filling, add a tablespoon of maple syrup or honey, but keep in mind this will affect the overall sweetness of the pie.
Now, preheat your oven to 375°F (190°C). Place the bottom crust on a 9-inch pie dish, pressing it gently into the bottom and up the sides. Fill the crust with the apple mixture, spreading it out evenly. If you’re adding walnuts or oats for extra crunch, sprinkle them on top of the apples now. Gently press the toppings into the apples to ensure they’re well distributed. The filling should look glossy and slightly moist, indicating that the sugars and juices are ready to caramelize.
In a separate bowl, combine the ¾ cup of all-purpose flour, ⅓ cup of brown sugar, and ¼ cup of granulated sugar. Add the ½ cup of unsalted butter and use a fork or pastry cutter to blend until the mixture resembles coarse crumbs. This crumbly topping will bake into a golden, flaky layer that seals in the juices. Press the topping over the apple filling, covering it completely. If you’re using the optional walnuts or oats, sprinkle them on top of this crumbly layer for added texture.
Slide the pie dish into the preheated oven and bake for 45 minutes, or until the crust is golden brown and the filling is bubbling. The bottom crust should be a deep golden color, while the top should have a slightly darker, caramelized finish. To avoid over‑browning, tent the pie with a strip of aluminum foil if the edges start to get too dark. The baking time can vary slightly depending on your oven, so keep an eye on the crust’s color and texture.
As the pie bakes, keep an eye on the edges of the crust. If they start to pull away from the sides of the dish, gently press them back into place with a spoon or your fingers. This helps the crust stay intact and ensures a clean, even edge when you slice. The aroma of caramelized sugar and warm spices will fill the kitchen, creating a sensory experience that’s almost cinematic.
After 45 minutes, remove the pie from the oven and let it cool on a wire rack for at least 30 minutes. Cooling allows the filling to set, preventing a messy, runny mess when you slice. The crust will firm up slightly, creating a crisp edge that’s a delight to bite into. While cooling, you can add a dusting of powdered sugar for a subtle sweet finish, but this is optional.
Slice the pie with a hot, damp knife for clean, neat slices. Serve warm or at room temperature, and pair it with a scoop of vanilla ice cream or a dollop of whipped cream for an extra indulgent touch. The combination of warm, buttery crust, caramelized apples, and a hint of nutmeg creates a flavor profile that’s both nostalgic and modern. Enjoy the moment, and remember—if you’ve ever struggled with a flaky crust, this recipe is your ticket to success.
Insider Tricks for Flawless Results
The Temperature Rule Nobody Follows
Many home bakers ignore the importance of oven temperature, but a precise 375°F (190°C) is key for a golden crust. If your oven runs hot, the crust will brown too quickly, leaving the filling undercooked. Conversely, an oven that’s too cool can result in a soggy bottom. To ensure accuracy, use an oven thermometer and preheat for at least 15 minutes before baking. A stable temperature guarantees even cooking and the perfect caramelized finish.
Why Your Nose Knows Best
Trust your nose during the baking process—if you smell the sweet scent of caramelizing sugar, you’re on the right track. The aroma signals that the sugars are breaking down and turning into a glossy glaze. If the scent is faint, give the pie a few more minutes in the oven. Your nose is the ultimate judge of doneness, often more reliable than a timer.
The 5-Minute Rest That Changes Everything
After baking, let the pie rest for at least 30 minutes before slicing. This rest period allows the filling to set, preventing a mess of juices. If you rush the pie, you’ll end up with a soggy center that clings to your knife. The rest also lets the flavors meld together, creating a more harmonious taste experience. Think of it as the pie’s final rehearsal before the grand performance.
Keep It Cool, Not Hot
Once the pie is out of the oven, avoid placing it on a hot surface. The residual heat can cause the crust to become soft and the filling to ooze. Instead, set the pie on a wire rack to cool evenly. This simple step preserves the crispness of the crust and the integrity of the filling.
Use Fresh, High-Quality Apples
The choice of apple is crucial for the pie’s flavor profile. Apples like Fuji, Honeycrisp, or Granny Smith offer a balance of sweetness and tartness that complements the spices. If you’re in a pinch, use a mix of apples for a more complex flavor. The fresher the apples, the more vibrant the final product will be. Don’t settle for pre‑sliced or frozen apples—they’ll release too much liquid and ruin the texture.
Creative Twists and Variations
Caramel Swirl Surprise
For an extra indulgent twist, swirl a thick caramel sauce into the apple filling before baking. The caramel adds a silky sweetness that pairs beautifully with the nutmeg. The swirl also creates a visually stunning pattern that makes the pie Instagram‑worthy. Serve with a scoop of salted caramel ice cream for the ultimate dessert experience.
Spiced Citrus Kick
Replace the lemon juice with orange zest and a splash of orange liqueur for a citrusy punch. The orange zest adds a bright, floral note that complements the apple’s natural sweetness. The liqueur provides a subtle depth that lingers on the palate. This variation is perfect for spring or summer gatherings.
Nutty Crunch Layer
Incorporate toasted pecans or almonds into the topping for a nutty crunch that contrasts with the soft apples. Toast the nuts in a dry skillet until golden, then fold them into the crumbly topping. The nuts add a savory note that balances the sweetness, creating a well-rounded flavor profile. This version is ideal for those who love a bit of texture in every bite.
Low-Carb Delight
For a low-carb version, replace the all-purpose flour with almond flour in the crust and topping. Use coconut sugar instead of granulated sugar for a lower glycemic index. The almond flour will give the crust a slightly nutty flavor, while the coconut sugar adds a subtle caramel note. This adaptation keeps the pie delicious while accommodating dietary restrictions.
Vegan Variation
Swap the butter for a plant‑based butter or coconut oil, and use a flaxseed egg or mashed banana to bind the dough. This vegan version retains the flaky texture and buttery flavor without animal products. The flaxseed egg also adds a slight nutty undertone that complements the apple filling. Serve with a dairy‑free vanilla custard for a complete vegan dessert.
Storing and Bringing It Back to Life
Fridge Storage
Store leftover pie in an airtight container at room temperature for up to 3 days, or refrigerate for up to 5 days. The crust may soften slightly in the fridge, but it will regain its crispness when reheated. To keep the filling from drying out, wrap the pie in parchment paper before placing it in the container.
Freezer Friendly
Wrap the cooled pie tightly in plastic wrap, then place it in a freezer‑proof bag. Freeze for up to 2 months. When you’re ready to enjoy, thaw the pie in the refrigerator overnight. The crust may lose some crispness, but a quick reheat in a 350°F oven for 10 minutes will restore its golden texture.
Best Reheating Method
Reheat the pie in a preheated 350°F oven for 8–10 minutes, or until warmed through. To preserve the crust’s crunch, avoid microwaving, as it can make the crust soggy. If you’re in a hurry, use a toaster oven to warm a slice quickly. A small splash of water added to the bottom of the pan before reheating can help steam the pie, keeping it moist and fresh.