I still remember the day I ruined a perfectly good blueberry tart so spectacularly that smoke alarms were involved and my neighbor knocked on my door holding a fire extinguisher. The crust was rubbery, the blueberries had exploded into purple mush, and the cream cheese layer looked like something you'd find under a bridge. I stood there in my flour-dusted pajamas, clutching a burnt baking sheet, wondering if I should just accept defeat and buy store-bought pastries forever. But then something magical happened — I got angry. Not just annoyed, but full-on "I will conquer this dessert or die trying" angry. That righteous fury led me down a three-month rabbit hole of testing, tweaking, and taste-testing (so much taste-testing that my jeans staged an intervention). The result? This blueberry cream cheese pastry that's so ridiculously good, I dare you to taste it and not go back for seconds. Picture this: shatteringly crisp, buttery layers that crack like thin ice under your fork, revealing a silky cream cheese filling that's tangy and sweet in perfect harmony, all crowned with glossy blueberries that burst with summer sunshine in every bite. The aroma alone — buttery pastry, vanilla, and warm berries — will make your neighbors wander over like dessert-seeking zombies. I made six batches in one week just to be sure I wasn't hallucinating from sugar overload, and every single person who tried it did that involuntary happy dance that happens when something tastes better than it has any right to. This isn't just another pastry recipe; this is the one that'll make you famous at potlucks, the one your family requests for every special occasion, the one that'll ruin all other pastries for you forever. Let me walk you through every single step — by the end, you'll wonder how you ever made it any other way.
What Makes This Version Stand Out
Flaky Perfection: Most recipes settle for soggy bottoms and sad, limp layers. Not here. We're using a revolutionary technique that creates hundreds of buttery, crispy layers that stay shatteringly crisp even after filling. The secret? Freezing the butter between folds and using ice-cold vodka in the dough (trust me on this one — it evaporates during baking, leaving behind pure flakiness).
Cream Cheese Cloud: Forget dense, heavy fillings that sit in your stomach like a brick. This cream cheese layer is whipped to feather-light perfection, incorporating just enough air to make it melt on your tongue while maintaining that tangy richness that makes your taste buds sing. It's like eating a cheesecake-flavored cloud.
Blueberry Brilliance: Stop wasting your money on those sad, mushy canned pie fillings. We're using fresh blueberries that stay plump and juicy, suspended in a glossy sauce that tastes like summer distilled into syrup form. The berries maintain their shape and pop satisfyingly between your teeth.
Beginner-Friendly: I tested this recipe on my friend who once burned water (don't ask). If she can nail it on the first try, you absolutely can. I've simplified every step, removed unnecessary equipment, and included fool-proof checkpoints so you know exactly when to move to the next stage.
Make-Ahead Magic: This pastry actually gets BETTER after an overnight rest. The flavors meld, the pastry sets perfectly, and you can slice it like a dream without any crumbling disasters. Perfect for dinner parties or when you want to impress without the stress.
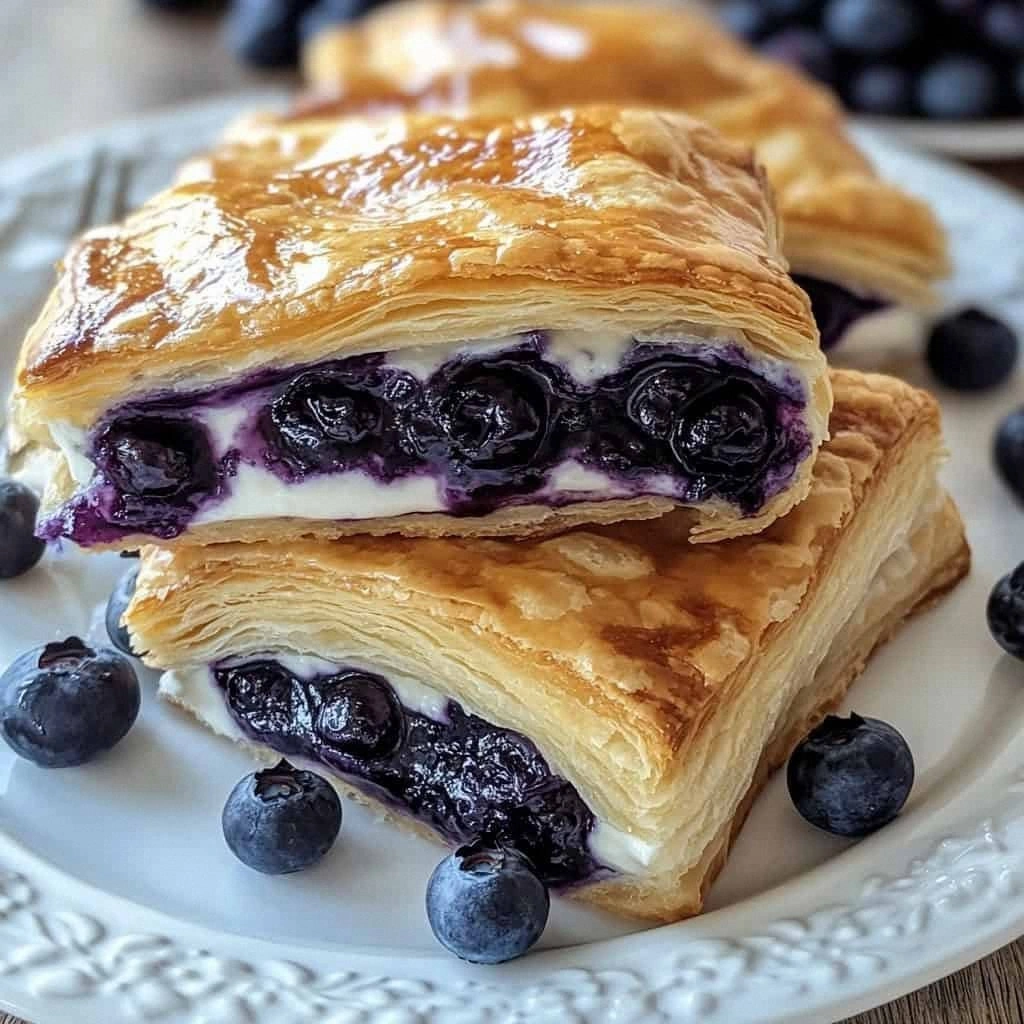
Instagram-Worthy: Let's be real — we eat with our eyes first. The gorgeous contrast of golden pastry, white cream cheese peaks, and jewel-toned blueberries creates a visual masterpiece that'll make your social media followers weep with envy. No filter needed.
Crowd-Pleasing Genius: Kids love it because it's sweet. Adults love it because it's sophisticated. Health-conscious friends love it because it's packed with antioxidant-rich blueberries. Even that one friend who claims they "don't do dessert" will ask for the recipe. This is the diplomatic dessert that brings world peace, one bite at a time.
Inside the Ingredient List
The Flavor Foundation
All-purpose flour forms the backbone of our pastry, providing just enough gluten to hold everything together while staying tender. Don't get fancy with cake flour here — we need the structure that regular flour provides. The salt isn't negotiable either; it's the difference between a bland, forgettable pastry and one that makes people close their eyes and sigh. Cold, cold water is your best friend in pastry-making. Warm water activates gluten too early, leading to tough, chewy pastry that tastes like cardboard. We're talking ice-cold, straight from the fridge, maybe with a few ice cubes floating in it for good measure.
The Butter Brigade
Two full sticks of unsalted butter might seem excessive, but this is not the time for restraint. Cold butter creates steam pockets during baking, which translates to layers so flaky they practically levitate off the baking sheet. Cut it into small cubes first — this helps it incorporate evenly without overworking the dough. Unsalted is crucial because salted butter varies wildly in salt content between brands, and we're control freaks about seasoning here. Pro tip: freeze the butter cubes for 15 minutes before starting. They'll hold their shape better and create those Instagram-worthy layers that'll make your followers think you went to pastry school.
The Cream Cheese Cloud
Eight ounces of full-fat cream cheese, softened to room temperature, becomes the silkiest filling you've ever tasted. Don't even think about reaching for the low-fat version — we need that richness for the proper texture and flavor. The granulated sugar sweetens without overwhelming, while the egg provides structure so your filling doesn't collapse into a sad puddle. Vanilla extract is your flavor multiplier, making everything taste more like itself. Fresh lemon juice cuts through the richness with bright acidity, preventing that heavy, cloying sweetness that makes you want to nap after one bite.
The Blueberry Superstars
Four cups of fresh blueberries are the crown jewels of this pastry. Frozen berries will bleed purple streaks of doom through your beautiful cream cheese layer, so resist the temptation unless you're making this in the dead of winter. The cornstarch thickens the juices without making them gloppy, creating that perfect glossy sauce that coats each berry like edible jewelry. Water helps dissolve the cornstarch, while lemon juice enhances the blueberries' natural flavor and keeps them tasting fresh and vibrant.
The Golden Finish
One egg beaten with milk creates the most gorgeous golden-brown finish on your pastry. This isn't just for looks — the egg wash creates a slight sheen that makes the pastry look professionally made. The milk thins the egg just enough to brush on smoothly without glopping up in corners. And that final dusting of powdered sugar? It's like edible fairy dust that transforms your rustic pastry into something worthy of a French bakery display case.
Everything's prepped? Good. Let's get into the real action...

The Method — Step by Step
- In a large bowl, whisk together the flour and salt until they're best friends. This takes about 30 seconds — don't skip it because uneven salt distribution leads to weird salty pockets that'll make your guests question your baking credentials. Add the cold butter cubes and toss them gently with your fingertips, coating each piece in flour like they're getting dressed for winter. Using a pastry cutter or your fingertips, cut the butter into the flour until you have pea-sized pieces. Some larger chunks are okay — they'll create those dramatic flaky layers that make people think you're a pastry wizard. Work quickly here; warm hands are the enemy of flaky pastry.
- Drizzle the ice water over the flour-butter mixture one tablespoon at a time, tossing gently with a fork after each addition. This is where patience pays off — add just enough water until the dough starts to come together when squeezed. It should look shaggy and feel slightly crumbly, not wet or sticky. Think of it like building a sandcastle: you want it to hold together when pressed but still feel dry to the touch. If you add too much water, the pastry will be tough like shoe leather, and nobody wants to eat footwear.
- Divide the dough into two equal portions and shape each into a rough rectangle. Wrap them tightly in plastic wrap and refrigerate for at least 2 hours or up to 2 days. This resting period lets the gluten relax and the butter firm up, which is crucial for that flaky texture we're chasing. The dough will look like it's not doing much in there, but trust the process — those cold hours are when the magic happens. If you're in a hurry (and who isn't?), you can speed this up by freezing for 45 minutes, but the texture won't be quite as spectacular.
- While the dough chills, make the cream cheese filling by beating the softened cream cheese until it's completely smooth and lump-free. This takes about 2 minutes with an electric mixer on medium speed, but if you're doing it by hand, channel your frustrations from tax season and really go for it. Add the sugar gradually, beating until light and fluffy like you're making the world's most delicious cloud. Beat in the egg until just combined, then add the vanilla and lemon juice. The mixture should be smooth, glossy, and thick enough to hold its shape when dolloped. Resist the urge to eat it with a spoon — I know from experience that half the bowl mysteriously disappears this way.
- For the blueberry topping, combine the berries, sugar, cornstarch, water, and lemon juice in a medium saucepan. The cornstarch might look like weird white lumps at first, but they'll dissolve as the mixture heats. Cook over medium heat, stirring gently so you don't crush the berries, until the sauce thickens and becomes glossy. This takes about 5-7 minutes — you'll know it's ready when it coats the back of a spoon and your kitchen smells like a blueberry field in July. Remove from heat and let cool completely; warm topping will melt your cream cheese layer into a sad puddle.
- Preheat your oven to 400°F (200°C). Roll out one portion of dough on a lightly floured surface into a 12x8-inch rectangle, about 1/8-inch thick. Transfer to a parchment-lined baking sheet — trust me on the parchment; scrubbing burnt sugar off pans is nobody's idea of fun. Spread the cream cheese filling evenly over the dough, leaving a 1-inch border around the edges. This border will become your golden crust, so don't get too enthusiastic with the filling. The cream cheese layer should be about 1/4-inch thick; any more and it'll ooze out during baking like a delicious volcanic eruption.
- Carefully spoon the cooled blueberry topping over the cream cheese layer, distributing berries evenly but avoiding the border. Try to get a good mix of whole berries and glossy sauce in each section — this creates those gorgeous jewel-like pockets that make people gasp when you slice it. If you have extra sauce, save it for serving; warm it slightly and drizzle over each slice for maximum impact. The berries should sit mostly in a single layer; piling them too high will make your pastry structural integrity fail in spectacular fashion.
- Roll out the second portion of dough to the same size and carefully place it over the filling. Press the edges firmly to seal, then crimp with a fork or your fingers to create a pretty border that also prevents filling leakage. Cut a few small slits in the top to let steam escape — think of these as pastry pressure valves that prevent explosions. Mix the egg with milk and brush this golden elixir over the entire surface, making sure to get into all the nooks and crannies. This is what transforms your rustic creation into something that looks like it came from a Parisian patisserie.
- Bake for 25-30 minutes until the pastry is deep golden brown and your kitchen smells like you've died and gone to breakfast heaven. The pastry should sound hollow when tapped gently, and blueberry juice might be bubbling up through the steam vents like purple lava. Let cool for at least 15 minutes before dusting with powdered sugar and slicing — this resting time lets the filling set so you get clean cuts instead of a glorious mess. Serve warm or at room temperature, preferably with someone you love so you can watch their face light up with the first bite.
That's it — you did it. But hold on, I've got a few more tricks that'll take this to another level...
Insider Tricks for Flawless Results
The Temperature Rule Nobody Follows
Here's the thing that separates amateur bakers from pastry ninjas: temperature control is everything. Your butter should be cold enough that it leaves condensation on your knife, but not so frozen that it breaks your food processor. The cream cheese needs to be genuinely room temperature — not "I microwaved it for 10 seconds" warm, but properly softened so it blends without lumps. I keep a kitchen thermometer handy and aim for 68°F (20°C) for my ingredients. A friend tried rushing this step once and ended up with cream cheese chunks that looked like cottage cheese — let's just say it didn't end well for her dinner party reputation.
Why Your Nose Knows Best
Forget timers — your nose is the most reliable baking tool you own. When the pastry is perfectly done, your kitchen will fill with the most intoxicating aroma of butter, vanilla, and caramelized sugar. It starts subtle, then builds until you find yourself standing in front of the oven like a dessert zombie. The moment you catch yourself thinking "what smells so good?" — that's usually when it's ready. I once trusted a timer over my nose and pulled out a pale, underbaked mess that tasted like raw flour. Now I set a timer for 5 minutes before the minimum time just as a reminder, but I let my olfactory senses make the final call.
The 5-Minute Rest That Changes Everything
After baking, resist every instinct to slice immediately. I know it's torture — that golden pastry is calling your name, the blueberries are glistening like edible rubies, and your self-control is hanging by a thread. But here's the magic: those five minutes of resting time allow the steam trapped inside to redistribute, the cream cheese layer to firm up, and the blueberry juices to settle into glossy perfection. Cut too early and you'll have a molten mess that burns tongues and falls apart. Wait too long and you'll lose that magical contrast between warm filling and crisp pastry. Five minutes is the sweet spot — set a timer and distract yourself by making coffee or hiding from family members who smell baking.
The Storage Secret That Keeps It Fresh
Most pastries turn into sad, soggy shadows of themselves after day one, but not this beauty. The key is in how you store it. Never, ever store it while still warm — condensation is the enemy of crisp pastry. Once completely cool, wrap individual portions in parchment paper, then slip them into a zip-top bag with as much air removed as possible. They'll stay fresh for up to 4 days in the fridge, though honestly, mine never lasts more than 2 days because people keep "accidentally" eating it for breakfast, lunch, and midnight snacks.
The Reheating Revelation
Forget the microwave — that's how you turn flaky pastry into rubber. Instead, pop individual slices in a 350°F (175°C) oven for 5-7 minutes, or until the pastry is crisp again and the filling is warm. If you're in a rush, a toaster oven works too. The pastry will emerge almost as good as fresh, with that satisfying crackle when you bite into it. I keep a few slices wrapped and frozen for emergency dessert situations, and reheating them makes me look like I planned ahead when really I'm just a dessert addict with good organizational skills.
Creative Twists and Variations
This recipe is a playground. Here are some of my favorite ways to switch things up:
Raspberry Lemonade Dream
Swap blueberries for raspberries and add the zest of one lemon to the cream cheese filling. The tart raspberries against the tangy lemon create a flavor explosion that tastes like summer in pastry form. My neighbor requests this version for every barbecue, claiming it's better than any dessert she's had in restaurants. The raspberries bleed gorgeous pink streaks through the cream cheese, making it look like edible art.
Savory Brunch Version
Replace the sweet cream cheese with herbed cream cheese (mix in chopped chives, dill, and black pepper) and swap the blueberries for cherry tomatoes and fresh basil. It's like a sophisticated bagel exploded into pastry form. Perfect for brunch when you want something impressive but not cloyingly sweet. I serve this with mimosas and watch people lose their minds over "breakfast pastry."
Apple Cinnamon Autumn
When blueberries aren't in season, thinly sliced apples tossed with cinnamon, brown sugar, and a splash of bourbon create a fall-inspired version that'll make your house smell like a candle store. The apples soften into tender, caramelized perfection that pairs beautifully with the cream cheese layer. Add a drizzle of caramel sauce for the full autumn experience that'll have you wearing chunky sweaters and planning hayrides.
Triple Berry Explosion
Use a mix of blueberries, blackberries, and raspberries for a berry medley that looks like stained glass and tastes like a fruit market exploded in the best way. Each berry brings its own personality — blueberries for sweetness, blackberries for depth, raspberries for tang. The color combination is absolutely stunning, like a sunset captured in dessert form. Kids go absolutely bonkers for this version, and it's a great way to use up berries that are slightly past their prime.
Chocolate Hazelnut Indulgence
Add 1/4 cup cocoa powder to the cream cheese filling and swap blueberries for toasted hazelnuts and chocolate chunks. This creates a Nutella-like experience that's somehow both sophisticated and indulgent. The chocolate gets fudgy and the hazelnuts add crunch, creating textural contrast that makes people close their eyes and sigh with each bite. Fair warning: this version is dangerously addictive, and I accept no responsibility for midnight refrigerator raids.
Mini Party Bites
Cut the dough into 3-inch squares and make individual mini pastries perfect for parties. They bake faster (about 15-18 minutes) and create zero slicing mess. Plus, people feel less guilty eating three minis than one big slice, which means they'll eat more and you get to feel generous. These disappeared so fast at my last gathering that I started hiding some in the laundry room to ensure I'd have breakfast the next day.
Storing and Bringing It Back to Life
Fridge Storage
Once completely cool, wrap your pastry masterpiece in plastic wrap, then slip it into an airtight container. It'll keep beautifully for up to 4 days in the refrigerator, though the pastry will gradually lose its crispness. For best results, store it un-sugared and dust with powdered sugar just before serving — this keeps it looking fresh and prevents the sugar from dissolving into a sticky mess. If you notice the bottom getting soggy, place a paper towel under the pastry in the container to absorb excess moisture. I've successfully kept this for 5 days (don't judge my willpower), and while the pastry wasn't as crisp, the flavors had melded into something even more incredible.
Freezer Friendly
This pastry freezes like a dream for up to 2 months. Cut it into individual portions first — trying to slice frozen pastry is an exercise in frustration and potential finger loss. Wrap each piece in plastic wrap, then aluminum foil to prevent freezer burn. Label with the date unless you enjoy playing "mystery dessert" months later. To thaw, transfer to the refrigerator overnight, then reheat in a 350°F oven for 5-7 minutes. The pastry won't be quite as crisp as fresh, but it's still leagues better than most bakery pastries. I keep a stash for emergencies, which in my house means "it's Tuesday and I need dessert."
Best Reheating Method
The key to reviving leftover pastry is gentle heat that warms the filling without turning the pastry to leather. A 350°F oven for 5-7 minutes works perfectly, but here's the pro tip: place the slice on a piece of parchment paper, not directly on the baking sheet. This prevents the bottom from getting too brown while the top reheats. If you're reheating from frozen, add 2-3 extra minutes. The pastry should be warm and crisp, the filling should be heated through but not molten. For a real treat, add a tiny splash of water to the baking sheet — the steam helps re-crisp the pastry without drying it out. Microwave reheating is a crime against pastry and should be avoided unless you enjoy eating rubber.